 Email article
The Mac operating system is an operating system that was designed for the apple Macintosh computer. It was developed by Steve jobs and Steve Wozniak. Both of the developers are the founders of Apple Technology Company. All the programs on computer and mobile can run successfully due to operating system. With the help of operating system programs can easily communicate and work. Common desktop operating systems are windows, Linux. While each operating system is different in its functionality. Every operating system has a different Graphical user interface. Graphical user interface provide graphic capabilities which make it easy for the user to understand the program. MAC OS can run only on Apple desktops and laptop computers. There are two versions of MAC OS one is “Classic Mac OS” and the other is “OS X”. Some of the 3D-appearance characteristics are there in OS X desktop interface. OS X is a modified form of MAC OS, new features can be easily added to the operating system.
How to crop, resize and tweak images on MAC OS?
- Image Crop
The built-in preview application on the MAC will let you do a lot of things with photos. First of all open your image with the preview application then move towards the navigation bar, select tool from tools on the menu item then you proceed to crop the image you would like to. You will also notice that it gives you an actual indication of the pixel size of your crop. This is more useful there when some specific pixel size of image is needed to be cropped. By moving cursor on the cropped area you can also move the selected portion. After this select crop form tools in menu bar. In this way you can get your desire image.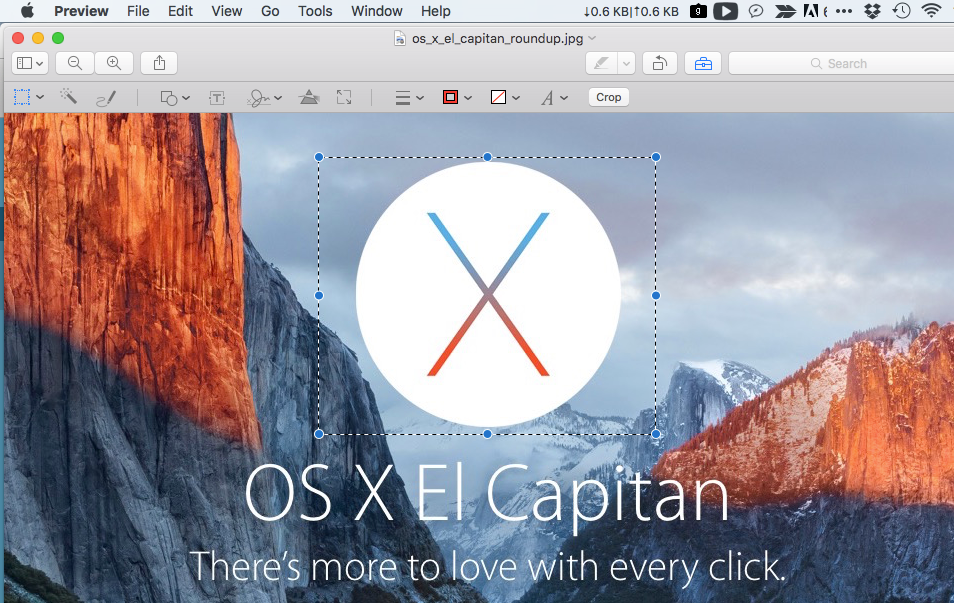
- Resize Image
If you want to resize the photo in MAC OS, first of all, select the image move towards tools and select the resize option form there. Then provide the required value of width and height. It should be noted down that the image height or width is given in pixels. Then select save as from file in menu bar and save an image as a new one.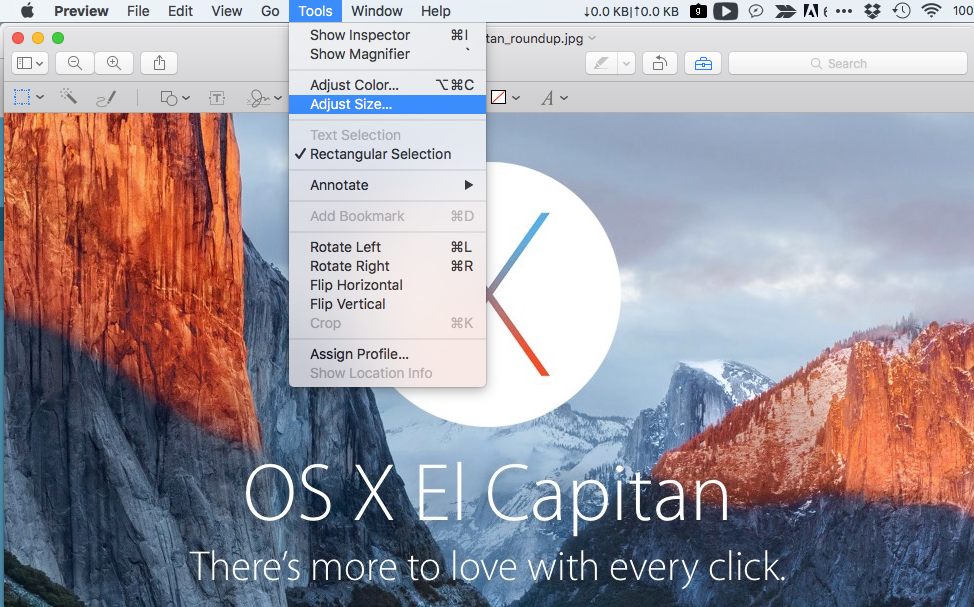
- Resize multiple images at once
In MAC OS instead of resizing the images one by one you can also select multiple images at once and resize them all. Suppose you have a folder on your desktop and it has a couple of images inside it. Then by clicking on first image and you see on the ride side of your laptop screen the complete information of like image like their name, size, pixel size etc. All the images are of same size. Select all the images click on first images select it then hold on the shift button and click on the last image in this way multiple images can be selected at once. After this right click on this group selection and from the context menu that pops up choose more then select automator and after this select create workflow this brings up to automator application which contain all the images which we select. After this move on the left most corners choose photos then double click on scale images. Then you will see a scaling window just below the automator in scaling area there are two options one is to resize image in pixels and the other one is to resize it in percentage select the pixel option and give the required values. After this press the run button from the top. In this way multiple images can be resized at once.
MAC OS provides user flexibility. It enables you to perform your work efficiently and fulfill your requirements in an easy manner.


