 Email article
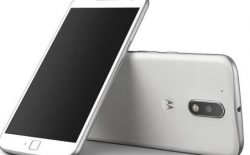 While installing a new ROM sure sounds like a fun thing to do on your Motorola Moto G4 Plus handset, there are some things you need to take care of first before getting the new ROM becomes possible. The first thing you want to do is unlock the bootloader. From there just follow this guide to get TWRP Recovery running on the Moto G4 Plus and it is ready to be rooted. Once you have done all three things (unlock the bootloader, install a custom recovery and root the device) you are then willing to check out what ROMs are available to install. You can load them to your custom recovery and flash them right away.
Here is everything you need to install TWRP Recovery on Motorola Moto G4 Plus smartphones by using some ADB commands from a Windows-based computer:
REQUIREMENTS
- You must unlock the Motorola Moto G4 Plus bootloader before you can follow this guide to install a custom recovery on the smartphone.
- You must have a computer that is running the Windows operating system to install a custom recovery on the G4 Plus handset using this guide.
BEFORE WE BEGIN
- Make sure you have unlocked the Developer Options menu on the G4 Plus smartphone by tapping on the Menu > Settings > About Device > Build Number. Keep tapping your finger over where it shows you the build number seven or so times. You know it’s time to stop when you can see a message on the screen of your phone stating that you are now using the handset a developer.
- Enable the USB Debugging Mode from the recently unlocked Developer Options menu by tapping on the Menu > Settings > Developer Options > check the box that is available on the screen for the USB Debugging Mode option.
HOW TO INSTALL TWRP RECOVERY ON MOTOROLA MOTO G4 PLUS SMARTPHONES
- Download the Fastboot and extract it to the desktop. (You do not have to do it again if you have just come here from unlocking the bootloader).
- Press the Power button on the G4 Plus phone and choose the option to switch it off completely from the menu.
- Hold the Power button and the Volume Down button simultaneously so that your phone boots up into the bootloader mode.
- Connect the G4 Plus to the computer with the USB cable once you are confident you have it in the bootloader mode.
- Download the TWRP Recovery and extract it to the desktop of the computer and then copy the files from the TWRP folder to the same folder as the fastboot, so they are all in the one directory.
- From within the Fastboot and TWRP folder, hold down the Shift key and right-click the white background and choose to open a new command window here from the list of options.
- Type the following command and replace where it shows you the “twrp.img” with the name of the real file:
fastboot flash recovery twrp.img - Enter the following command once the custom recovery is finished flashing:
fastboot reboot - As soon as the Motorola Moto G4 Plus smartphone reboots, hold the hardware button combination to boot directly into the recovery mode so the TWRP first-time boots on your phone. Doing so will help keep it installed on your smartphone and stop the custom recovery from being wiped by the stock recovery.
Now that you have unlocked the bootloader and installed a custom recovery, it’s time to check out how to root the Motorola Moto G4 Plus smartphone so you can do things like install root applications from the Google Play Store and flash custom ROMs.


