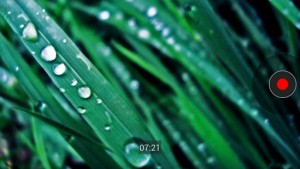
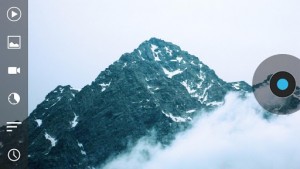
 One of the coolest things that you can do with a camera, especially with DSLR models, is shoot a time-lapse video. Basically, the camera leaves the shutter open for a certain period of time, all the while capturing frames and splicing them together to create a short video. One of the most common uses for time-lapse photography is to shoot the starry night sky. These days, smartphones are equipped with some pretty powerful cameras. Unfortunately, not many smartphones come pre-equipped with a time-lapse option. Droid Timelapse allows you to capture time-lapse videos with your Android powered smartphone or tablet easily.
What is it and what does it do
Main Functionality
Droid Timelapse allows you to create/capture time-lapse videos with your device’s camera.
Droid Timelapse allows you to specify how many frames per second you would like the device to capture. From there, you can shoot some pretty impressive time-lapse videos. The beauty of an app like this is that you don’t have to buy any expensive equipment to go along with it. Your smartphone or tablet will create time-lapses just fine.
Pros
- Can capture HD videos, if your camera supports it
- Can enable flash, if your device has flash
- Plenty of configurable options, like frame capture rate, video quality, delay timer, and more (see Discussion section below to learn more)
- Fairly attractive, Holo inspired visual theme. Closely resembles the vanilla Android camera, making it easy to use and understand
- Provides instant access to the last time-lapse recorded, no need to fish around in gallery
- No ads
Cons
- Display stays on while recording, which can drain battery significantly
- Can be a pain propping up your smartphone or tablet if it doesn’t have a stand
- Only works with devices using Android 4.0 and up
- You cannot choose the storage location for captured videos; all videos are stored in the default location for Droid Timelapse
Discussion
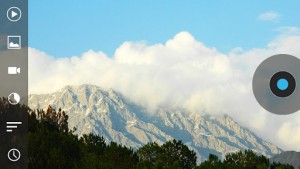 Not everyone will find delight in generating time-lapse sequences on a mobile device. In fact, a lot of professional photographers will probably opt to use their expensive equipment before they take advantage of an app like this. Still, it’s pretty cool to use, and it’s perfect for those of us that don’t have a DSLR camera lying around- or equipment of equal value.
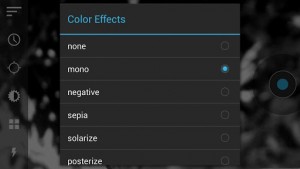 Droid Timelapse uses a Holo inspired user interface, and actually looks a lot like the vanilla Android camera. There aren’t too many settings or options to configure when capturing a video but that’s okay. You don’t actually need tons and tons of options to sort through.
The left hand side of the screen holds the various buttons and toggles to customize time-lapse capture while the right sight of the screen is reserved for the shutter or record button. It’s pretty straightforward stuff. Like I said earlier, if you’ve ever used the vanilla Android camera then you can certainly find your way around the Droid Timelapse interface.
 Starting from the bottom and working our way up, the configurable options are as follows:
- About- information screen about the app and its developers
- Flash- select flash mode for the camera
- Color effects- apply various filters and colors to the captured video
- White balance- pretty self explanatory, you can choose white balance based on lighting in the surrounding environment
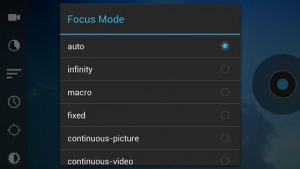
- Focus mode- Adjust the shutter focus
- Delay timer- Set a delay timer for when you press record
- Maximum duration of video- Configure video length and it can be set to infinite
- Frame capture rate- Assign capture frequency
- Video resolution- Select video capture quality
- Gallery- Takes you to the Android gallery
- Quick play- Plays back the most recent time-lapse recorded
Most of the options are pretty straightforward, but some of them deserve a thorough description.
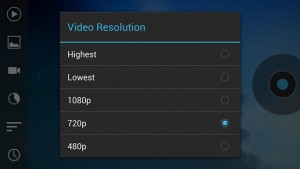
 When choosing the video resolution, you can automatically adjust the capture mode to the highest or lowest quality available to the device through presets. You can also directly choose between 1080p, 720p and 480p capture modes, depending on what your device supports.
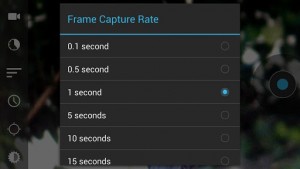
The frame capture rate determines how many frames are recorded per second. The higher the number is, the fewer frames that are captured. For example, if I select a frame capture rate of a half a second (0.5), then it will capture a lot more frames than if I choose a 5 second capture rate. The rate options start at 0.1 second and go all the way up to 60 seconds.
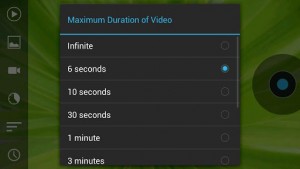
 The option to specify the maximum duration limit for each video is quite useful. If you want to leave the device for a certain period of time, you can pre-select how long you would like the recording to last. You can also just leave it on “infinite” which means the device will continue recording until it runs out of storage space or the battery dies. Additional length options start at 6 seconds and go all the way up to an hour with a plethora of increments in-between.
There’s not much else to know about the app. It captures time-lapse sequences efficiently. The videos I captured were pretty cool, at least I thought they were. I set my phone down early in the morning on my kitchen counter, and left it to record until later in the evening. When I went back to check it, I witnessed all sorts of comings and goings in my apartment, particularly things that my pets were doing that I had no clue about. It would certainly be cool to try out the time-lapse at night while filming the stars. Although, I’m a little wary leaving my phone out alone, so I’ll have to do it when I can sit with it for a while and enjoy the weather.
Conclusion and download link
 If you want to capture time-lapse sequences using the camera on your Android-powered smartphone or tablet, than Droid Timelapse is the way to go. It’s painless, efficient and incredibly easy to use, which also makes it ideal for pretty much everyone. If you don’t own a DSLR camera, or better photography equipment, than this is probably one of the cheapest ways to go about capturing time-lapse videos.
Price: Free
Version reviewed: 1.3
Requires: 4.0 and up
Download size: 917KB

 Email article
