 Email article
Photo slideshows are a great way to show off your photos. Lots of image editing software packages include static slideshow options. The freeware PhotoFilmStrip software generates a video montage with dynamic photo footage. This software incorporates the ‘Ken Burns’ effect which lets you edit how the camera pans. Read on to learn more.
To add the software, check out the PhotoFilmStrip website which isn’t in English but the program itself is. From the site home page click the download page link, and then PhotoFilmStrip 2.0.0-RC1 under WinXP/Vista/Win7. Alternatively, if you have Linux select PhotoFilmStrip 2.0.0 under Linux.
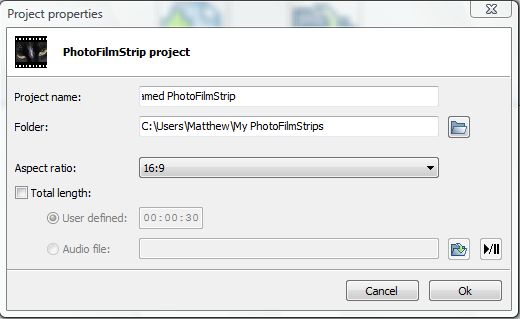
When you first open the software, you can select either the Create new project or Open existing project option. Click the Create new project option to open the Project properties window below. Give it a suitable title, and select a folder location to save the video. To add a background audio track to the video, click the Total Length > Audio file check-boxes. Then select the folder icon to open a suitable file. Click the OK option to close the window.
Then you can add some photos. Click the + option and select one, or more, photos for the video. To add multiple photos, hold the Ctrl key and select them.
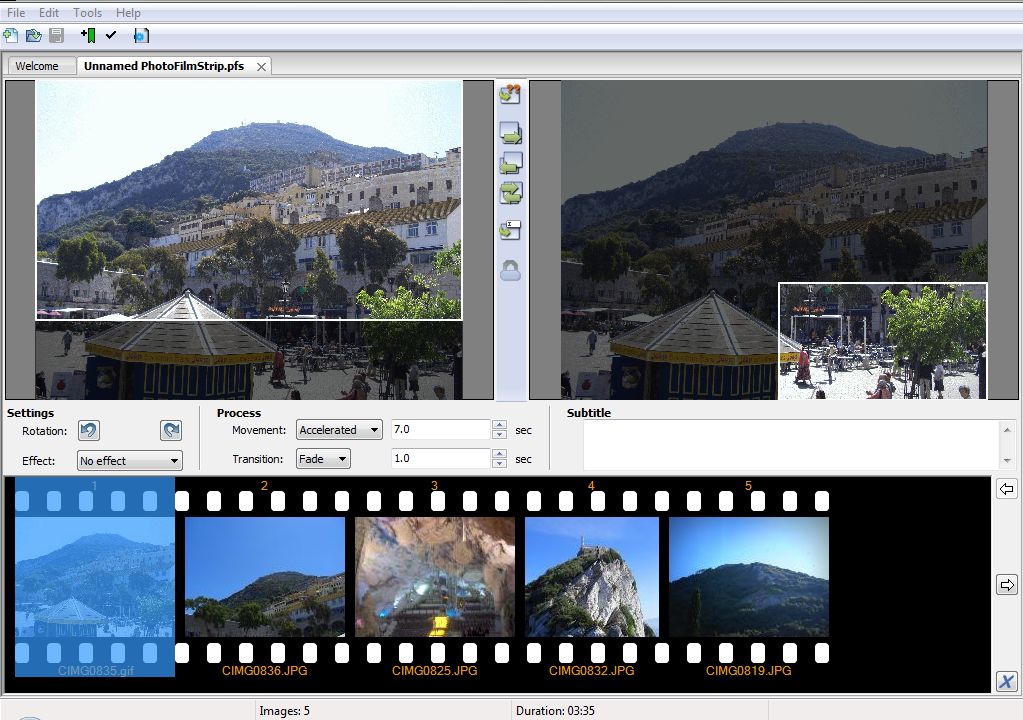
The photos are added to a filmstrip as in the shot above. Select any one of the photos in the film to edit them. Above the filmstrip the selected images are duplicated on the left and right side. Each includes a motion control rectangle. The one on the left shows where the animated path of the photo begins, and the one on the right highlights the ending point. You can edit this motion path by dragging, or resizing, each of the rectangles to alternative points on the image.
You can adjust the speed of the motion by selecting the Movement drop-down list. Selecting Accelerated adds the fastest motion. The Delayed option slows the motion down.
There are also a couple of transition effects to add between photos. Click on the Transition drop-down list, and select either Fade or Roll. The Fade option fades out each of the images. The Roll option rolls in the next image.
If you haven’t added an audio file, you can increase or decrease the duration each photo is displayed during the video. Select the text box next to the drop-down list, and then input a larger number to increase the image time. Videos that include background audio play for as long as the background music.
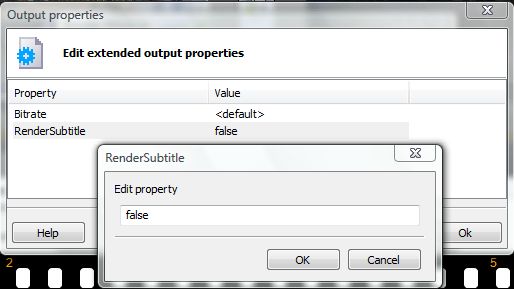
You can also add subtitles to the videos. Select an image and add some text to its subtitle box. Click Tools > Render filmstrip and then Properties. That opens the window below from where you should click the RenderSubtitle value false and input true. Click OK to close the window.
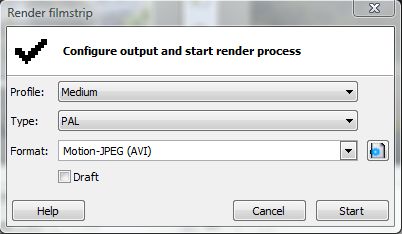
Back at the Render filmstrip window below you should select a suitable profile, type and format for your video. VCD is the lower quality profile selection, and Full HD the higher video quality setting. The Full HD option also takes the longest to render. Click Start to begin rendering the video.
The video is then processed. A few minutes will probably be required before you can play the video. Click the Play video option on the right of the green bar to play it with your media player.
This YouTube video includes an example of what a finished PhotoFilmStrip video can be like. Overall, the software churns out quality videos.


