{rw_text}Software reviewed in this article:
Version reviewed:
v2.2
Supported OS:
Windows NT4/2000/2003/XP/Windows Vista/Windows 7
Price:
$35.95 (USD) but you can get it for free for a limited time at Giveawayoftheday.com!
Software description as per the developer:
Frame Photo Creator is a professional digital photo tools, not only enable you to take photos on your home PC but also can edit ,print, and manipulate digital photos to improve photo quality .So we also call it photo sticker,sticky photo,frame photo editor,big-head photo maker.
————————-{/rw_text} –>
{rw_good}
- Users can create a collage with images, or output images individually.
- Users can add frames, “funny faces”, and effects to images.
- Users can add background images to the collage if desired.
- Comes with many frames, “funny faces”, and effects to pick from.
- Users can import their own frames.
- Has ability to take pictures directly from webcam (if applicable).
- Has an auto-timer for the webcam feature.
- Can print or export the projects as images.
{/rw_good} –>
{rw_bad}
- Images are resized to fit frames instead of the frames being resized to fit images.
- When searching for images, Odin Frame Photo Creator is set to look for bitmap files only by default every time; user needs to manually change it to other image format if that image format is desired.
- The transparency of frames is not shown in the “preview” box.
- Has a few bugs.
{/rw_bad} –>
{rw_score}
{for=”Ease of Use” value=”9″}For the most part Odin Frame Photo Creator is very easy to use. There is, however, one annoyance: when looking for images, Odin Frame Photo Creator is is set to look for bitmap files only by default every time; you need to manually change it to other image format if that image format is desired.
{/for}
{for=”Performance” value=”6″}Has quite a few bugs. Plus the output images are resized to fit frames, instead of the frames being resized to fit output images, so this results in different sized output images than input images which will often not be desirable.
{/for}
{for=”Usefulness” value=”4″}I don’t see too many people finding this useful.
{/for}
{for=”Price” value=”4″}$35.95 is way too overpriced for this software. If the developer cleans up his/her act, this program is more properly priced from $10-20 in my opinion.
{/for}
{for=”Arbitrary Equalizer” value=”6″}This category reflects an arbitrary number that does not specifically stand for anything. Rather this number is used to reflect dotTech’s overall rating/verdict of the program in which all the features and alternatives have been considered.
{/for}
{/rw_score} –>
{rw_verdict}[tdown]
{/rw_verdict} –>
Odin Frame Photo Creator is a software that allows users to edit images by adding frames, “funny faces”, and effects to the. Collages can then be created with multiple images, or individual images can be exported separately.
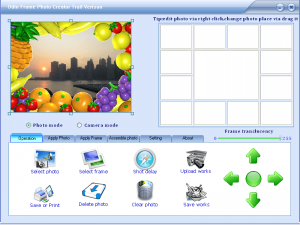
This is what OFPC (Odin Frame Photo Creator) looks like:
In terms of looks, the interface does not look that bad at all. On the other hand, when using OFPC, the interface just feels “weak”, so to speak. The feeling is hard to describe; you have to actually use the software to understand what I mean. However, do take note it is really just a “feeling” – the interface does not hinder usage of the program at all. In fact, OFPC is very easy to use.
To get started with OFPC, you need to load the images you want to edit. OFPC supports all of these image formats:
Take note that when you browse your computer for images, OFPC is set to look for bitmap images only by default. You need to click on the “Files type” drop down menu at the bottom of the browse window and select other image formats if you desire images other than BMP.
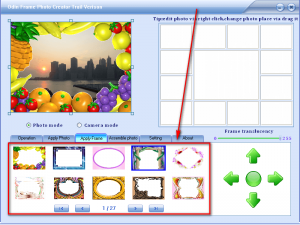
Once you have an image loaded, it appears in the “preview” box in the top left. By default a frame is shown on the image, but you have the ability to change the frame to any frame you like:
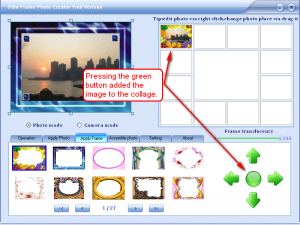
Simply clicking on a frame will change it. As per my count, there are 260 frames for you to select from. If you don’t like any of the frames that come supplied with OFPC, you can use your own frame (“Operation” -> “Select Frame”). You also have the option of changing the transparency of the frame; however I have noticed that the change in transparency is not reflected in the “preview” box – it only shows when you add the image to the collage. Once you like the frame that is on your image, you need to click on the round green button to add it to the collage:
If indeed you do plan on creating a collage, you need to load every image you want in the collage and repeat the same procedure to add frames to them all and add them to the collage. If you don’t plan on creating a collage, you don’t need to add any more images; you can go straight to the editing and saving of the image.
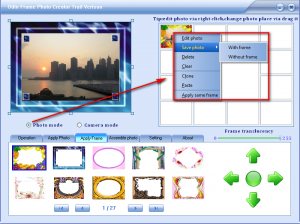
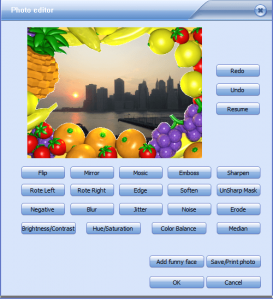
After you have added images to the collage – regardless of if you plan on creating a collage or not – you can right click on them to edit the images and/or to save/print the images individually as opposed to as a collage:
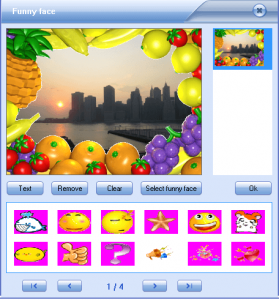
- Editing the image involves the ability to add a bunch of effects, and “funny faces”:
You can add as many effects as you want, and you can add as many “funny faces” as you want. (There are a total of 20 funny faces to chose from as per my count, and you can click + drag the faces around after you add them.)
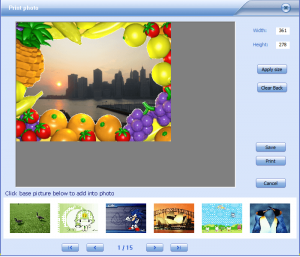
- Saving/printing the images is fairly straightforward; you select if you want with or without frame, and save/print it:
You can save your image as these image formats:
If you were creating a collage the ability to add a background image would be relevant, but since this is for individual images, there is no “background” for you to add an image in.
Take note that by default all images are resized to 361×278. If your original input image was larger than this size, it is made smaller. If your original input image was smaller than this size, it is made larger. If your original input image does not has the same aspect ratio as 361×278, you may notice some stretching. You are, of course, given the option to set the width and height but if you plan on making the width and height bigger than 361×278, expect a huge loss in output image quality because that is exactly what will happen.
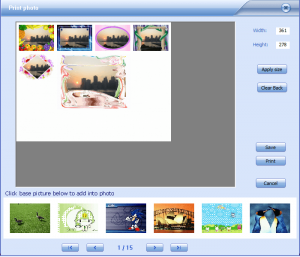
After you have edited your images, assuming you are looking to create a collage instead of just exporting individual images, you can save or print your whole collage via “Operation” -> “Save or print”:
(If saving the collage, you can save the collage in the same formats as you can save individual images.)
Now, since you are saving/printing a collage, you can make use of the feature which allows you to add a background image to the collage (see bottom of the window). As per my count, there are 72 background images for you to select from.
Similar to saving individual images, the collage is set to 361×278 by default. You can, of course, change this size but remember if you plan on making it bigger, the image quality will decrease the larger you make it.
Other things to note about Odin Frame Photo Creator:
- OFPC has a feature that allows you to take pictures from your webcam (if you have one) and import them into OFPC directly. Simply click on “Camera mode” to use this feature; hit the “Shot delay” button to take an image. If you have the “shot delayer” feature on, the photo will be taken X seconds after you hit the “Shot delay” button (by default it is set to 0 seconds so the photo will be taken instantly). You can change the delay time from under “Setting”.
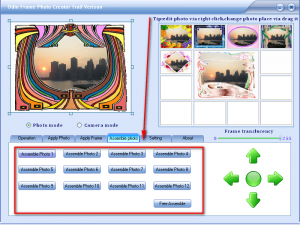
- OFPC gives you the ability to select from multiple different collage styles, if desired. You can change the collage style via “Assemble photo”:
- When you have multiple photos added to the collage, you can click + drag them to move them around to a different box/position.
Now, aside from the cons I already mentioned, I would like to shed light on the fact that OFPC is not bug free; it has quite a few bugs:
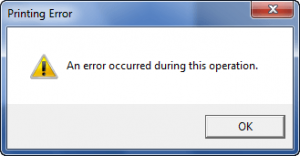
- The print feature does not work. Whether trying to print a collage or an individual image, I get an error every time I try to print:
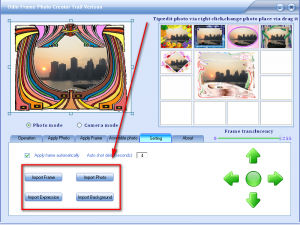
- There are features in OFPC under “Setting” which, I presume, are intended to allow you to permanently import frames, photos, “funny faces”, and backgrounds…
…so that the next time you open OFPC you will be able to select whatever you imported from its respective menu (i.e. you import a frame, and the next time you run OFPC you can select that frame from the frame tab). The problem this these features don’t work. Try as I must I was unable to perma-import anything.
- When using “Camera mode”, the frames appear on the “preview” box like normal, but when you actually take a photo and add it to the collage, the photo is without frame. Try as I must but I could not add a frame to the images saved directly from my webcam.
This review was conducted on a laptop running Windows 7 Professional 32-bit. The specs of the laptop are as follows: 3GB of RAM, a Radeon HD 2600 512MB graphics card, and an Intel T8300 2.4GHz Core 2 Duo processor.
{rw_freea}
Ashampoo Photo Commander 6 is a perfect example of a new generation of programs that are genuinely intuitive easy to use. It makes organizing your pictures and getting them to look great as simple as pressing the button on your camera. You’ll save time, have a barrel of fun and your friends and family will be really impressed.
Almost everything is done with a couple of clicks – adding picture frames, correcting your photos, making greeting cards, collages and slide shows, sharing your pictures on CDs/DVDs or your website and much more.
Ashampoo Photo Commander 6 is a one-stop solution. You organize and view your photo collection, edit and enhance your photos and use creative editing and project tools all in a single program. And it also manages your audio and video files!
-Developer
{/rw_freea} –>
{rw_verdict2}I like the fact that Odin Frame Photo Creator comes with a large selection of frames, “funny faces”, effects, and background images. I also like how the user is allowed to create collages, or export individual images. However, the lack of flexibility in size of export images and the bugs make me give this program a thumbs down. I do feel, however, if the developer can revisit the program and tweak it to add the major issues, it may turn into a program worth having.
{/rw_verdict2} –>

 Email article
