Windows Media Center on Windows 7 and up has a variety of multimedia options. For photographs it includes photo slideshow options. However, few might have guessed that it can also be an effective image editing tool, with options for cropping, red eye removal, contrast, printing and image rotation.
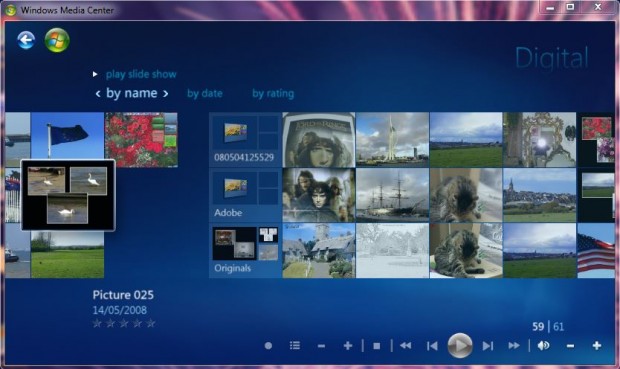
Type Windows Media Center in the Start menu search box to find the media center shortcut. Click its shortcut to open it, and then scroll down to Pictures + Videos. Then click on Picture Library > folders, and select a folder which includes your photos to open their thumbnails as in the shot below.
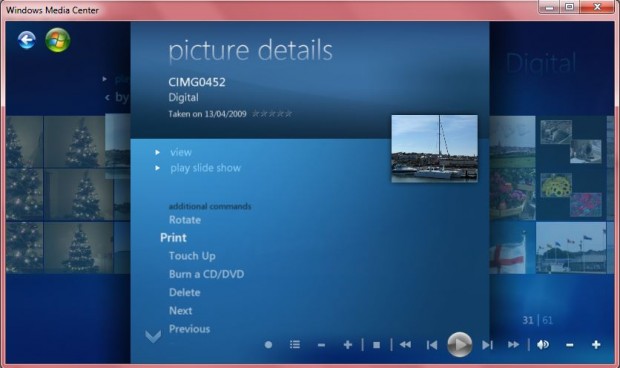
From there you should right-click one of the photo thumbnails, and select Picture Details. On that menu there is a Rotate option which when selected rotates the photo clockwise. In addition, you can also print photos (from default printer) by selecting the Print option.
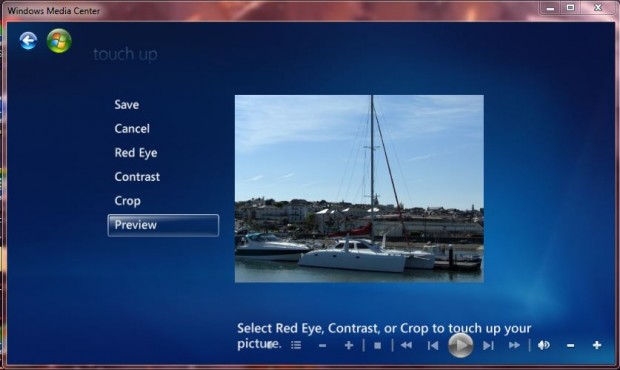
To open the Windows 7 Media Center photo editor, select the Touch Up option. That opens the window in the shot below from where you can make a few adjustments to the picture. Click on the Red Eye option to toggle red eye off. When selected a tick is shown beside the option.
You can adjust the contrast in much the same way. Click the Contrast option to give the photo a boost. As you cannot make any variable adjustments it isn’t very flexible, but nevertheless it does boost photo contrast. You should click Save to apply the editing to the photograph.
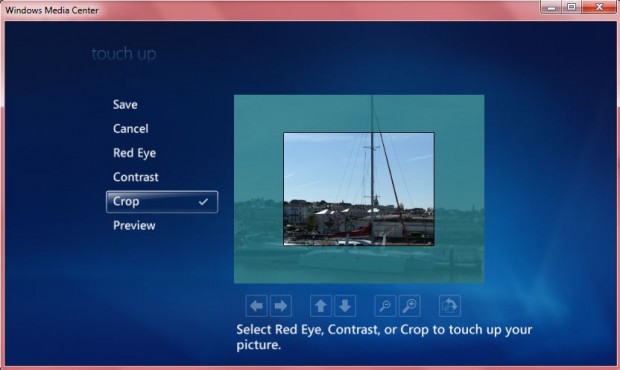
When you select the Crop option, you can cut out some parts of the photo. Click the vertical and horizontal arrows to adjust the position of the cropping rectangle. Select the + and – magnifying glasses to expand the size of the cropping area. To preview the cropped photo, click on the Preview option. Then click the Save option to keep the changes and replace the original.
Sure, Windows Media Center isn’t exactly an alternative to Adobe Photoshop. However, for some basic fixes its photo editor could still come in handy.

 Email article


