Imagine this scenario. You have a fully illustrated e-book or online manual. Now, you want to keep the illustrations as reference but the file is a PDF. Unfortunately, your knowledge in processing and editing PDFs is very limited. So, what would be your best course of action? Well, the answer is quite simple. You need to learn how to extract images from a PDF. We will show you how.
There’s no need for you to fret. It’s not that difficult. You just need to follow the steps below.
Step 1
Prepare your fully illustrated PDF (.pdf) file. This is the file that contains the images that you want to extract.
Step 2
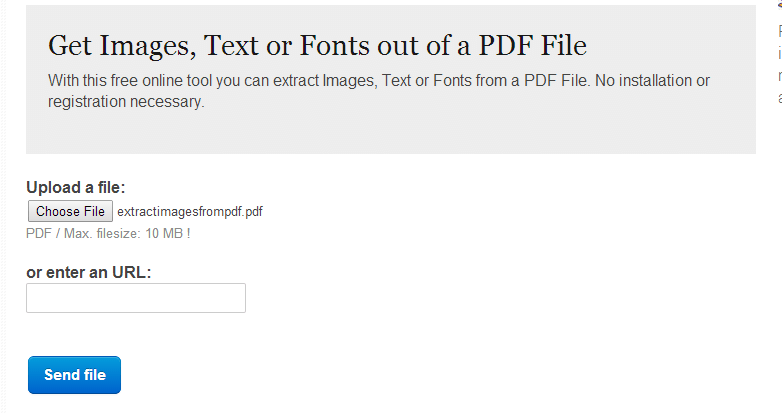
Go to ExtractPDF then upload your PDF file (please refer to Step 1). Since there are two options, you can opt to directly upload your file from your computer or just paste the link to your file. The latter is an option that is ideal for files that are stored in the cloud.
Step 3
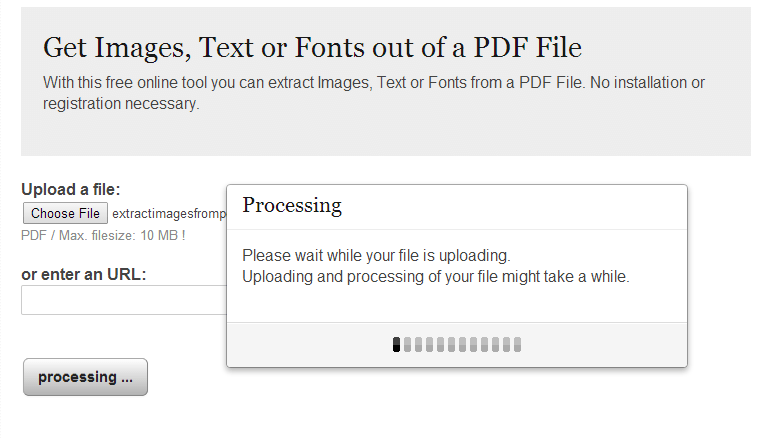
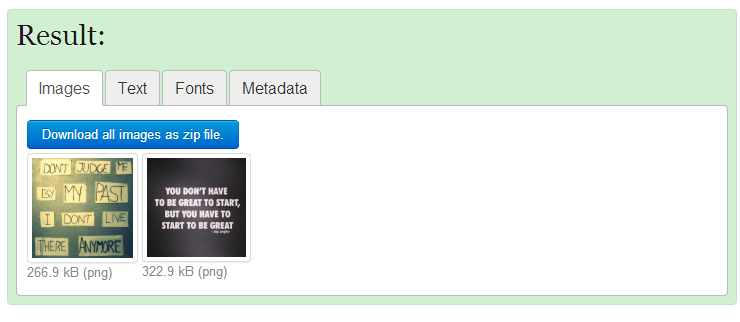
Click the “Send File” button and wait until you get the result. The result, which contains your PDF’s extracted images, will be displayed on a new page.
Step 4
Make sure that you’re on the “Images” tab then click each photo or image. A new window will appear. Click “Save” to download and save the image to your computer. If you want, you can also opt to download and save your extracted images in bulk. Just click the option for “Download all images as zip file”.
Step 5 (optional)
To find out whether the images were successfully extracted from your PDF, you can open the folder or directory where your extracted images are located then check whether they’re of good quality or not. The images will be saved in PNG (.png) format.
If you carefully follow the above mentioned steps, then you won’t have any problems when it comes to extracting the images from your PDF files. Just keep in mind that you can’t upload or extract images from PDFs that are larger than 10 MB.

 Email article


