 Email article
Wouldn’t it be great if you can create your own custom characters on Windows? By learning how to do so, you can personalize your texts, documents and even the images and screenshots that you edit on MS Paint. Plus, it’s a fun way to show your creative talents. Just skip past the break to read the full instructions.
How to create your own custom characters (letters, symbols, etc.) on Windows in seven easy steps
Step 1
Prepare the tools that you’ll need. Apparently, you’ll need a computer that is running on Windows. There’s no specific requirement regarding the OS version but it would be great if your computer is running on Windows XP or higher.
Step 2
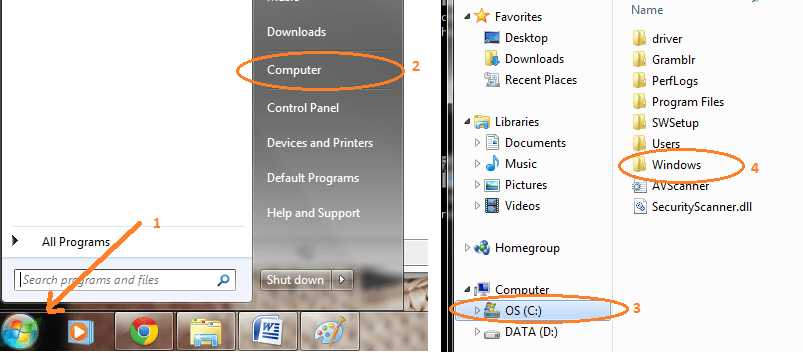
Open your Windows Private Character Editor. To do this, click “Start” then go to “My Computer”. After which, go to your C:\ drive then navigate to your “Windows” folder.
Step 3
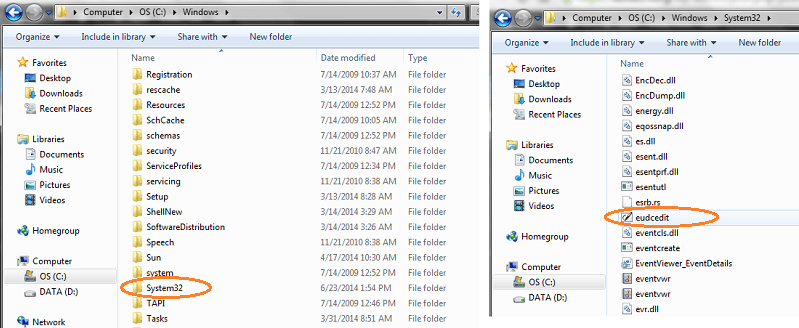
On your “Windows” folder (C:\Windows), find another folder named “System32” then click on it. Once again, browse the files and folders that are stored in that directory. This time, find the application called “eudcedit”. Remember, the application’s full filename must be eudcedit.exe. You can check the file by right-clicking on it then go to “Properties”.
Step 4
Click the “eudcedit” application to launch the Windows Private Character Editor.

Step 5
On the Private Character Editor, the first thing that will greet you is a pop-up window. Just click “OK” then proceed to creating the character or custom font that you want using the tools listed in the toolbar. You can use the pencil, brush, eraser, etc.

Step 6
Once you’re done creating your custom character, click the “File” tab then select “Font Links”. After that, you will be asked if you want to save the character. Just click “Yes” then select whether you want to associate your new private character with all fonts or only with selected fonts.
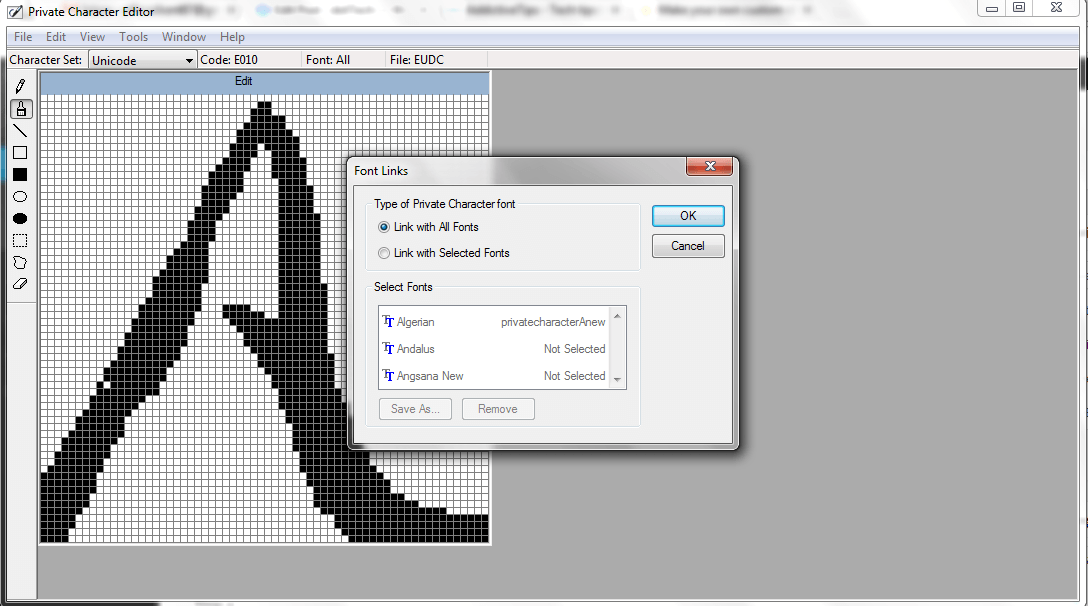
Anyways, the choice is yours but why go through the tricky process of associating it with selected fonts when you can just opt for the quicker route? In this case, just choose to link your custom character with all fonts then click “OK”.
Step 7
Close or minimize the Windows Private Character Editor then open your character map (click Start > All Programs > Accessories > System Tools > Character Map). For quicker access, just click “Start” then type “character map” on the search box then press “Enter”.
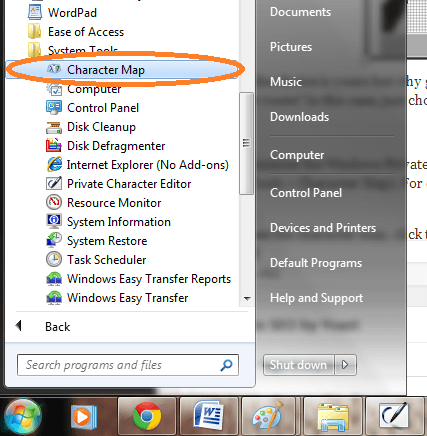
Once you see the character map, click the dropdown menu in the “Fonts” section then select the option for “All Fonts (Private Characters”. There, you’ll see a list of all your custom characters. Just select a character that you want to use, copy it then paste it to Notepad, WordPad, MS Paint or MS Word. It’s as easy as that.


Additional Tip: To quickly access the Windows Private Character Editor from your desktop, just click “Start” then type “eudcedit” in the search box then press “Enter”.
Just keep in mind that you can’t use your custom symbols on your web browsers.


