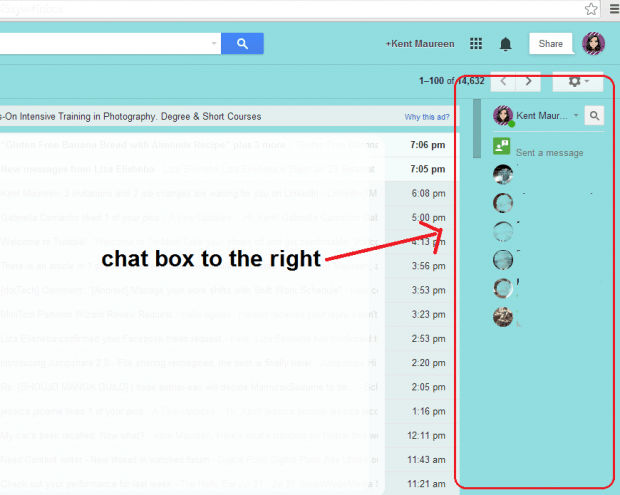
Did you know that you can easily move your Gmail chat box from the left side to the right side of your inbox? How? Well, it’s easy. All you need to do is to follow the steps listed below.
By doing so, you can gain more space on the left side of your Gmail inbox. You can also use the extra space for organizing your emails using labels. Besides, some users prefer to move the chat box to the right side of their inbox because they can easily expand their contact list to view and chat with their online contacts.
Enable right-side chat in Gmail
Step 1
Log in to your Gmail account using your email and password.
Step 2
Once you are logged in, you can view your Gmail inbox in its usual layout. By default, the chat box is placed on the lower-left side of your Gmail interface.
To move it to the right side, click the “Gear” icon that is located on the top-right portion of your Gmail interface.
Step 3
On the drop-down menu, click “Settings”.
Step 4
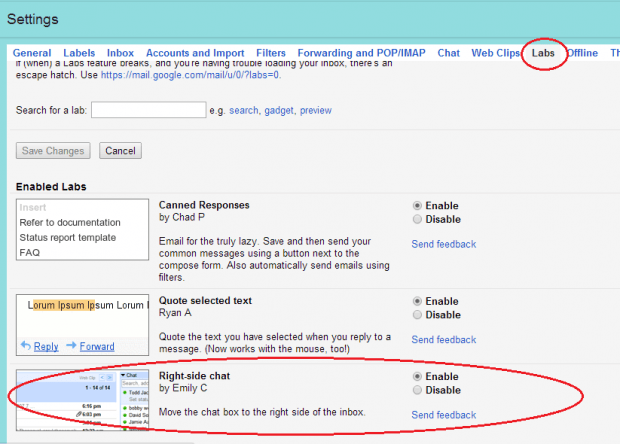
Go to the “Labs” tab then scroll the list until you find the section for “Right-side chat” (see image below).
Step 5
Click the “Enable” button next to “Right-side chat” and then scroll back to the top portion of the page. Click the button for “Save Changes”.
Wait a bit while Gmail applies the changes to your account. Once done, it will automatically reload your account.
After reloading your account, you can immediately notice that the chat box has been successfully moved from the left side to the right side of your Gmail inbox. It’s as easy as that.
Now, if you want to restore the default Gmail chat box layout, just repeat the above mentioned steps but instead of clicking the “Enable” button for “Right-side chat”, you need to click the “Disable” button. After which, do not forget to click the button for “Save Changes”.
So that’s it. You’re done.

 Email article


