 Email article
This article covered how you can customize folder icons. However, Iconmancer doesn’t include any options for switching disk drive icons. As such, for that you should check out the freeware FolderiChanger software package.
You can add the software to Windows XP, Vista, 7 and 8 from this website page. Then run through the software’s setup wizard to install. Once you’ve added it to Windows, open the FolderiChanger window below.
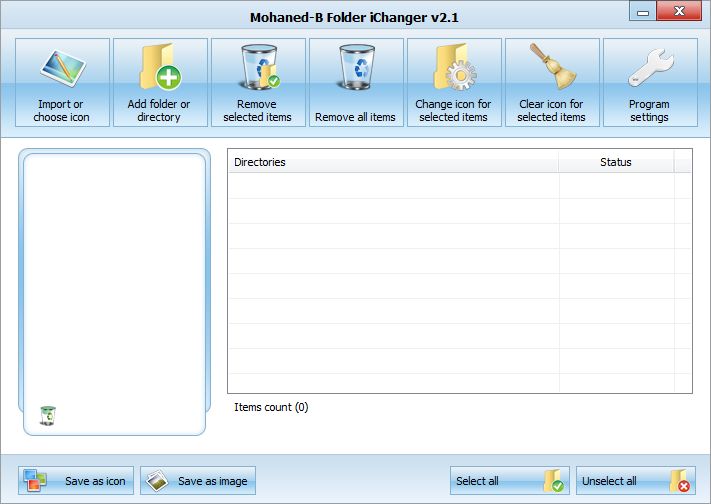
Press the Add folder or directory button to select a disk drive. Select a disk drive such as C: from the Browse for Folder window, and then press the OK button. That adds the disk drive to the Directories list in the shot below.
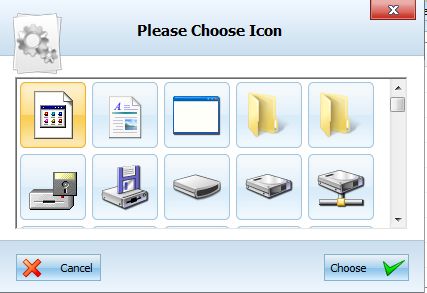
Next, click the Import or Choose icon button and From System Icons option. That opens the window in the shot below, which includes alternative disk drive icons. Select an icon, and then the Choose button to close the window.

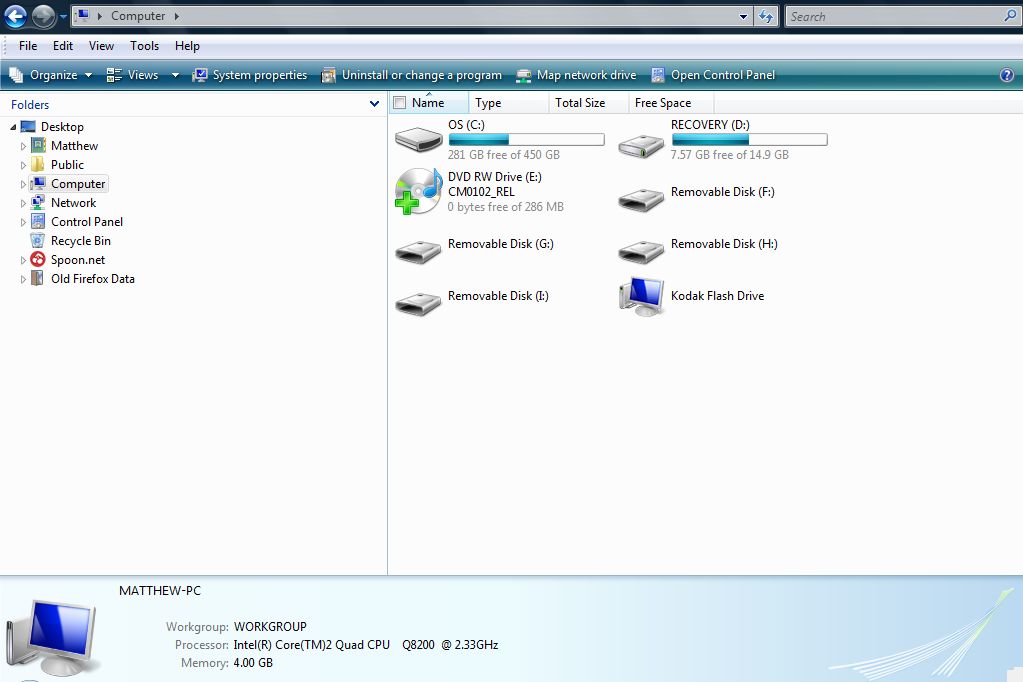
Now press the Change icon for selected item button to switch the icon. The software will then ask you to restart Windows. Click Yes to restart windows, and then open Windows Explorer after the restart. Now you’ll find your customized disk drive has an alternative icon as in the shot below.
So with this software you can customize both your disk drive and folder icons. However, Iconmancer has more extensive options for customizing folder icons.


