 Email article
Almost all editing software packages have resize options to adjust image dimensions with. Resizing them usually requires entering specific values for width and height. However, with VarieDrop you can set multiple resizing profiles; and then resize images by dragging and dropping them.
You can add VarieDrop to Windows from this page. The software is available for the XP, Vista, 7 and 8 platforms. Click the Software link, and select exe32 or exe64 for 32 or 64-bit versions of the package. Then run through the VarieDrop setup wizard to install it, and open the window below.
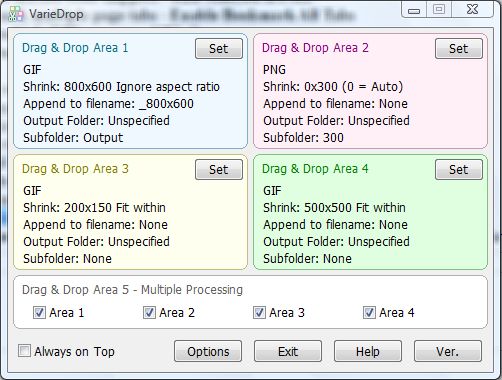
The window has four drag and drop areas. You can resize the images by dragging them from Windows Explorer onto one of the areas. For example, if you drag a photo to Drag and Drop Area 3 it will resize to 200 X 150. The newly resized photo saves in the same folder as the original.
Of course, you can add alternative dimensions to the drag and drop areas. Press the Set buttons to open the window below. Then click the Shrink check box, and enter a couple of values in the Width and Height boxes. Press OK to close the window, and drag a photo from Windows Explorer to the drag and drop area to resize it.
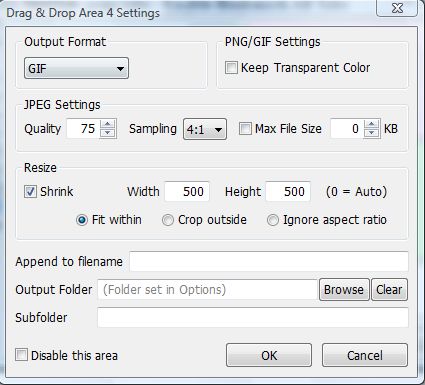
Select alternative file formats for the pictures by clicking the Output Format drop-down list. You can choose GIF, JPEG, PNG, TIFF and BMP output formats for the resized images. To retain full image quality in the resized picture, enter a higher percentage value in the Quality text box.
Press the Options button to open the Options dialog box in the shot below. There you can specify a default output folder to save resized pictures in. Press the Browse button to select a folder to save the photos in.

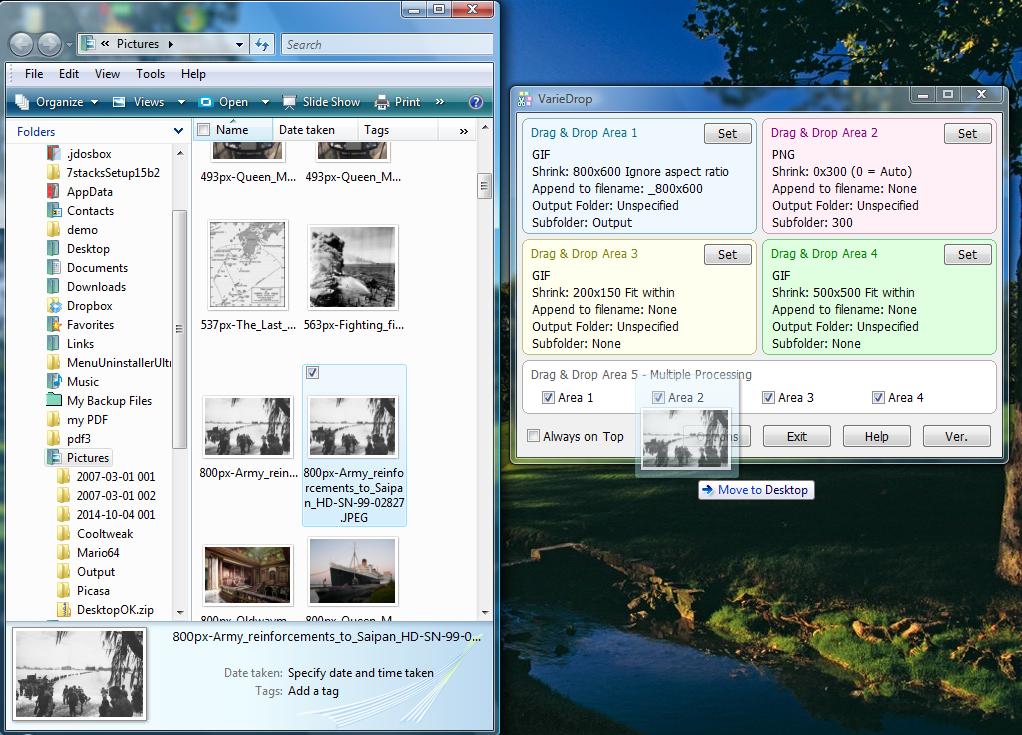
If you ever need to resize lots of photos to the same dimensions, VarieDrop could come in handy. Then you can quickly resize the images by dragging and dropping them onto the VarieDrop window, and retain the original image quality.


