 Email article
As you may have already noticed, your default Android keyboard does not have a dedicated number row. So if you want to enter numbers, you’ll need to press the “?123” key first. If you want to add a dedicated number row to your default Android keyboard (Google Keyboard), here’s what you need to do.
How to add a dedicated number row to Google Keyboard in Android
- On your Android smartphone or tablet, go to device “Settings” and then go to the “Personal” section. Select “Language & Input”.
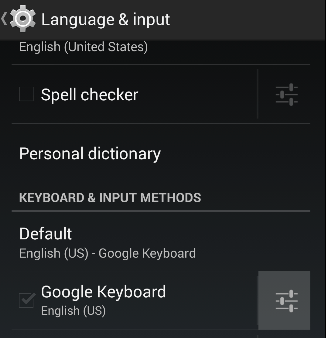
- Under “Language & Input”, go to the “Keyboard & Input Methods” section. Check whether your default keyboard is Google Keyboard or not. If it is, simply find “Google Keyboard” from the list and then press the customization icon right next to it.
- On the next screen, you will see your default keyboard’s settings.
- Under “Google Keyboard Settings”, go to “Other Options” then tap “Advanced Settings”.
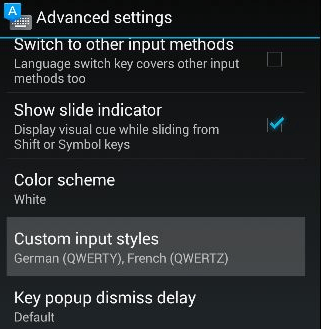
- Under “Advanced Settings”, find and select “Custom input styles”. You will then see a list of input styles such as “German (QWERTY)”.
- Just tap the “Add Style” button at the bottom of the screen.
- In the “Add Style” dialog, select your preferred language and layout. For language, choose “English (US)”. For layout, choose “PC” then press “Add” to confirm.
- A custom input styles confirmation dialog will appear. Press “Enable” to proceed.
- On the following screen, go to the section for “Active Input Methods” and then check whether the “English (US) (PC)” keyboard is active. If not, make sure to check the box right next to it.
- Once done, simply press the back button on your device. As you can notice, your new keyboard has already been added to custom input styles.
- So go ahead and open any app. Start typing to see the dedicated number row on your default Android keyboard.
It’s that simple.


