In Google Docs, it’s easy to create lists and tables. The thing is what if you have a lengthy list that you want to sort out or organize in alphabetical order? If you do it manually, then it will definitely take a lot of time.
Fortunately, there’s an alternative option that allows you to easily sort out lists by alphabetical order. You can do it in ascending (A – Z) or descending (Z – A) order. Just read the rest of this post to learn how.
How to sort a list alphabetically in Google Docs
- First off, go to your Google Docs dashboard. Remember, you can access Google Docs via its direct link or via Google Drive.
- Once you’re in Google Docs, you may edit an existing document or create a new document.
- After which, just create a list in either numbered or bulleted format. You can just randomly key in the data for your list.
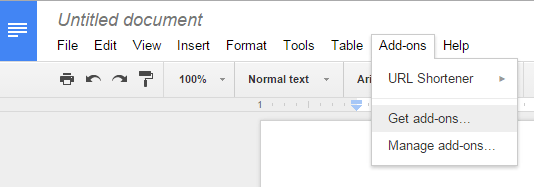
- Once your list is ready, go to your Google Docs toolbar and click the “Add-ons” tab.
- Under “Add-ons”, click “Get add-ons”.
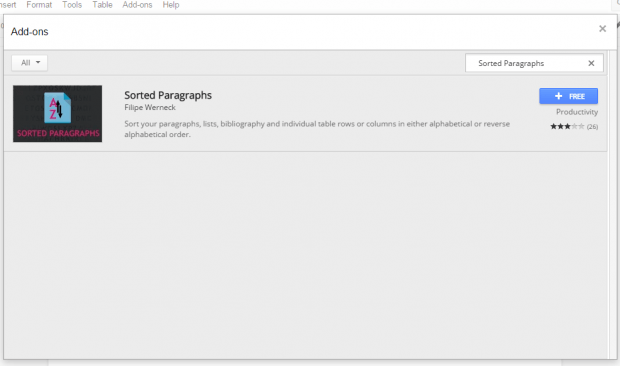
- On the add-ons list, key in “Sorted Paragraphs” and then press “Enter”.
- Once the add-on shows up on the list, click the “+Free” button next to it. This will allow you to add the add-on to your Google Docs platform.
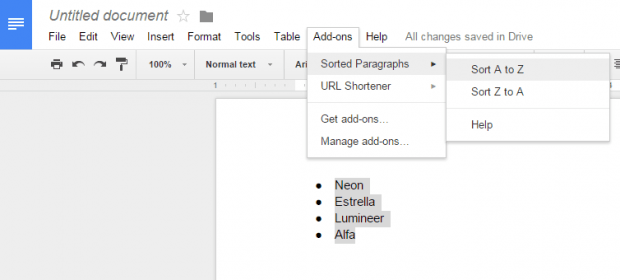
- So what’s next? Just go back to your list and highlight every item in your list that you wish to sort in alphabetical order.
- After doing so, just click the “Add-ons” tab again and then select “Sorted Paragraphs”. Choose whether you want to sort your list in ascending (A – Z) or descending (Z – A) order.
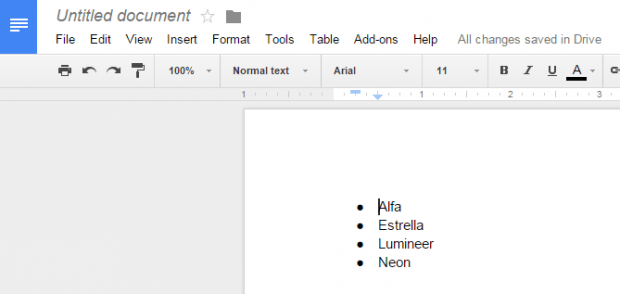
- So that’s it. The items in your list will be automatically sorted out. You can just repeat the steps if you still have more lists that you wish to sort out.

 Email article


