Email article
In Windows 10, Outlook Mail is a new email client that replaces the Mail, People, Calendar app combo in Windows 8. It features an overhaul redesign which mimics the design of the desktop version of Outlook. In this article, I’ll show you how to add a new email account and manage the sync settings in Outlook Mail in the latest build of Windows 10.
How to add a new email account to Outlook Mail
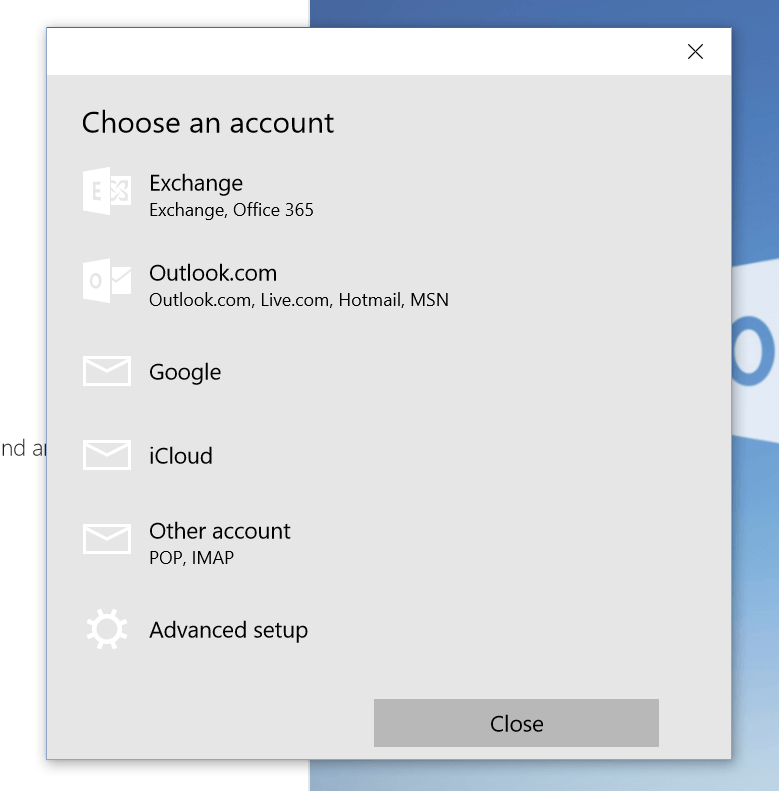
Like the old Mail app in Windows 8, Outlook Mail supports many major email services (Exchange, Outlook/Live, Google, iCloud) and advanced setup of POP and IMAP protocols. To add a new email account, you can follow these steps.
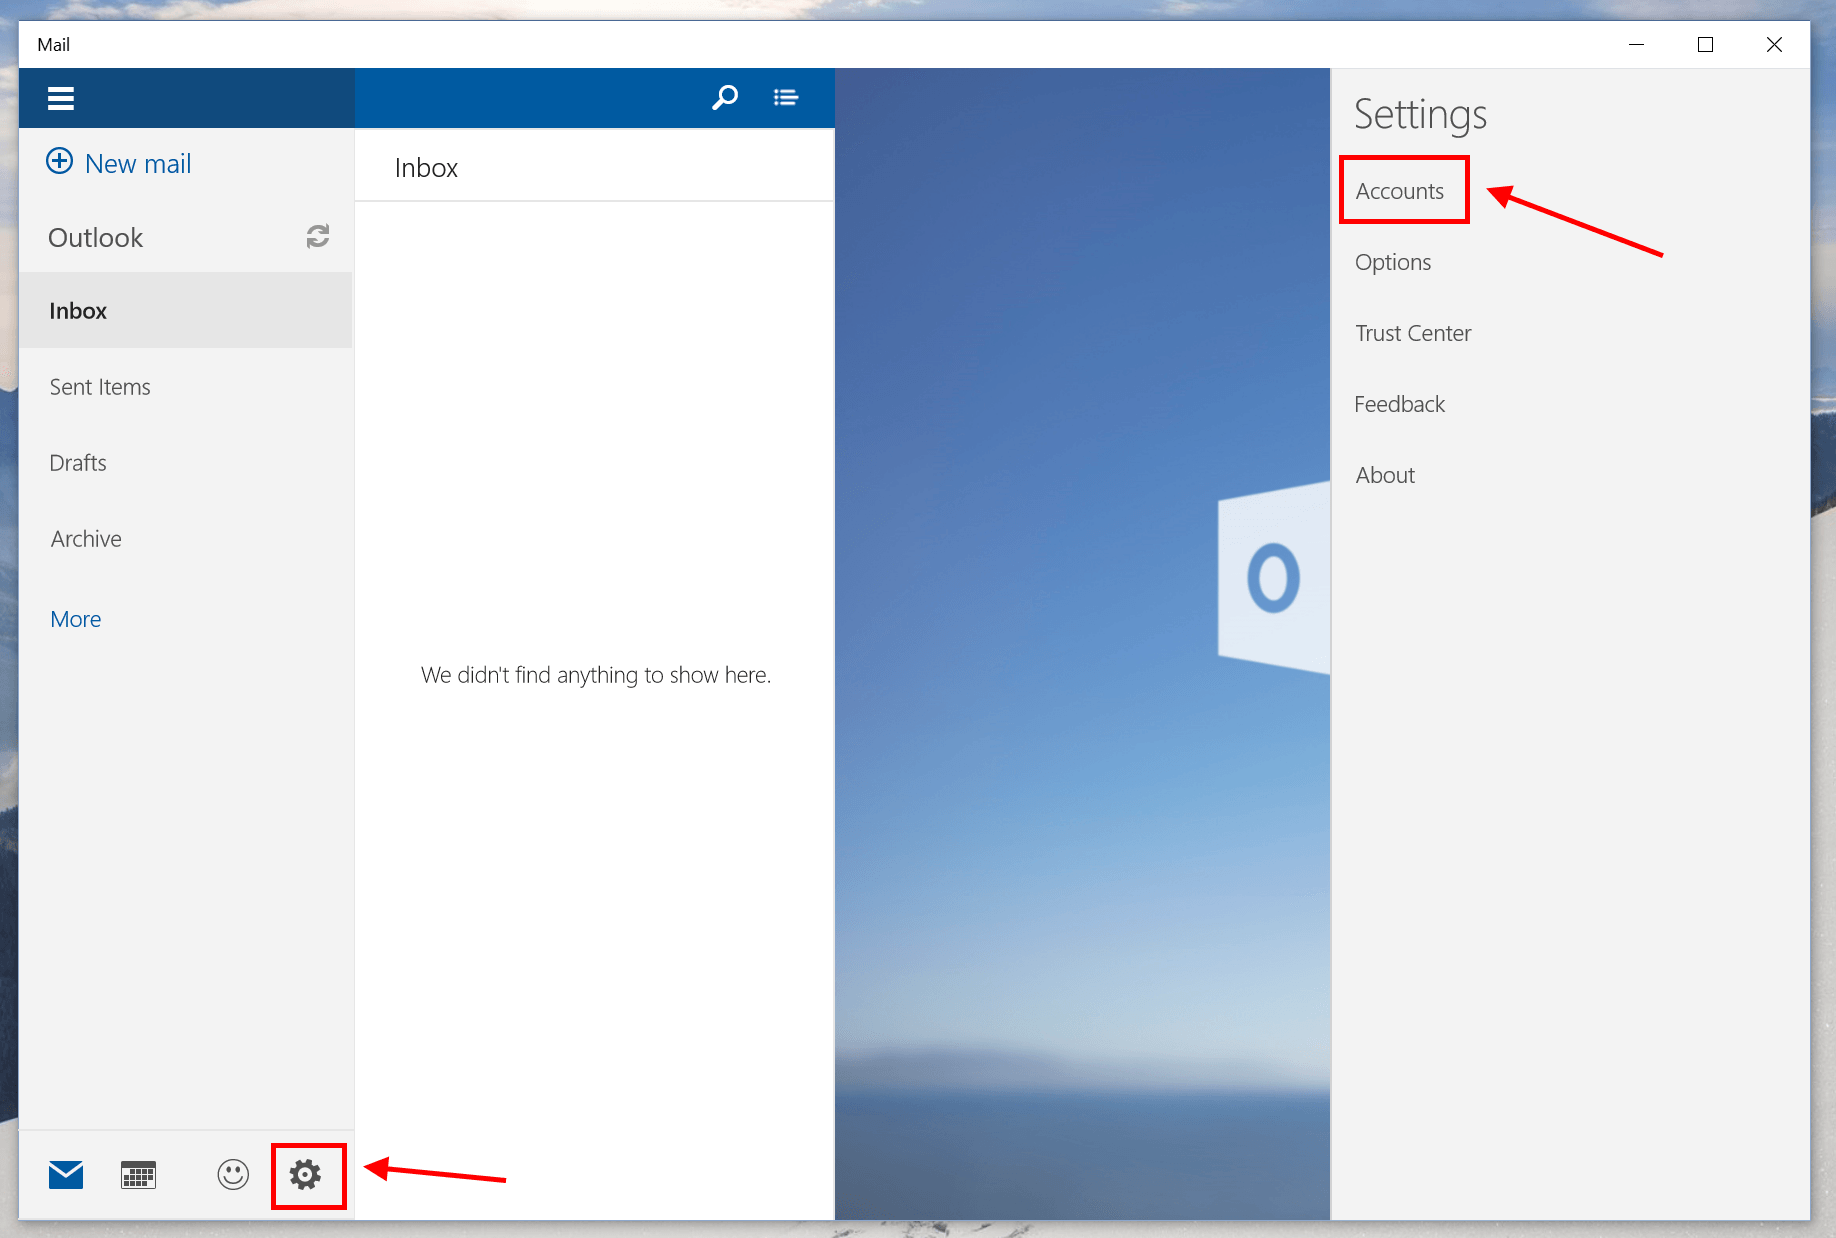
- In Outlook Mail app, click the Settings icon at the bottom left of the app window then select Accounts in Settings panel.
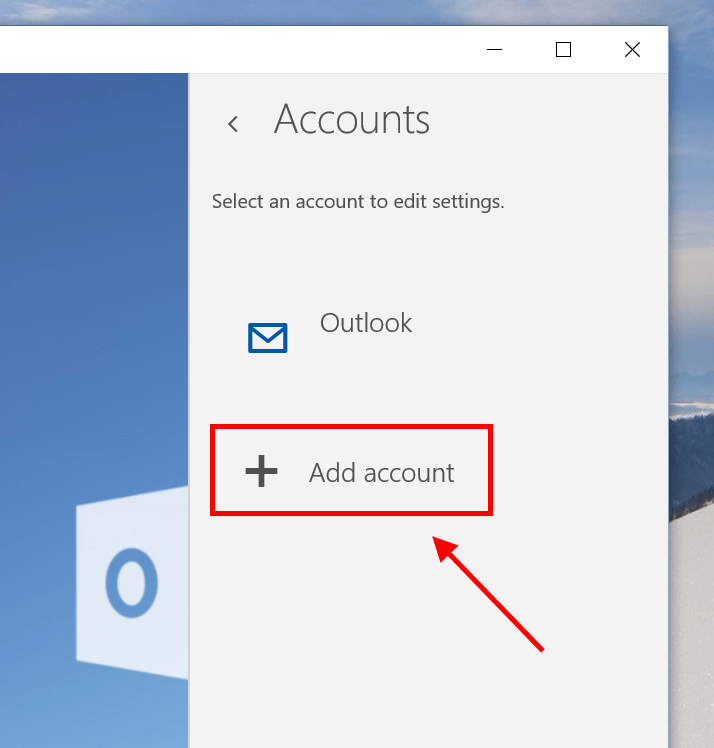
- Click “Add account.”
- In the pop-up window, choose your email service and follow the steps.
- Then you’ll be done.
How to change sync settings of an account in Outlook Mail
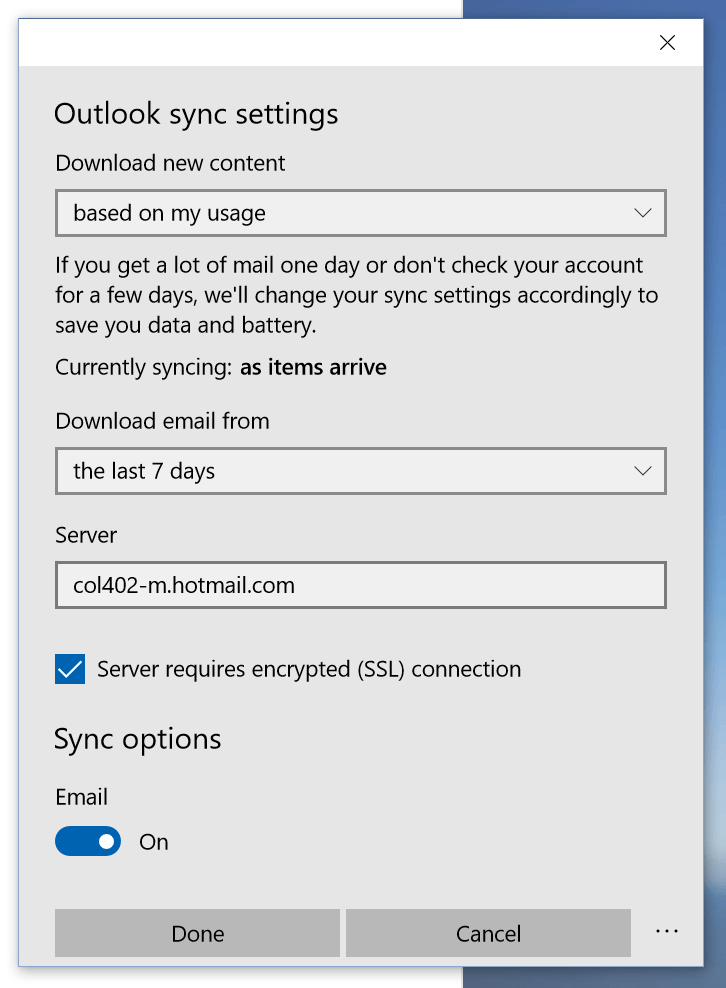
Sync settings is a crucial thing in any mail client because you may miss an important email due to a wrong setting. In addition, setting sync frequency too high can affect your device’s battery too. Here’re the steps to change sync settings in Outlook Mail.
- Click Setting icon at the bottom left of the Outlook Mail app window and select Accounts.
- In Accounts settings panel, select the account you want to change its sync settings.
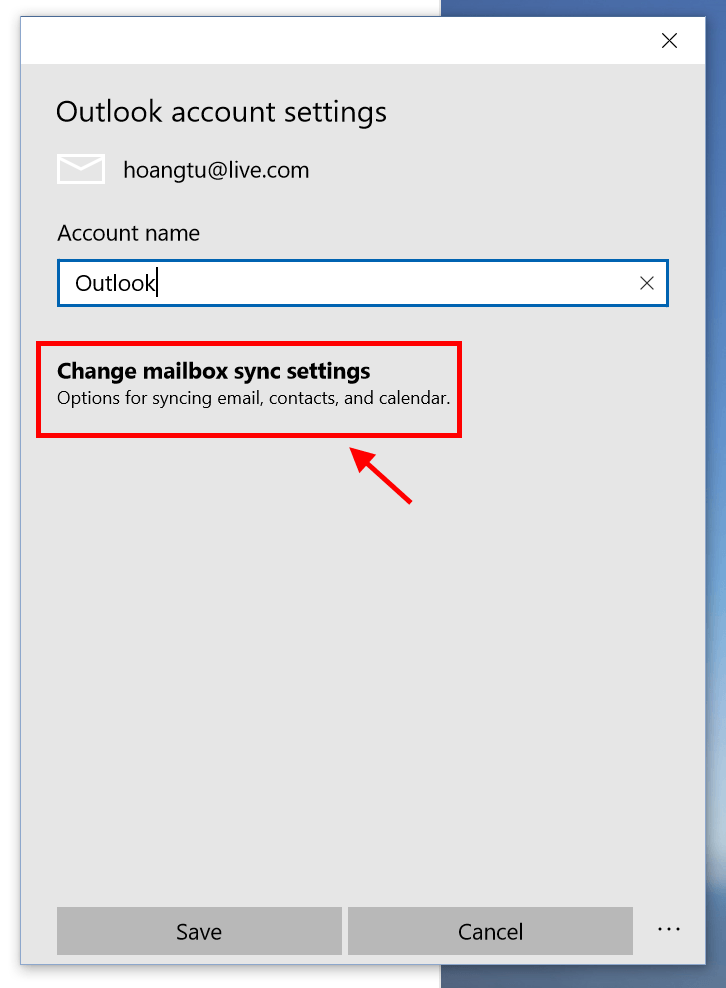
- Click “Change mailbox sync settings” in the pop-up window.
- Finally, select a desired setting in the drop-down menu of “Download new content.”
- And that’s all!