We know Apple loves naming it’s OS X operating systems about landmarks or places, and they are no stranger to creating features with double meanings too. One of the latest features is the ‘Time Machine’ which is a name they use for their backup software, implying you can go back in time to obtain older files or store files for a period of time.
Today I’ll show you how to exclude files from a Time Machine backup with ease. While most people don’t ever think about eliminating files out of backups, it helps wipe time away from your backing up duties if done correctly.
HOW TO EXCLUDE FILES FROM THE TIME MACHINE BACKUP
1. Open the Time Machine application on your Mac you wish to back up.
2. Now navigate to the ‘System Preferences’, followed by ‘Preferences’.
3. Click the ‘Options’ button.

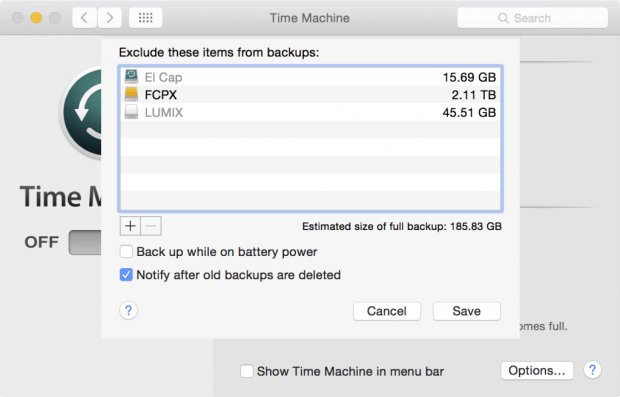
4. You’ll see a list of ‘exclude these items from backups’ in a box. Directly beneath that box is a ‘+’ sign. Click that sign.
5. Now you can select which folder or file you wish to exclude and it will join the list. Browse your drives for the desired files.
As you can see in the screenshot during the guide, the far right side of the box displays the total file size of each. That’s handy if you want to double check you did upload the correct file and it matches with your estimations on what that file size is. It also gives you the estimated total file size beneath the box on the right side.

 Email article


