Email article
Windows 10 comes packed with a new backup and restore files feature that is the perfect backup and restore feature Windows needed. While everyone would love a backup of their data, there often isn’t an easy enough solution for people to bother. Nearly all of you shouldn’t have any trouble learning how to back up and restore files in Windows 10 using the guide below.
We’ll break this up into two sections: the backup and then the restore, since that’s the general order you will take.
HOW TO BACKUP FILES IN WINDOWS 10
1. Click on the Start button.
2. Click on the ‘Settings’.
3. Click on the ‘Update and Security’ option.
4. Click on ‘Add a Drive’ under the ‘Backup’ section.
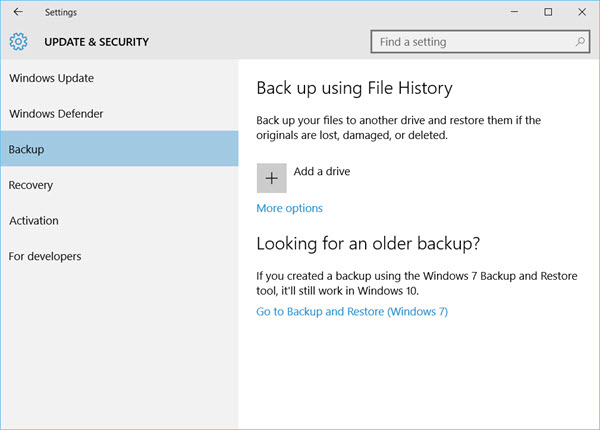
5. From here, you can either choose to back up the data to an external drive or network location. As always, we recommend getting an external drive if your computer doesn’t have much memory. The reason for that is the backup will use your existing memory if you aren’t backing up to an external source. If you find your computer, laptop or notebook running out of space, it’s often due to backups happening — and those backups aren’t always directly related to your Windows backups either. iTunes automatically backing up data and other data relating to your mobile phone is a common way to quickly run out of space.
HOW TO RESTORE FILES IN WINDOWS 10
The opposite of backing up is restoring. That means getting that data you did backup back on your computer. Here’s how to do that in Windows 10:
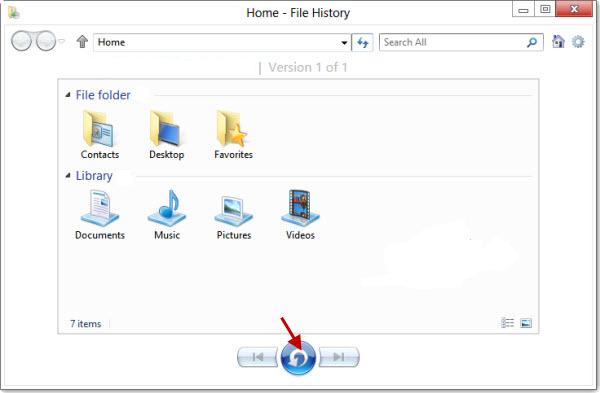
6. Start typing ‘restore files’ in the search field and click on the option called ‘Restore your files with File History’.
7. Wait for the Control Panel to open.
8. Click on the ‘Restore personal files’ option.
9. Browse the files you want to restore. Click the blue button on the screenshot below when you find the files you want to have back on your computer.
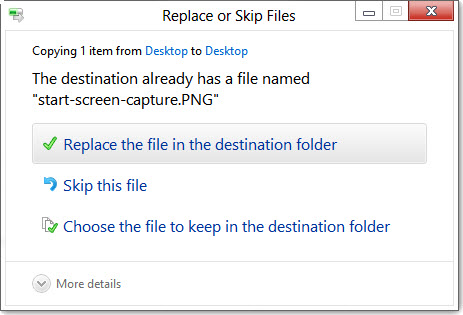
Confirm you want to replace the file to the destination you gave for that file.
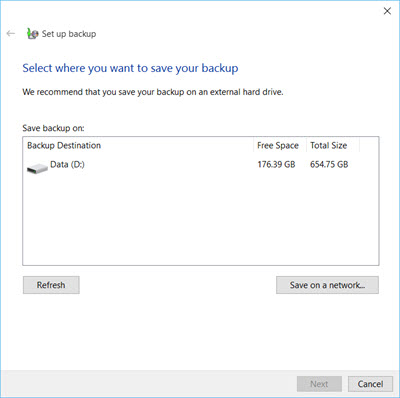
10. Additionally, you can take a backup that’s similar to a Windows 7 backup if you prefer.
Navigate to the Control Panel and select the ‘All Control panel Items’ option, followed by ‘Backup & Restore (Windows 7)’. Now just select the ‘Set up backup’ option and you’re done. You will now see a screenshot just like the one below: