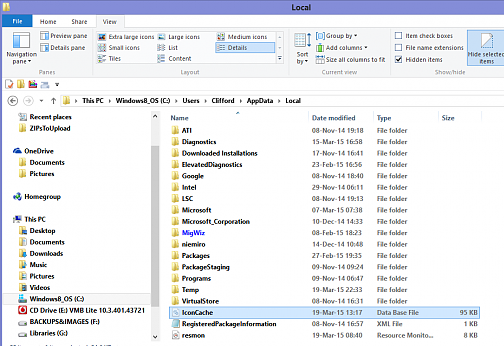
The icons that your Windows system uses for your programs and documents are stored in an icon cache, so they can be quickly displayed whenever you need them instead they load slowly. In the case if you are having some issues or difficulties with icons on your system than rebuilding the icon cache is the solution to your problem.
Sometimes the icon cache on your computer may become corrupted, and it may cause the icons of files on your system to display distorted or incorrectly. When this type if issue occurs then you need to delete the icon cache to reset it and recreate it automatically.
How does the Icon Cache work in Windows System?
There are icons everywhere in your system: File Explorer, the control panel, Programs and Features, and many others. It can take a lot of your computer system resources to retrieve all icon images from your hard disk and to yield them dynamically.
As more information is added to the database, the database file grows accordingly. When your Windows system wants to display an icon, first it will check the cache in your windows, and then it will show the cached icon if it’s match is found in the cache. If it is unable to locate the one, then it will check the executable file directory of your system and scan the application directory on your system.
Where Is the Icon Cache Stored?
What you have to do is that you’ll have to delete all icon cache files which you can see in the corresponding folder to rebuild icon cache in your system. It is not as simple as you are thinking that just by clicking on them and pressing Delete button will delete them but those files are still used by your Windows system Explorer, so you are unable to remove those files usually.
How to Rebuild the Icon Cache?
Before proceeding any further, save and close anything that you are working on.
Steps to Rebuild Icon Cache:
- Open File Explorer window and navigate to the following folder path:
:\Users\<your username>\AppData\Local\Microsoft\Windows\Explorer
- Now just press & hold the “Shift” key on your system’s keyboard and right-click on the Explorer folder. Now select “Open command window here” option.
- After performing above step, a command prompt window will open at the path mentioned below
(C:\Users\<yourusername>\AppData\Local\Microsoft\Windows\Explorer)
- Just to be sure, type in dir command into your command prompt window and press enter. Now a list of all the icon cache files is displayed on the command prompt screen that we have discussed earlier.
- Now you have to open the Task Manager. To open task manager, you simply have to right-click on Windows Taskbar option and click on the option that says Task Manager.
- In the list of processes, look for Windows Explorer. Right click the process and select and select End Task option. Now Explorer and desktop will disappear. Exit your Task Manager and make sure that no other applications are running on your system except the command prompt.
- Now type the following command in your command prompt window of your system:
- The asterisk (*) at the end of iconcache ensures that all the files that are starting with iconcache name are included and are deleted.
- Now use the dir command one more to view the files that are in the folder. If any more files are displayed, it means that in the background some of the applications are still running. Close all of the requests and repeat the command (del iconcache*) again.
- Now press CTRL+ALT+DEL keys at once and choose “Sign Off” option.
When you “Sign in” back then any missing or outdated icons are re-created or hopefully they are repaired.
This is how you can resolve your issue in just a few simple and easy steps.

 Email article


