 Email article
 Screen recording is a nice solution for creating how-to videos, recording gameplay, preparing for a presentation, saving video conversations and more. AceThinker Screen Grabber Pro comes in handy for recording any activity on your screen with versatile functions. You can easily include your voice, system sound, webcam, clicking effects and more into the screen capture. It also provides premium features for editing screen in real time, taking quick snapshots, touching up images and more.
Key Features
Intuitive Interface and straightforward operation: This tool has nice interface that you’re able to understand the process by having the first glance. It provides several capture modes to perform screencast and you could easily go through the way you like. Once the screencast is initiated, you could access a toolbar for controlling over the recording (e.g., pause, publish, etc). And if you prefer not to show up the toolbar in recording, you may also hide it and use hotkeys to instead.
Include multimedia into recording: Based on the essential screen recording, depending on your specific needs, you could include webcam, microphone sound, system sound, cursor effects and more into the screencasts. These features give you the capabilities for recording tutorials, tech guide, web meeting memos and more activities in different scenarios.
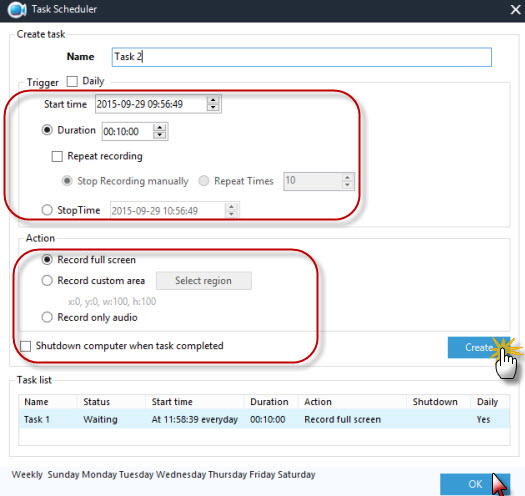 Task Scheduler: For users who need to record a prospective event on their computer, this tool enables you to utilize the task scheduler. Using this function, you could easily perform screen recording automatically and to record ongoing web videos, web meetings, system monitoring tasks, etc. You’re able to configure the time point to start recording and to repeat this task on weekly/monthly basis.
Two Editors for optimizing your screencasts: Along with your recording, you could not only access the options for controlling the process, but also highlight your screen using callouts, texts, color marks in real time. Except the screen editor, there’s also a video editor for you to trim, resize, crop and polish the recorded video.
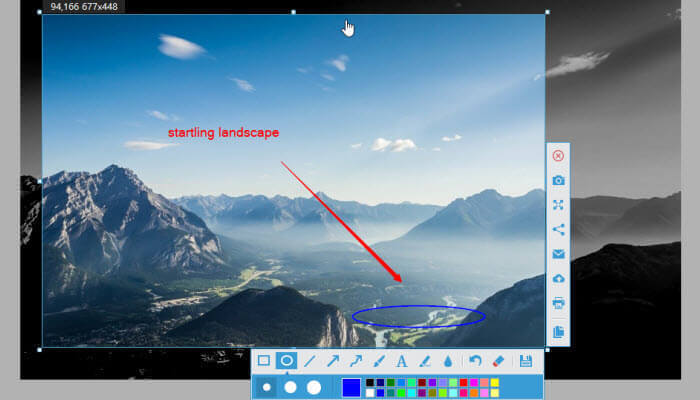
Extreme features for screen capture: There’re times you may need to make a screenshot for quickly sharing with others in communication, it can also be attained in this software. The built-in screenshot function lets you perform quick snapshots and also edit the image with multiple options. Once an image is done, the program will remind you to save to local disk, deliver via email, send to your social accounts and copy to clipboard.
User Guide
This program is now available to download from the product page of AceThinker Screen Grabber Pro and you could check below the detailed guide.
 Initialize Screencast Creation
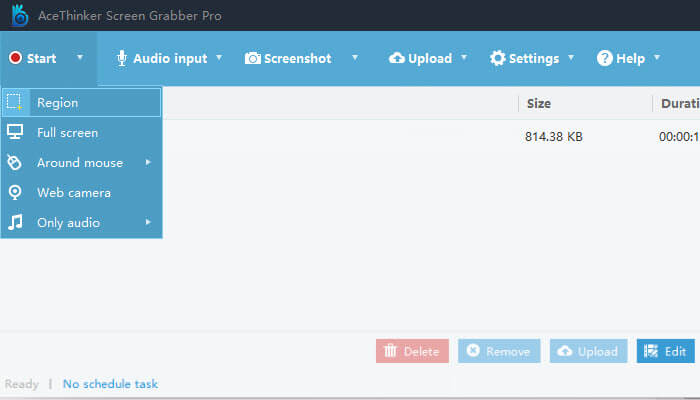
Download and install the program from here and then activate it on your desktop (Mac users please check for Mac Screen Recorder). When getting to starter interface, you could click “Record” to commence the process, you’re able to select from region, full-screen, around mouse (record the activity around your mouse) or audio-only.
 Annotate Screen during Recording
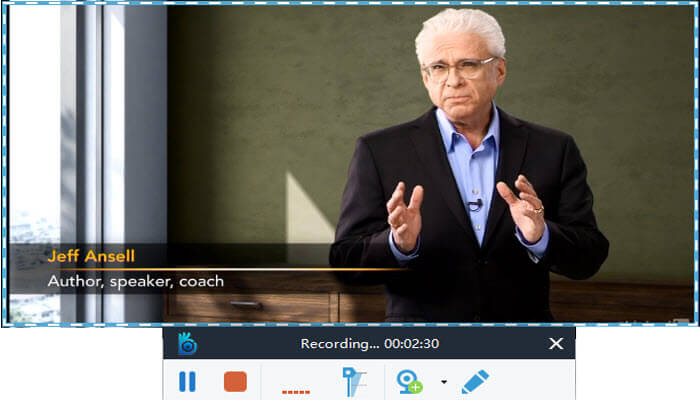
When the screen recording is undergoing, you could access the options on toolbar, so as to control the whole process. You could adjust the sound volume or add your own narration at any time you want. And if you prefer, you may also annotate the screen using watermark, highlights, texts, lines, etc. You could also include webcam into capture and to achieve picture-in-picture recording.
 Publish Recorded Video
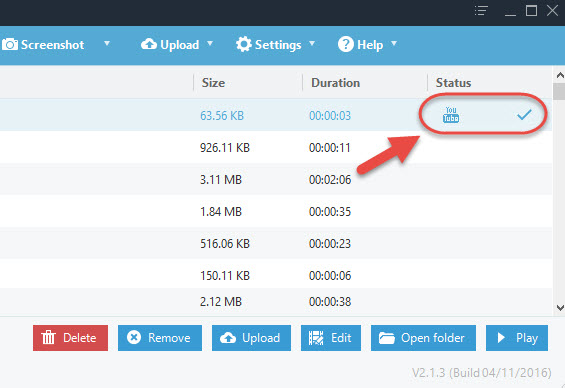
Once you’re done with recording, click the “Stop” button on toolbar to end it up. You will find the screencast in recording list on main interface. You could right-click on it and select “Open Folder” to locate it. You may also view it with built-in player, rename the file, delete or upload it.
 Customize Settings (Optional)
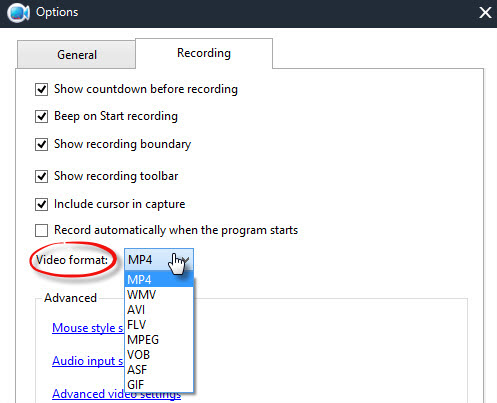
On the interface, you can forward to “Settings” and then “Options” to customize your screencast. On the Options dialog, you will see two tabs. The “General” tab involves settings to personalize hotkeys in performing recording, output location and basic settings like minimize program to disk-tray. And on “Settings” tab, you could access more concrete options:
- Mouse Style: Include mouse click into capture and adjust the clicking effecting. You could adjust the color, hot spot size and more.
- Video Output: You can choose among MP4, WMV, FLV and more media formats.
- Video settings: Experienced can change the frame rate, bit rate, and codec to produce screencasts in the resolution they like.


