 Email article
Restore points are Windows safety nets for when people need to rely on backups that they have not otherwise taken. If you hear lots more people talking about a backup being a requirement on mobile operating systems such as Android in comparison to Windows operating systems on computers, that is because Android does not offer the restore point feature unless you are a root user.
By default Windows is set to manage these restore points for you since you are the administrator of the OS, and it is then up to you to apply the restoration point for when you need it. However, first, we are going to run through how to enable manually and disable the restore point just in case your computer has not got it turned on at the moment.
Enabling the Restore Point in Windows 10
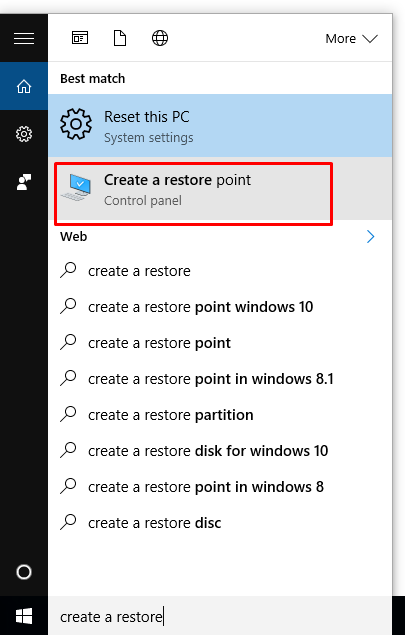
1. In the search box from the taskbar, start typing in the words create a restore point and then click on the same option when it appears.
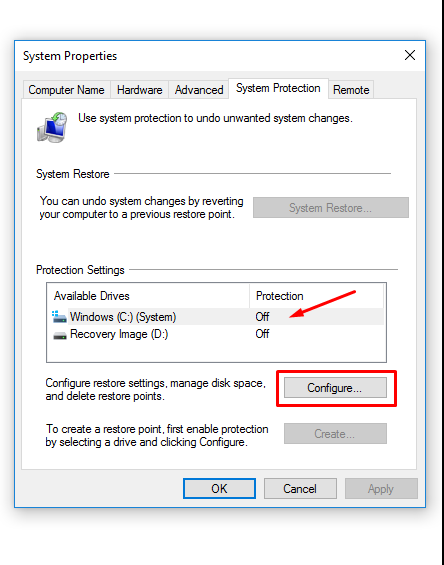
2. If yours is already set to the on position under the Protection Settings, then you do not have to do anything as it is already enabled. However, if yours is set to off then click on the Configure button.
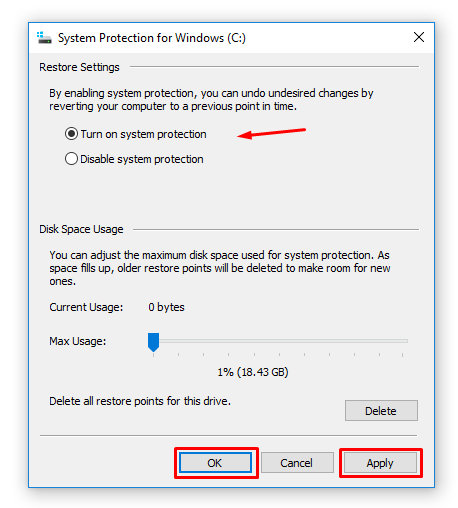
3. Check the box for the Turn on system protection option and then click OK and Apply.
Now that you all have the system restore point turned on it is time to find out what it takes to make a system restore point in Windows 10 quickly. Here is how:
Creating a quick restore Point in Windows 10
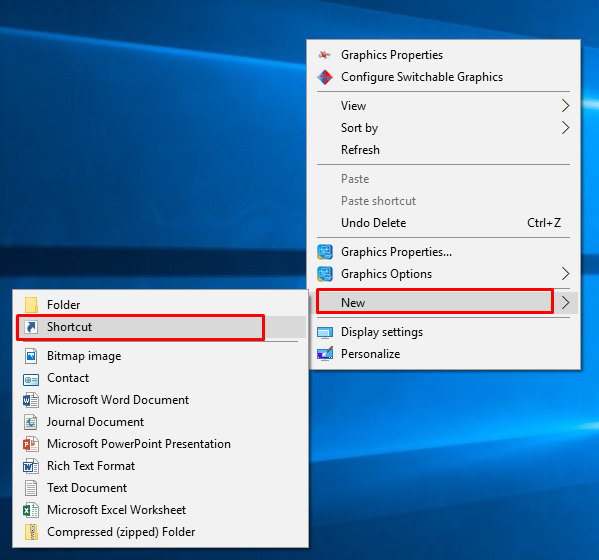
1. Minimize your web browse and then right-click on the desktop and hover over the New and then click on the Shortcut.
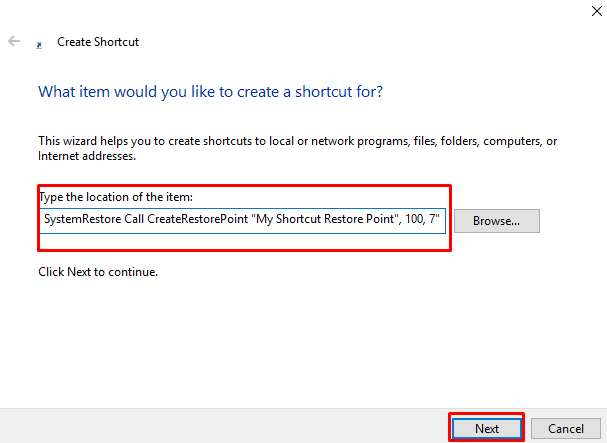
2. Add the following to your shortcut location and then click on the Next button when it is done: cmd.exe /k “wmic.exe /Namespace:\\root\default Path SystemRestore Call CreateRestorePoint “My Shortcut Restore Point”, 100, 7″
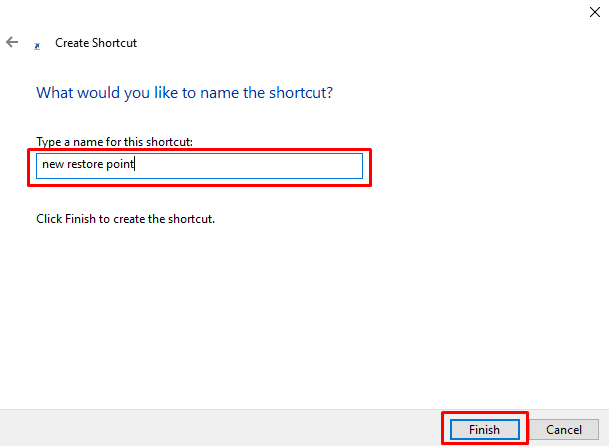
3. Choose a name for your restore point. We called it “new restore point” to keep it simple. Click on the Finish button after you have typed your name.
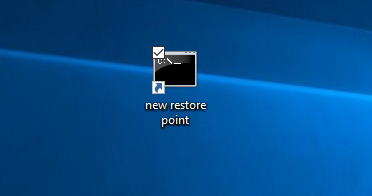
4. The new restore point is now available from the desktop now.
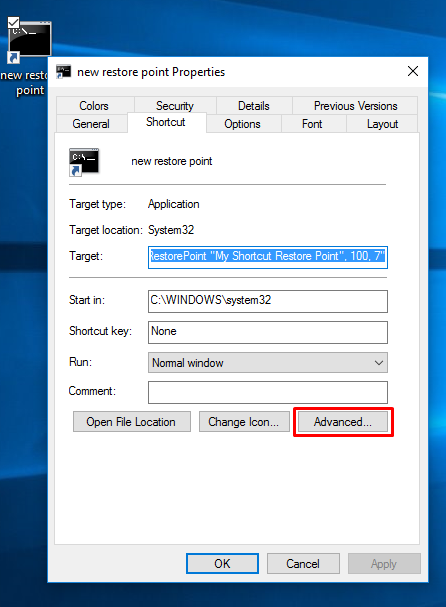
5. Right-click on the restore point and click on the Properties box.

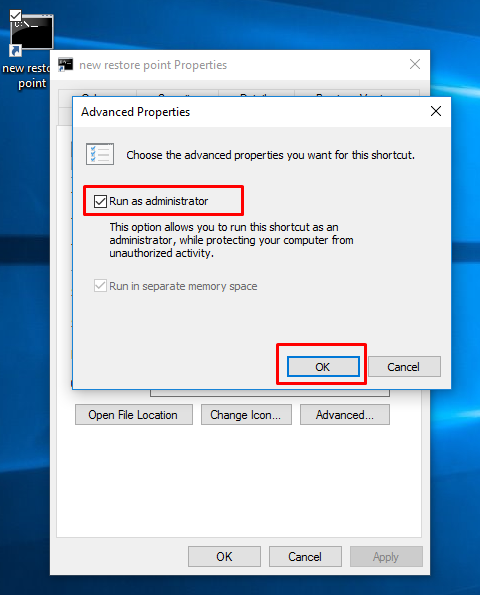
6. Click on the Advanced button at the bottom of the screen.
7. Make sure to check the Run as administrator box and then finish by clicking the OK button.
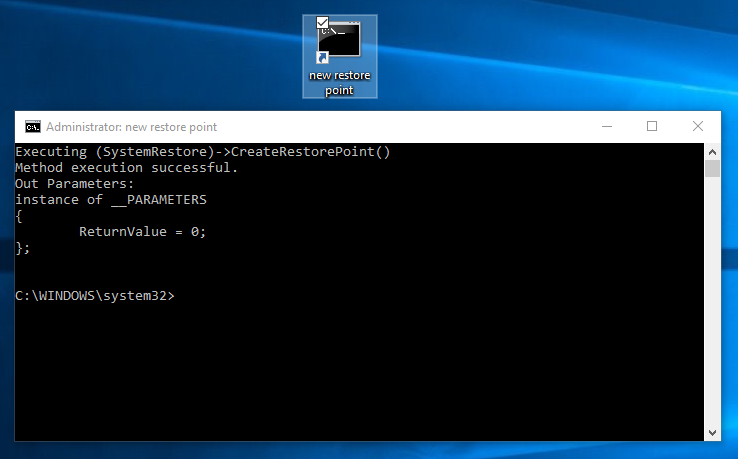
8. You have now created a new restore point that you can execute when you feel like it. All you need to do is double-click on the icon that is on the desktop and after a few seconds, it creates it for you.
In conclusion, that is how to enable and then create a quick restore point using Windows 10 operating systems. Now you can roll back the Windows OS to the exact time you want to in case you plan on taking some risks with Windows as long as you manually create the restore point just before going ahead with your task. The guide is also useful for people who do not enjoy going through the usual way of creating system restore points.


