 Email article
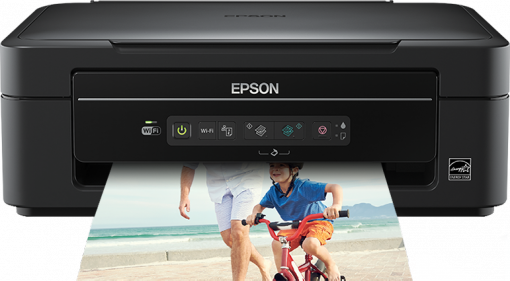
A printer is one of the most common peripheral devices to connect to a computer. Over the years, they haven’t provided a joyous time for many when it comes to setting them up.
As time goes on, things are becoming easier and easier to do with technology as developers work out ways to do things that are simpler than they were before. Dealing with printers is one of the things that is noticeably easier these days in comparison to earlier versions of Windows operating systems.
While many things have changed, some things have also remained the same with regards to printers connecting with our Windows operating systems. We’ve always had the chance to set a default printer to use, for example.
The idea behind selecting a default printer is that it will be the printer that Windows uses whenever you go to print something. That way you don’t have to select the printer each time manually.
There are quite a few ways you can set a default printer in Windows 10. Those who know the previous versions of Windows well will be familiar with doing it from the Devices & Printers menu from the Control Panel or even the Print dialog found in Notepad. The guide below runs through two of the more recommended methods that should continue to be available in future versions of the Windows operating system.
How to select a printer in Windows 10
One of the things that Windows developers have tried to do with the Windows 10 operating system is fit as much stuff as it makes sense to into the Windows Settings area so you can easily work out how to do things from there. Changing the default printer is one of those things that can be done from the Windows Settings menu.
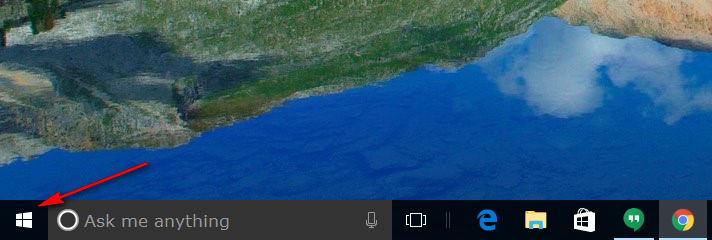
Click on the Windows icon found on the far left-hand side of the taskbar to get access to the Start menu.
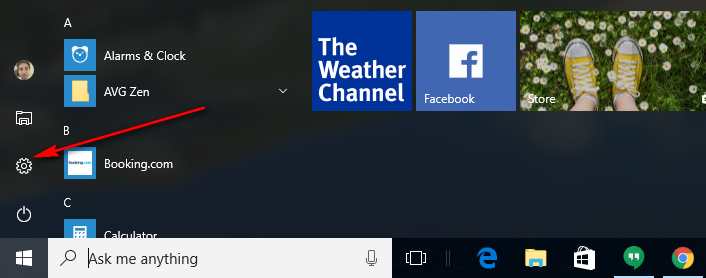
Click on the “Settings” gear icon found in the Start menu’s left side pane to get access to the Windows Settings.
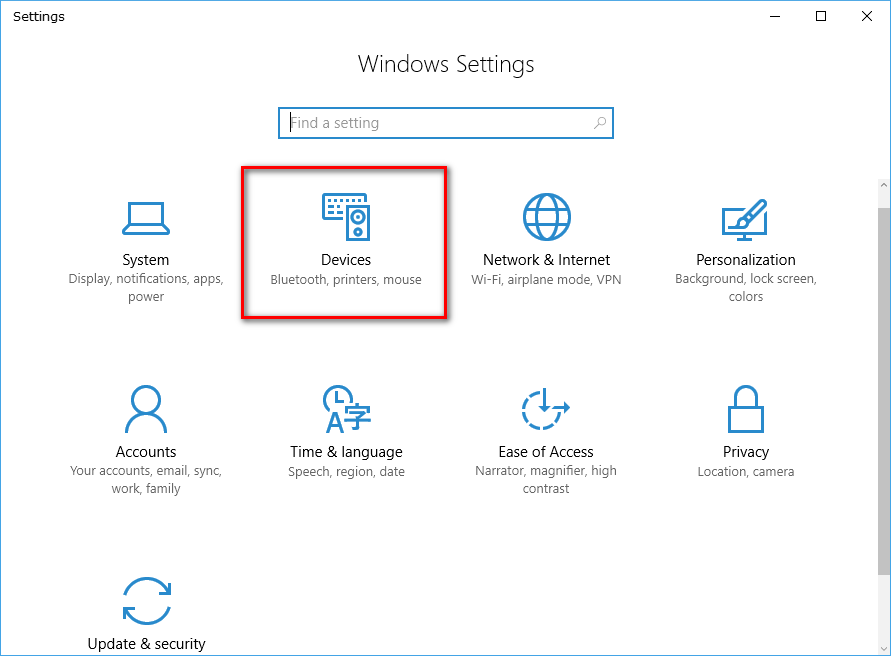
Click on the “Devices” button from the Windows Settings menu.
Under Printers & Scanners in the left pane, scroll down until you can see the “Let Windows manage my default printer.”
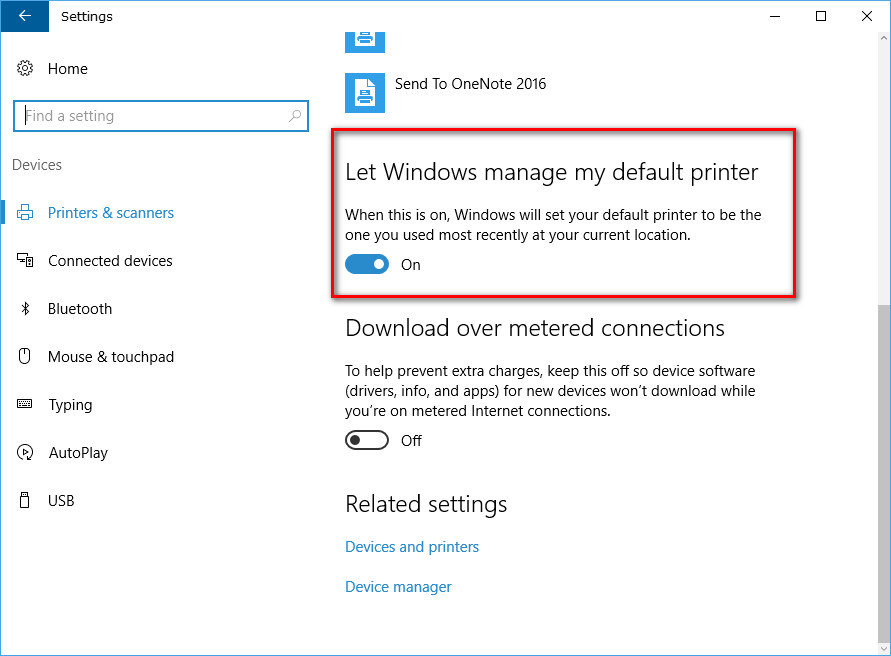
This option for letting Windows manage your printer is turned on by default when you use Windows 10, but in order to choose the default printer manually by yourself, you need to toggle this switch to the off position.

With the “Let Windows manage my default printer” turned off, scroll back up the same screen and locate the printer you want to select as the default under the Printers and scanners heading.
Click the mouse or touchpad on the name of the printer and then click on the “Manage” button that becomes available beneath it.
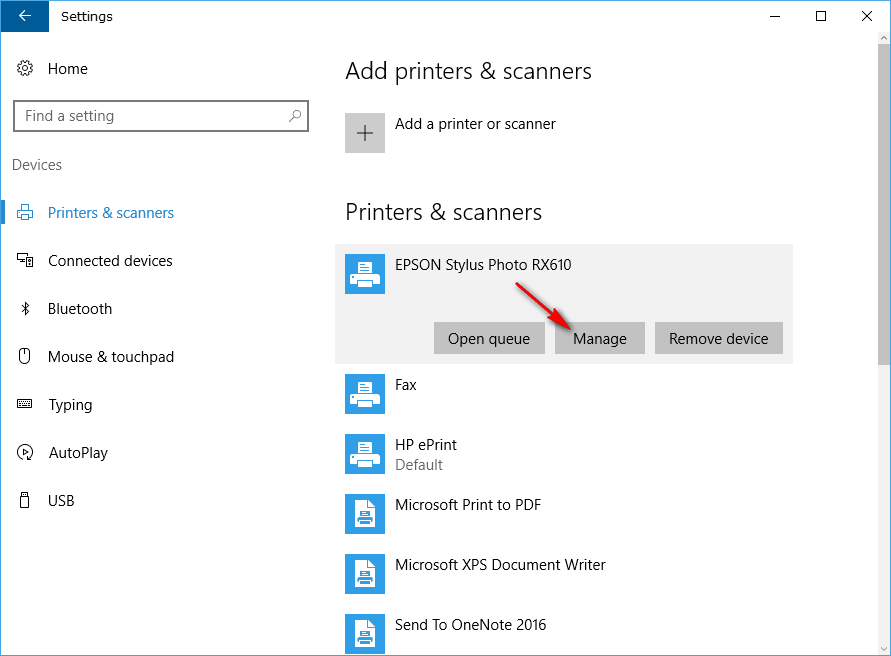
From within the Manage your device menu, you get a button now that shows “Set as default” that you need to click to set it as your default printer.

That was how to set the default printer in Windows 10 by using the Windows Settings. The other option we recommend learning is how to do it from the Command Prompt application because what would Windows be without the command line in the future?
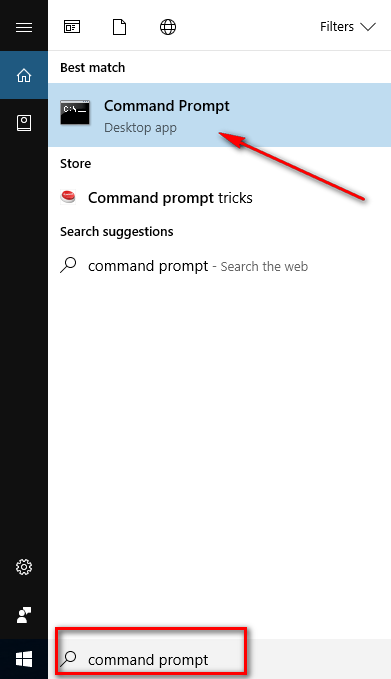
To use the Command Prompt, start typing “Command Prompt” into the search field found in the taskbar in Windows 10 and then click on the application when it becomes available under the Best match section.
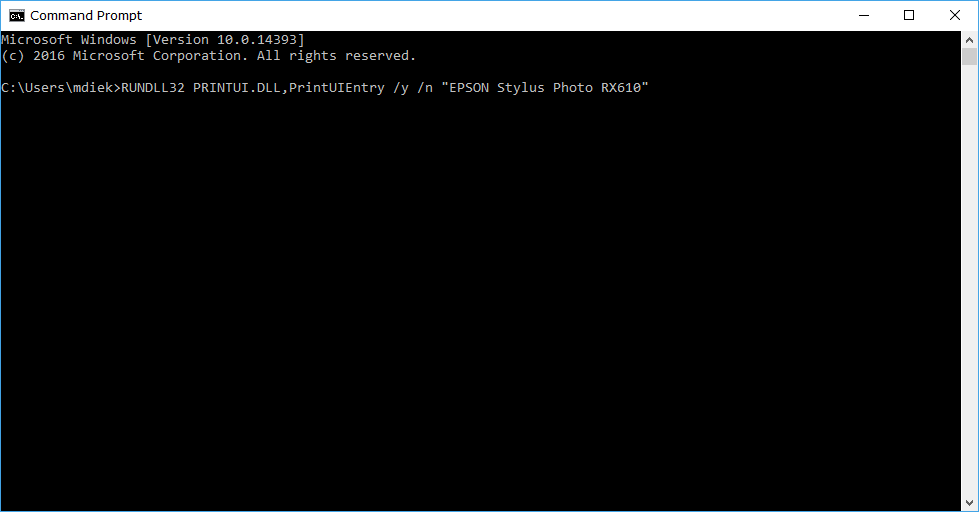
Enter the command RUNDLL32 PRINTUI.DLL,PrintUIEntry /y /n “Printer name” — changing where it shows the “printer name” with the name of your actual printer. The best way to do this is by going back to the Printers and scanners section from the Windows Settings demonstrated above and then copy the exact name of the printer as it shows from the Printers and scanners heading.
Those are a couple of ways for you to set the default printer using any version of the Windows 10 operating system.


