Everyone running any version of the Windows 10 operating system gets to use the PowerShell 5.0 by default.
The Windows PowerShell is built on the “.NET Framework,” and is designed specifically for administrators to execute tasks that automate the administration of the Windows 10 OS and the apps that run on it. Administrators and power users of Windows 10 can do those things from the PowerShell’s command-line shell and scripting language.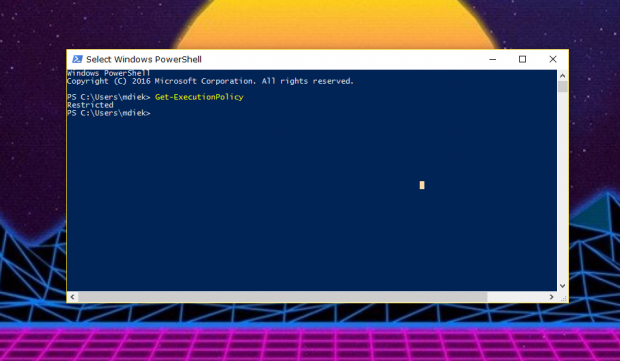
Like the Command Prompt in Windows 10, the PowerShell offers a way for you to open it as an administrator and a way for you to open it without being an administrator. When you are opening the Windows PowerShell as an administrator, you are opening an “elevated PowerShell.”
The following guide demonstrates the ways in which you can open the elevated PowerShell so that power users and IT professionals can automate the administration and applications that run on Windows 10.
How to open Elevated Windows PowerShell from “All apps” in the Start Menu
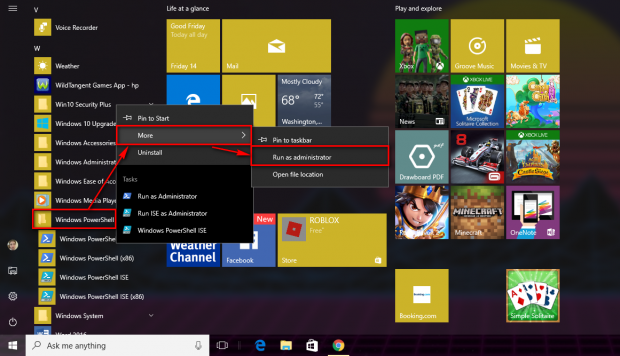
Open the “All Apps” menu by heading to the Start button and then looking where it shows you a list of all of the applications available in alphabetical order. Next, scroll down the list until you get to the “Windows PowerShell” entry and click on it to expand it.
With the menu expanded, right-click on the “Windows PowerShell” entry that you want and then hover the mouse or touchpad over the “More” link and then click on the “Run as administrator” option from the secondary menu.
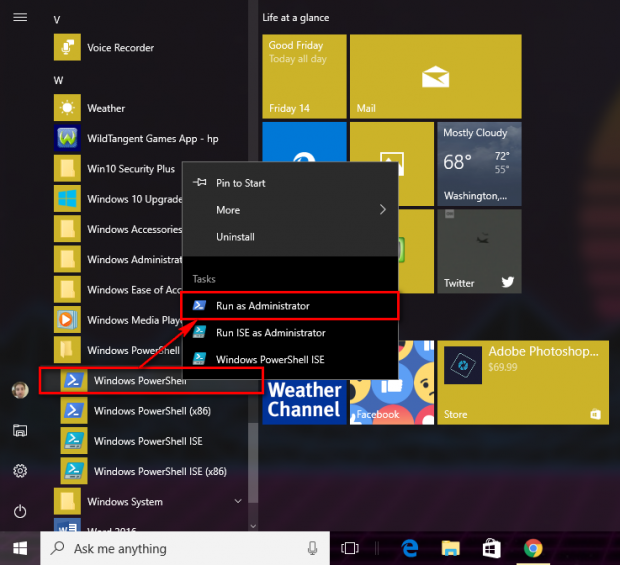
Newer versions of the Windows 10 operating system also give another quicker method for people to take from the same “All apps” section coming from the Start menu. Scroll down the list of apps again and click to expand the “Windows PowerShell” entry and then click on the “Run as Administrator” option.
How to open Elevated Windows PowerShell from the Task Manager
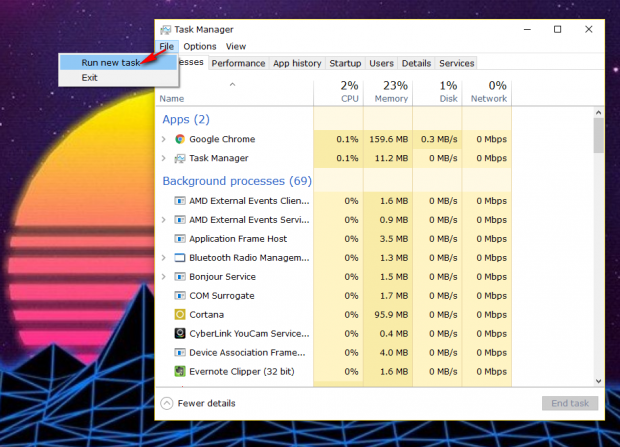
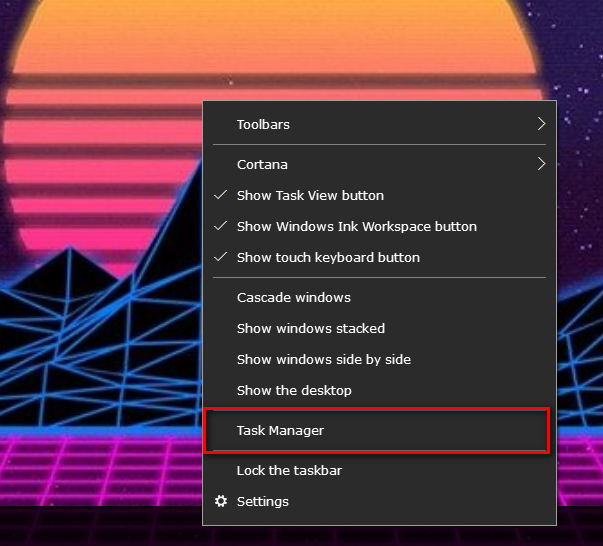
Right-click the mouse or touchpad on the taskbar and then click on the “Task Manager” link from the menu.
Click on “File” and then “Run new task” to start running a new program.
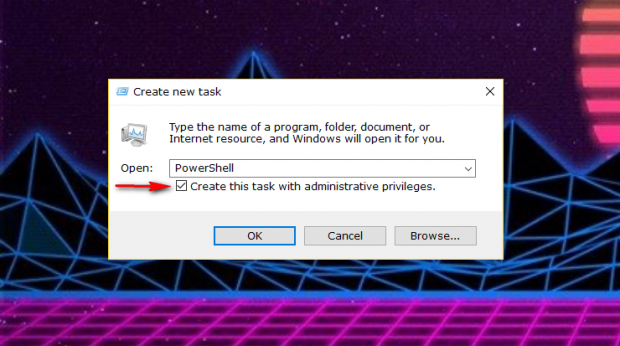
Type in “PowerShell” into the box and then make sure you check the checkbox positioned directly below the space where it lets you type that says “Create this task with administrative privileges” so it becomes the admin version.
How to open Elevated Windows PowerShell in a Search box
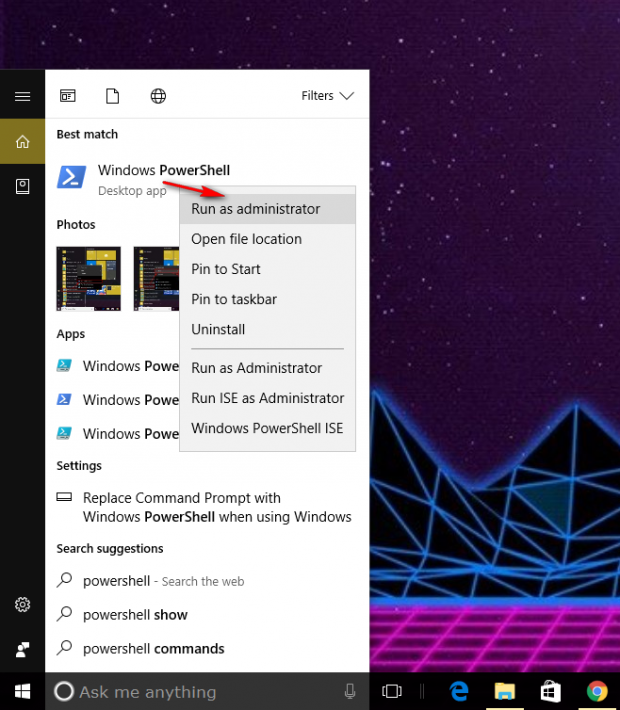
Type “Windows PowerShell” into the search box from the taskbar and then right-click and select the “Run as administrator” option when you can see the desktop application become available under the “Best match” section.
How to open Elevated Windows PowerShell from the Win+X Quick Link menu
Start by changing the Command prompt to show the Windows PowerShell in the Quick Links menu by using the Settings.
Right-click on the Start button or press the Windows logo key + X to bring up the Quick Links menu and then click on the second option that shows “Windows PowerShell (Admin)” next to it.
How to open Elevated Windows PowerShell from the File Explorer
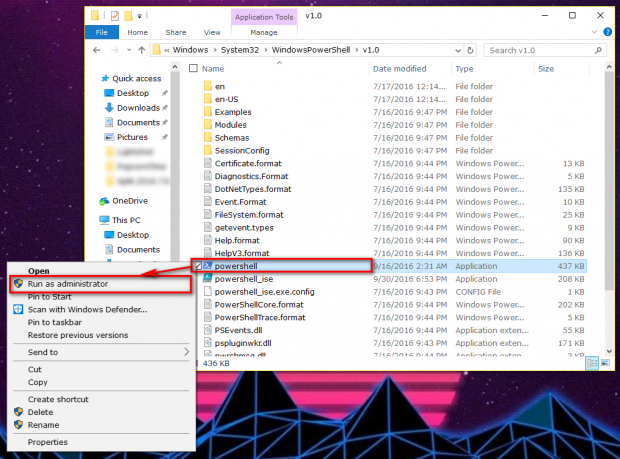
Open the File Explorer again by navigating to the Start > File Explorer and then head to the “C:\Windows\System32\WindowsPowerShell\v1.0” path—or just copy and paste it into the address bar at the top of File Explorer. Next, scroll down the list (if required) until you see “powershell” and then right-click on the entry and choose “Run as administrator” from the menu.
How to “Open Elevated Windows PowerShell Here” in File Explorer
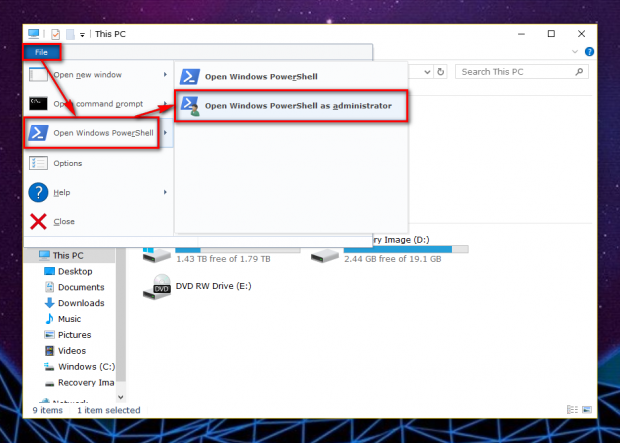
Open File Explorer by heading to the Start > File Explorer and then show any folder or drive and then click on the “File” option at the top of the screen. Next, hover the mouse or touchpad over the “Open Windows PowerShell” entry and then click on the “Open Windows PowerShell as administrator” option from the secondary menu.
By default, when you open a new PowerShell window, you don’t have full rights, and not all possible commands can be entered. The way you change that is by running it with the elevated privileges—which is the same as running it with the administrative permissions. That way, anything that you know is possible to do can now be done.

 Email article
