Windows comes with a system tool called Check Disk (know as Chkdsk for short) that can periodically check the integrity of your computer’s disks. That advice comes directly from Microsoft themselves, just in case you need to fix some performance issues. You aren’t necessarily going to know about them unless you check the disk first.
Disk issues typically come in the form of drive errors. A drive error happens if your computer has a bad sector, you have been shutting down the computer improperly, there is drive corruption, the software has problems, and so forth. The Check Disk system tool can correct the problems that it detects after it has detected them as well. There are also a variety of driver types that the Check Disk tool is able to assess and fix, including drivers for NTFS, FAT16, and FAT32.
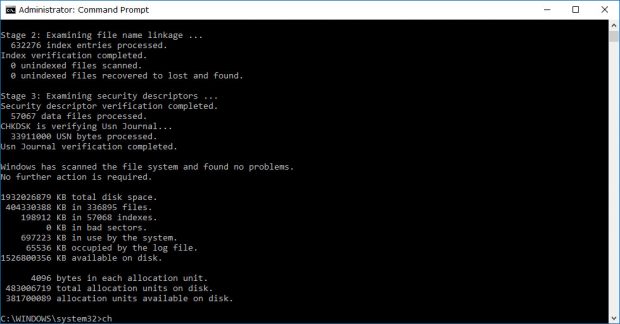
When you check the disk using the “Chkdsk” command from the command line, you’ll get a summary of what’s happening when the checking completes directly from the Command Prompt window. Once the audit is finished, the results of the scan are also automatically saved into the Event Viewer that Windows has. It’s possible for you to open up the Event Viewer after the scan completes and check out the results at a later time, so you don’t have to remember what they were.
How to Read Event Viewer Log for Chkdsk in Event Viewer
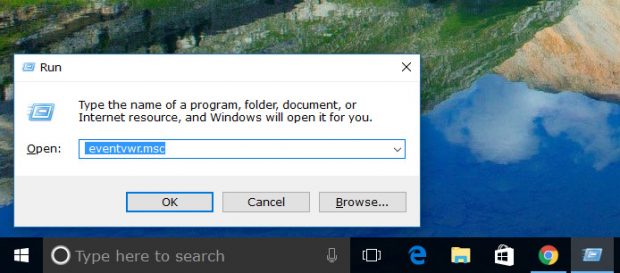
Open the Run dialog box by pressing the Windows logo + R keys on your keyboards and then type “eventvwr.msc” and hit the “OK’ button.
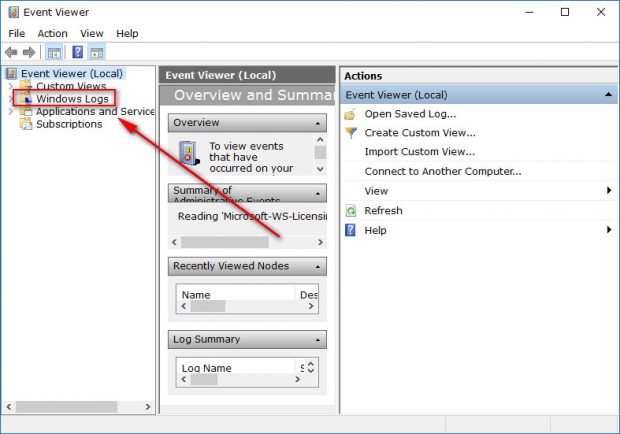
You’ll now have the Event Viewer window open. Click on “Windows Logs” from the left pane.
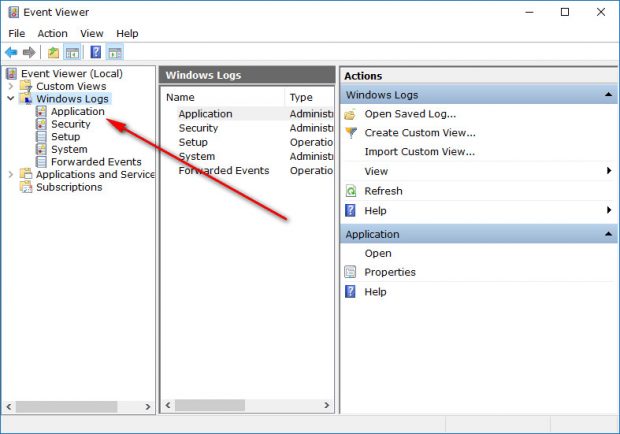
Now look for “Applications” and right-click or press and hold on it.
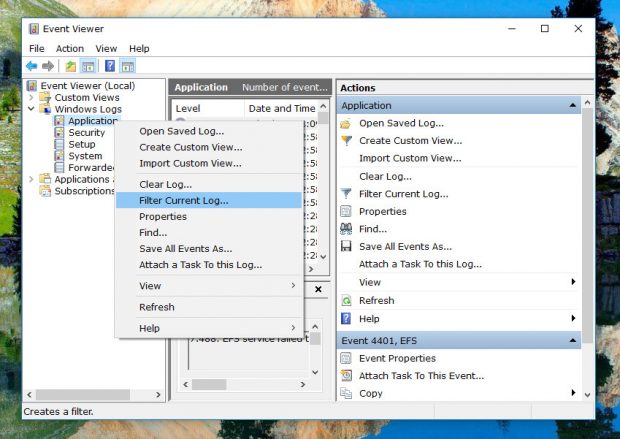
It gives you another menu where you can then choose the “Filter Current Log…” option. Click on that so you can then choose the log you want to see.
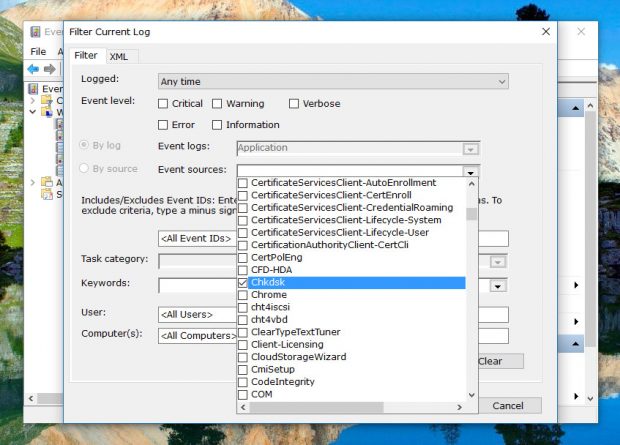
From the Event sources drop-down menu, check the box next to “Chkdsk.”
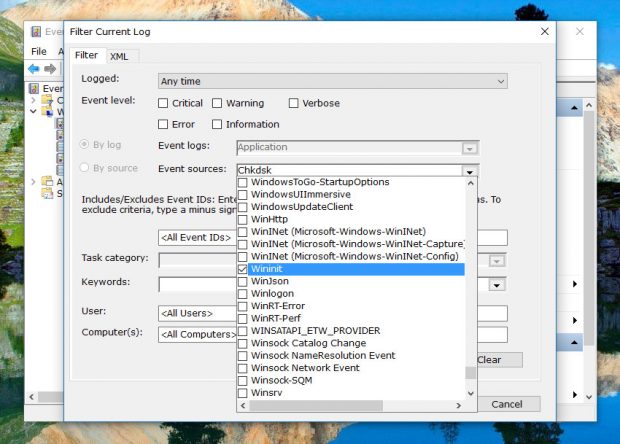
Also, scroll down toward the bottom of the list and put a checkmark in the box next to “wininit” as well. You’ll also want to include the wininit logs.
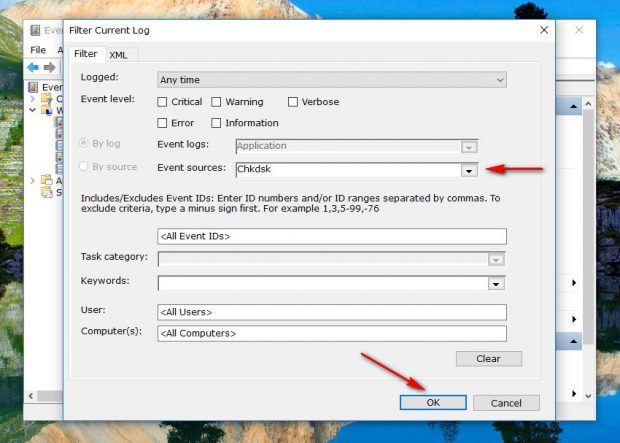
Close the drop-down menu by clicking outside of it (but still in the same window, so you don’t close it) and then click on the “OK” button for the Event Viewer to filter those options that you chose.
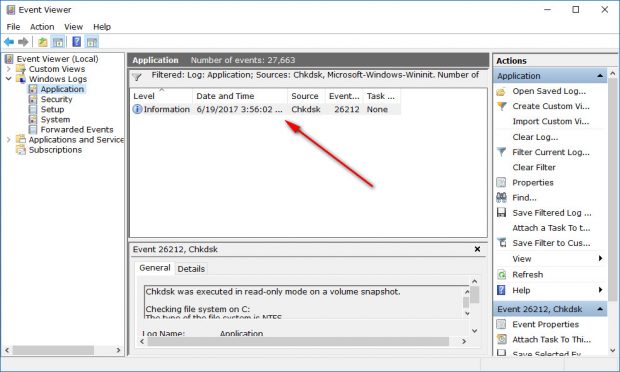
You’ll now see the information log that you can click on to check it out. Double-click on it like you typically would when you open anything else in Windows.
All of the information that was initially available from the Command Prompt window after running the Check Disk system tool is now here for you to see in the Event Properties window. Technically, there are a few extra details here too.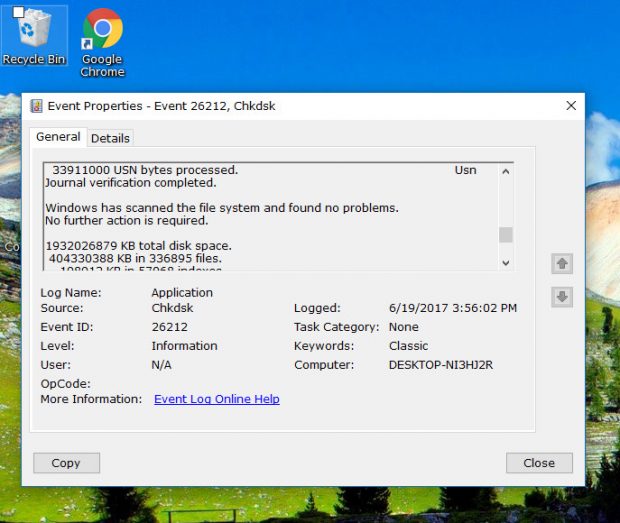
The Event Viewer log is only able to show you logs from scans that you have already done before opening it up. If you haven’t run any scans, then you won’t have any logs that you can open after completing the steps above. If you want to try one out, you can do that now by opening the Command Prompt with administrative permissions and then running the “Chkdsk” command. Give it a few minutes to complete the scan. Next, go back and repeat the steps above and you’ll find the information link to click from the applications area in the middle pane.
How to Read Event Viewer Log for Chkdsk in Windows PowerShell
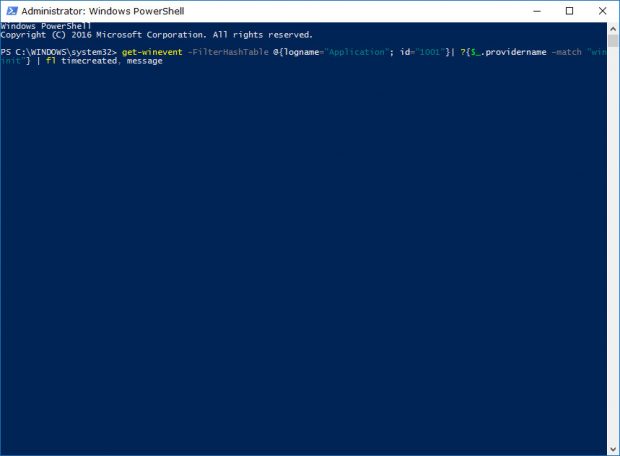
The Windows PowerShell is another place in Windows that you can read logs from the Event Viewer if you wish. To do that for your Check Disk logs, start by opening PowerShell and then copy and paste the get-winevent -FilterHashTable @{logname="Application"; id="1001"}| ?{$_.providername –match "wininit"} | fl timecreated, message command to read the Chkdsk log in PowerShell.
The Check Disk tool has been around for a long time, and many techies have used it to fix hard drive problems with Windows 7, 8 and 10. With some luck, Check Disk has managed to fix your problem, and you can continue using the computer. If you are still having issues, being able to read the logs is the first step in the right direction.

 Email article
