Few things relating to your devices are as important as keeping a working internet connection. A working internet connection allows users to browse the World Wide Web freely, receive Windows OS updates, and application updates. If you’ve ever run out of data because you went over the monthly data limit from your ISP, you’ll know all too well how inconvenient it can be when the internet is unusable.
Your bandwidth coming from your Internet Service Providers is metered—unless you have stuck a deal with unlimited bandwidth—and if you go over that amount, you’ll either be paying extra for more data or you’ll be suffering from a very slow internet connection.
Windows 10 lets you set up a metered connection so that the Windows 10 operating system limits the amount of bandwidth it uses from your ISP. Setting up a metered connection in Windows 10 is now more important than ever. Windows 10 is designed to be using up a considerable amount of your data, and it’ll even go out of its way to use up as much of your bandwidth as it wants without asking if you mind before it goes ahead and gobbles it up.
Most households in the US are now at least considering switching over to unlimited data plans with the rise of the use of smart TV apps for watching TV shows, and as a wider variety devices continue to become available that create new avenues for people to be online. But the move from Microsoft to use up as much bandwidth as Windows 10 does might have come a bit prematurely for some. Internet data can still be expensive in other countries where there are fewer people than the US, and that leaves plenty of individuals still on metered data limits from ISPs.
If you want to save as much of your precious data as possible on a computer that uses Windows 10, then the easiest thing to do is set up a metered connection. On the other hand, if you want Windows 10 to be able to do whatever it desires to your computer and use as much bandwidth as it thinks it needs to give you the ultimate user experience since you are paying for that unlimited data plan anyway, then you might as well leave it on unmetered and stay up to date with Windows features, performance improvements, bug fixes and security patches.
How to Set Wireless Network as Metered/Unmetered Connection in Settings app
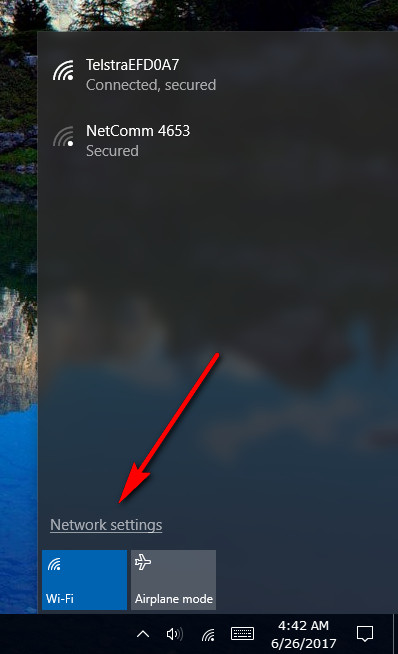
Most people opt to set the wireless network connection as a metered or non-metered one from the Settings app. To do that, start by making sure that you are connected to a WiFi network. That’s pretty easy to detect just by opening up a web browser and trying to use the internet, but there’s also an official way to do it without having to use websites. If you aren’t sure how that’s done, all you need to do is log in to your account—making sure you are also logged in to an account with administrator permissions—and then click on the WiFi icon available from the system tray in the taskbar. It then shows you the current WiFi networks within range of your computer. If you are connected to one, it is listed at the top of the list and says “Connected” beneath the network name.
Once you’ve established that you are online, click on the WiFi icon again.
Click on the “Network settings” link that is above the WiFi tile.
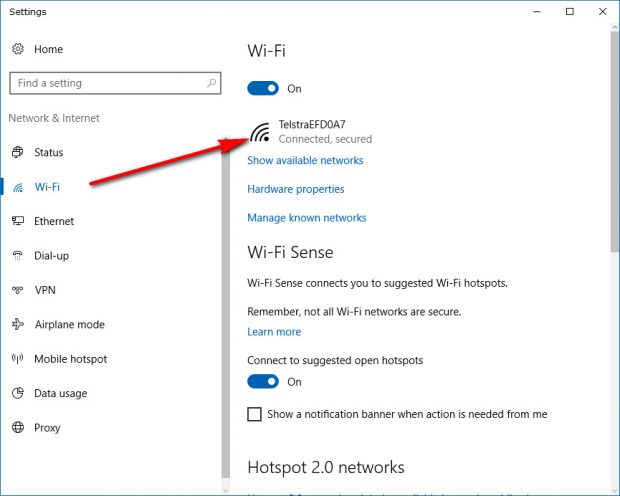
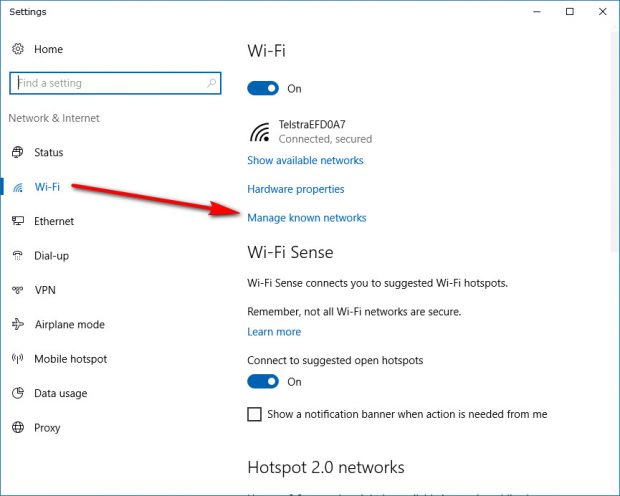
There are a couple of ways you can find the metered and unmetered toggle from this screen. To get started on the first option, make sure that “WiFi” is selected in the left side pane and then click on the name of your network connection in the right side pane.
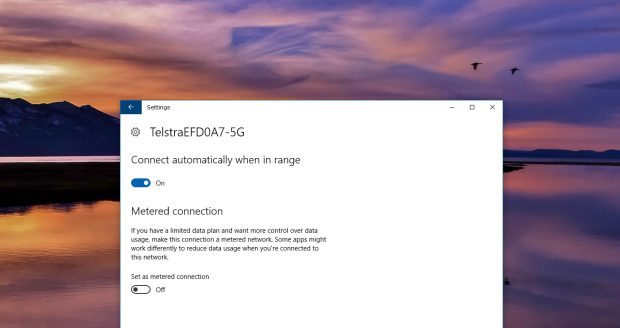
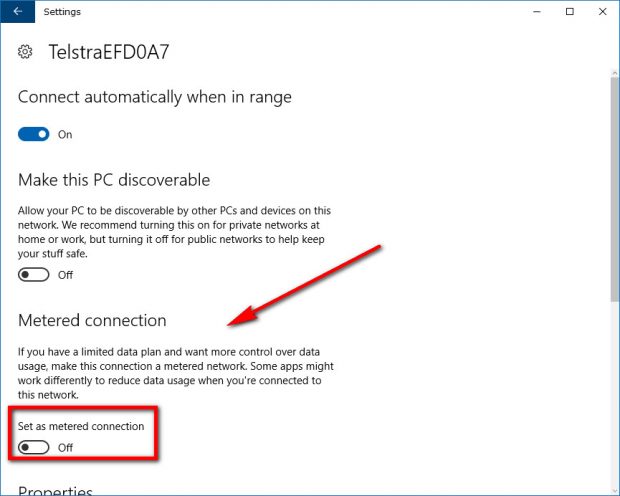
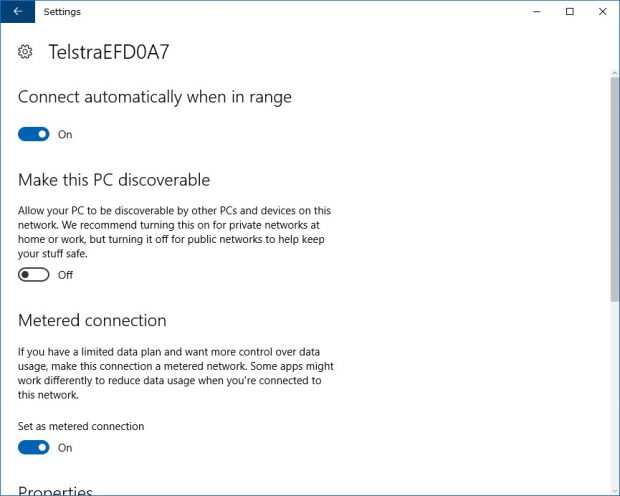
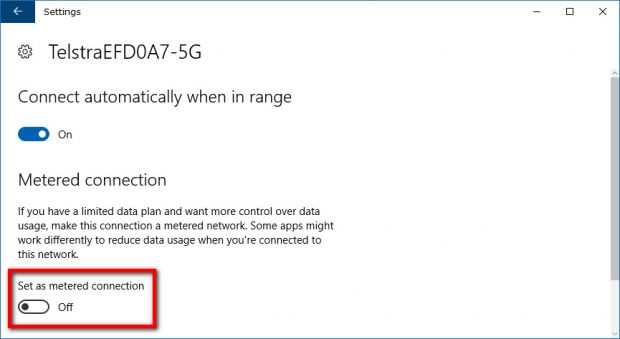
Under the Metered Connection heading is a toggle for “Set as metered connection” that you need to turn on when you want it set as metered.
You can close the Settings app and feel comfortable that your connection is now working as a metered one when you see the blue toggle turned on.
As we said before, there are a couple of ways to find the metered and unmetered toggle from the Settings app. The second way is by clicking on the WiFi icon in the system tray > Network settings > WiFi and then click on the “Manage WiFi networks in the right side pane.
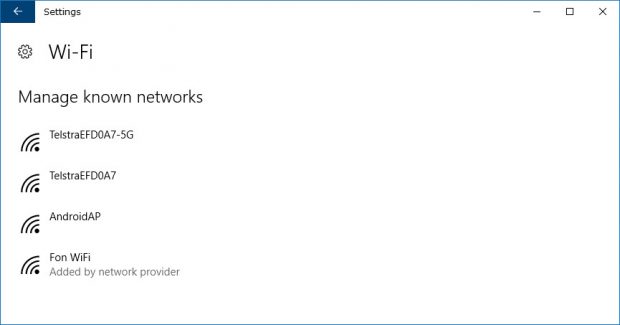
It directs you through to a page where you can view all of the WiFi networks that your user account has connected to thus far. Click on the one that you are currently connected to from the list.
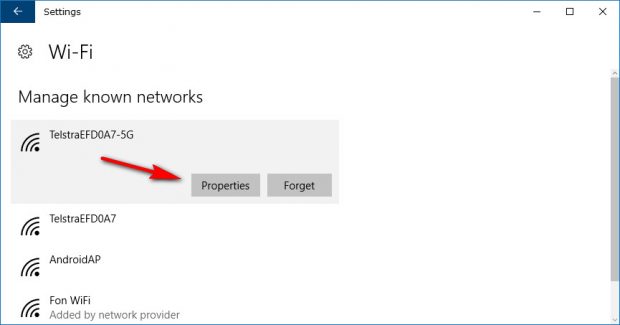
Doing so opens up another area where you get two more buttons. Click on the “Properties” button that’s related to your network.
It now gives you the same Metered Connection heading and the “Set as metered connection” toggle beneath it.
How to Set Wireless Network as Metered/Unmetered Connection from Command Prompt
Windows 10 also offers users the chance to set a metered or unmetered connection from the Command Prompt. To get started doing it this way, open an elevated Command Prompt window by navigating to the search box and typing “Command Prompt.” You’ll then need to right-click on the Command Prompt desktop app and choose to “Run as administrator” from the menu.
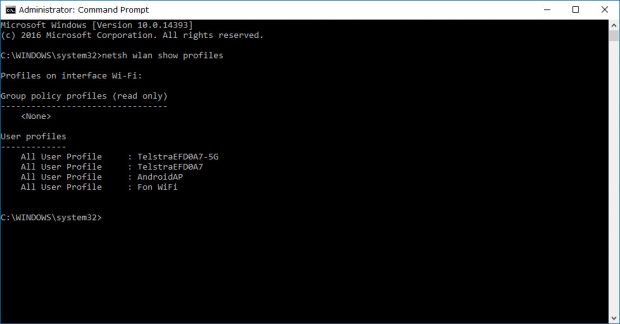
Once you have the Command Prompt window open, type the netsh wlan show profiles command and hit the Enter key on your keyboard.
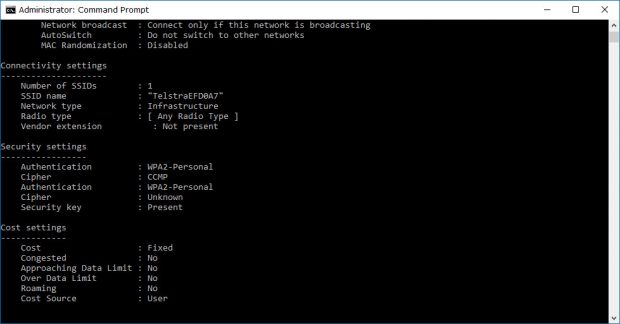
Next up, find out if the connection is currently a metered or unmetered one for your network from the Cost Settings in the Command Prompt by typing the netsh wlan show profile name="network name" command, and changing the “network name” part with the actual name of your network that the Command Prompt showed from the previous step.
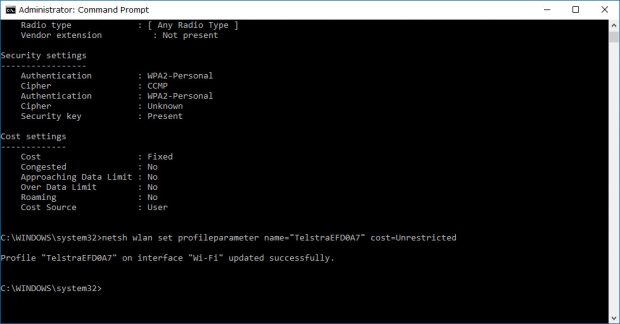
If you want to make the WiFi network an unmetered connection, type the netsh wlan set profileparameter name="TelstraEFD0A7" cost=Unrestricted command. For everyone else, you’ll need to enter the netsh wlan set profileparameter name="TelstraEFD0A7" cost=Fixed command if you want it to be metered.
Setting up the WiFi network at your home to be metered is going to help you if you have a limited amount of data and you are expecting to potentially run out of data before your monthly allocated amount ticks over to the next month’s usage. Microsoft doesn’t go into much detail about what their version of “metered” actually means or what exactly it will do. The folks at One Microsoft Way in Redmond, WA also don’t give you the chance to choose more precise settings relating to it like they probably should. For now, though, it’s the best option you have for trying to make sure you don’t run out of data, and that internet connection of yours stays within its data limits at all times.

 Email article
