 Email article
 Computer crashes have you down? Random blue screens making you sing the blues? The problem could be your RAM. Try out Memtest86+, a free open source piece of software that runs stress testing on your RAM. Often when your computer randomly stops working, it can be the fault of a bad stick of RAM and Memtest86+ helps you find that rotten apple.
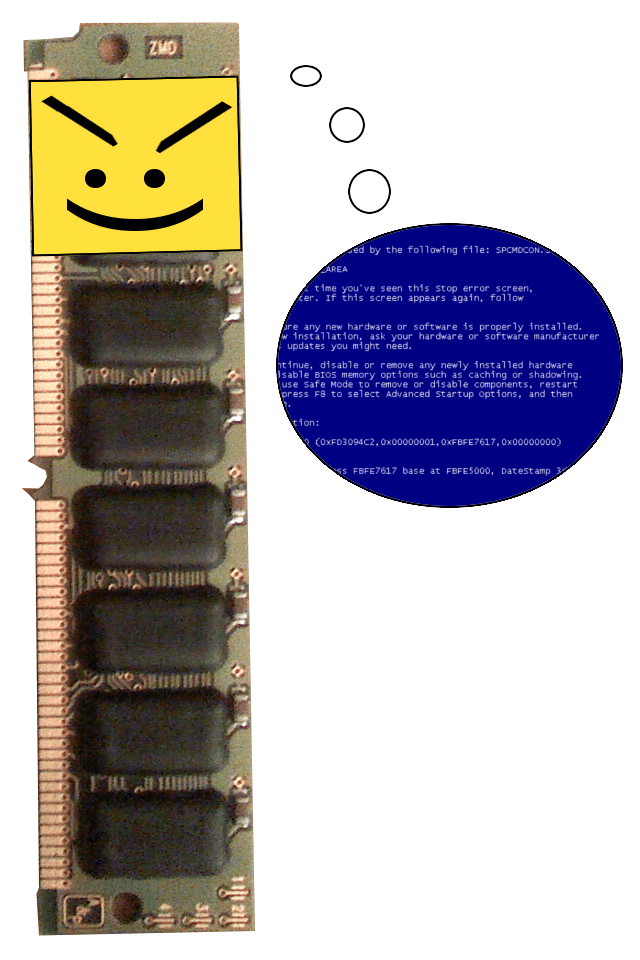
Image from Wikipedia (#1 and #2) —>
What is memtest86+? How is it different from that other memtest86?
Memtest86+ is open-source freeware (now isn’t that redundant) designed to take the guesswork out of checking for bad hardware. It runs a series of stress tests on your RAM to be sure that your RAM is in working condition.
If you’ve been on the scene for a long time, you’ll recall that there used to be a project called Memtest86. Memtest86 is actually what Memtest86+ is based on, but in 2002 Memtest86 stopped being developed. In 2004, a user of Memtest86 decided to try out Memtest86 on one of the very first x86-64 machines; and when that user tried to run it, it wouldn’t do anything. After a few bug fixes and modifications, Memtest86+ was formed, with better hardware support and a few bug fixes. Since then, Memtest86 has come back into active development, but Memtest86+ has had more years under its belt with newer hardware. Plus, its the plus edition; who doesn’t like pluses.
How to get it
To get Memtest86+, visit their website and download the zipped ISO file. Unzip the download and burn the ISO to a disc using a piece of software like your operating system’s built in one, ImgBurn, or Ashampoo Burning Studio Advanced 2010. If you prefer a bootable USB, there is a USB installer available for Memtest86+ also. Furthermore, Xboot supports Memtest86+, so you can use XBoot to create multi-ISO bootable media that includes Memtest86+.
Using memtest86+
After making the disc or USB drive, just pop it into your CD drive or USB port. Then boot your computer off the disc/USB drive – this usually entails pressing an F button like F12, editing the BIOS, or just waiting (depending what your computer). Once it’s loaded, it should look something like this:
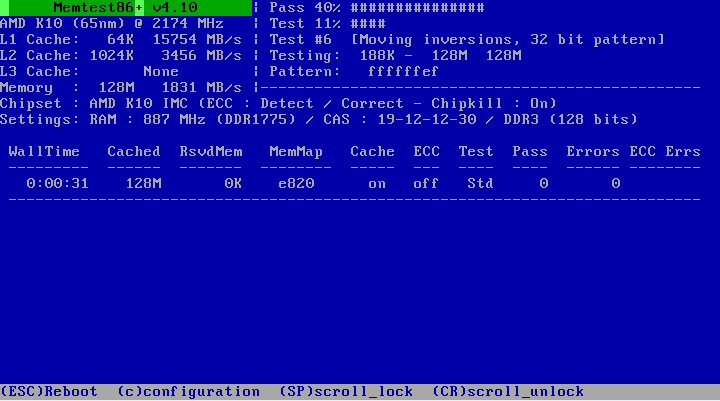
The testing starts automatically; it is done via “passes”, which essentially are stress tests conducted one after one. You’ll have to wait until it finishes at least one pass; but the more passes you let it conduct the more accurate results you will get because sometimes memory errors don’t pop for several hours. Indeed you should run Memtest86+ as long as you can afford to. If you have another computer you can use, leave it running for over a day; if you don’t, leave it running at least during the night.
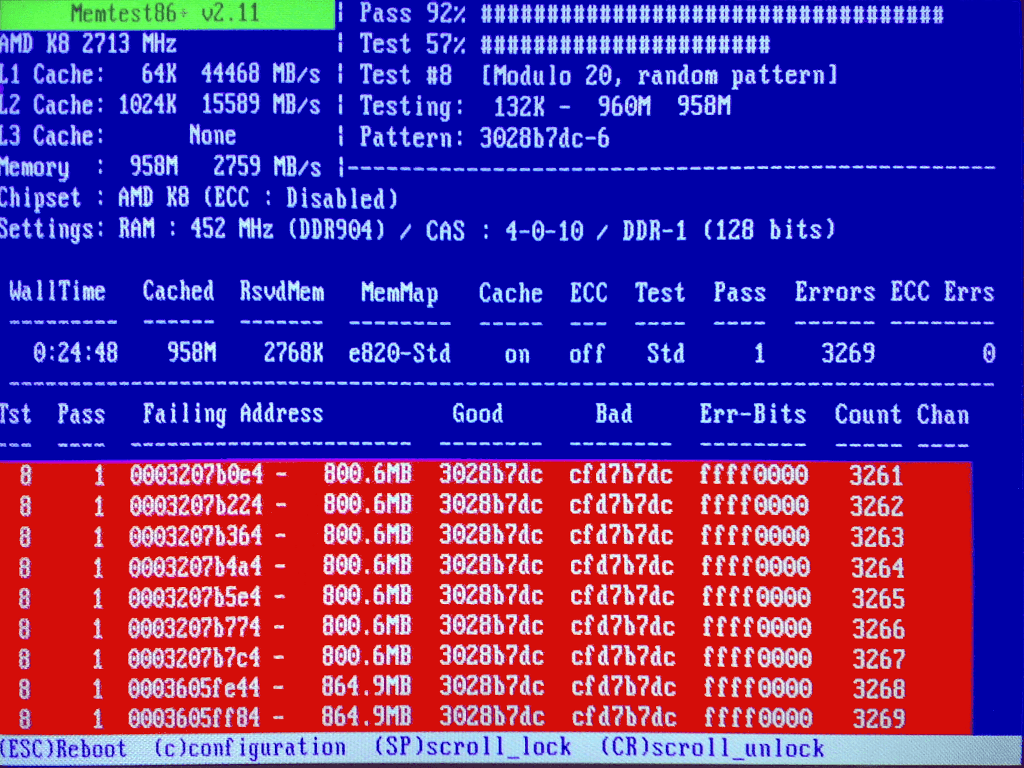
Memtest86+ doesn’t display any sort of “congratulations your RAM is error free” message. It will just continue to run passes as long as you let it go. The way you know your RAM is *probably* error free is by not receiving error messages. So, if you have a bad stick of RAM, you’ll see something like this:
Image from Wikipedia. Cleaned up by me.
If you don’t get any error message like the ones shown in the above screenshot, you’re good to go and have nothing left to do. Hit the escape button on your keyboard to boot out of Memtest86+ and back into Windows. Be sure to pull out the disc/USB drive so you aren’t booted back into Memtest86+. Keep in mind, though, just because you didn’t get error messages does not mean with 100% certainty that your RAM is error free; it could mean that you didn’t run Memtest86+ long enough to detect the errors.
But, if you do get RAM failures…
What to do if your RAM fails
If your RAM failed the test, then the first thing you should do is figure out which stick of RAM is failing. Open your computer and figure out how many sticks of RAM you have. Look for hardware that look similar to following: Laptop RAM | Desktop RAM.
Once you’ve identified the RAM, you need to perform guess-and-check to see which one is the bad one. If you have two sticks of RAM, take one stick out and rerun Memtest86+. If Memtest86+ no longer fails, then the bad RAM is the stick that you took out. If Memtest86+ fails, then the bad RAM is the one that is still inside the computer. Alternatively, both sticks of RAM could be bad; so if Memtest86+ fails, you should take the inside stick out, put in the other one, and rerun Memtest86+. If Memtest86+ fails again, that means both sticks are bad. If Memtest86+ does not fail, that means only that other stick is bad.
If you have more than two sticks, you will need to be creative on how you test to find the bad stick. For example, if you have three sticks of RAM, take one out and test the other two. If Memtest86+ doesn’t fail, the bad stick is the one that you took out. If Memtest86+ fails, then either of the three could be bad sticks; take another stick out and test each stick one at a time. Similarly, if you have four sticks of RAM, you can try taking two out and testing the other two. If Memtest86+ does not fail, that means the bad stick is one or both of the sticks that you took out, so you need to test both of those sticks individually. If Memtest86+ fails, you need to test the two you have in the computer currently one at a time to see which one is the bad one. Then you still need to go back and test the other two you took out because they could be bad also. Test them both at the same time and if Memtest86+ does not fail, then both sticks are good. If it does fail, you need to test each stick individually until you find the bad one (both could be bad).=
Although this process may be confusing and time consuming, a bad stick of RAM is potentially one of the worst non-data destroying technical glitches and it is potentially the easiest one to fix (assuming you live past the multiple rounds of testing).
Once you’ve figured out which particular stick you need to replace, you obviously need to replace it. When look for replacement RAM, it is critical you get the right type (i.e. DDR, DDR2, or DDR3). If you get the wrong type, it won’t work for your motherboard. Trying to match RAM clocks/frequencies is important too, but typically not necessary because your computer will automatically down clock all RAM to the level of the slowest one. Looking on the RAM itself should give you an idea as to what RAM type you need. If you can’t figure that out, try looking at your computer order form from way back when you bought the computer; they often tell you if your computer has DDR, DDR2, or DDR3 RAM. If you still can’t figure it out:
- Use a tool like Crucial’s RAM finder service (assuming you are able to use your computer).
- Try Googling your motherboard or your computer model.
- Simply take the RAM stick to your local Best Buy or any other computer store and one of their sales reps or techs will be able to tell you which type of RAM to buy. Do not let them talk you into buying RAM, though, because often you can find RAM cheaper online than in-store.
Conclusion
If you have anything important to do, blue screens can set you back hours, if not days. Bad RAM is one of the leading causes of blue screens everywhere. (<– Okay I made up that statistic; but it sounds official, right?) Although finding which stick of RAM is the bad one can also take hours if not days, once you find and replace it, you should no longer be pestered with those evil crashes. Memtest86+ is a great tool you can use to figure out if your RAM is bad, and as it is free and open source, you can be sure that it will continue to be developed by anyone who wants to even if the official development stops. Simply put, Memtest86+ is a great tool to run RAM tests and find the bad apples.
Version reviewed: v4.10
Supported OS: Is not locked down to any particular OS – as long as you have less than 64 GB of RAM Memtest86+ will work on your computer.
Download size: < 300 KB


