{rw_text}Giveaway of the day for May 3, 2009 is:
Version reviewed:
1.00
Software description as per GOTD:
ForeUI is an easy-to-use screen mockup tool which can rapidly create the UI prototypes of your applications. It provides many common UI elements and you can build your mockup with just drag and drop. Various UI themes are available for mockups; you can perform the UI prototyping with Wireframe, Windows XP or Mac OS X UI theme. Also you can turn on the rumple effect to make your prototype more like a “Design on Paper”.
————————-{/rw_text} –>
{rw_good}
- Clean interface – easy to understand and easy to use.
- Allows you to add lists, menus, windows, images, buttons, etc. to your UI mockup.
- Allows you to annotate your UI mockup.
- Each UI element is customizable.
- Has a nice grid system to line up your elements.
- You can change between Wired, Windows and OS X themes.
{/rw_good} –>
{rw_bad}
- You can only export your mock-up as a .PNG image.
- Fairly resource intensive.
- Only has the “traditional” UI elements.
- You must drag + drop elements – no select and create.
- If your element is near the side and you try to edit the text, the editing interface may be cut off.
- Element editing options window is not placed relative to the selected element.
{/rw_bad} –>
{rw_score}
{for=”Features as Described” value=”10″}All features are there.
{/for}
{for=”Ease of Use” value=”9″}I find it annoying that you must drag + drop and can’t select + create but it is still very easy to use.
{/for}
{for=”Performance” value=”6″}Uses quite a bit of RAM + two annoying bugs.
{/for}
{for=”Usefulness” value=”3″}While ForeUI can used in creative ways, this program is meant for application designers, or people associated with creating a program – most people won’t find it useful. Even amongst the application designers, same may find ForeUI too simplistic.
{/for}
{for=”Arbitrary Equalizer” value=”7″}This category reflects an arbitrary number that does not specifically stand for anything. Rather this number is used to reflect my overall rating/verdict of the program in which I considered all the features and free alternatives.
{/for}
{/rw_score} –>
{rw_verdict}[tupr]
{/rw_verdict} –>
Registration and installation went fine. Note that ForeUI is a Java application so you must have Java installed to use it. Most people already have Java so don’t worry about it. If you don’t have Java, ForeUI should prompt you to install Java during ForeUI installation; if not, you can download Java from Java.com. Thanks to Jim for correcting me: ForeUI installs its own “private” Java regardless of if you have Java installed or not. It is under in the “jre” folder under “Program Files/ForeUI”. On the developer’s website there is a install w/ Java and w/o Java and apparently the installer given out on GOTD is w/ Java.
ForeUI is a program that allows people to create UI mock-ups. A “UI” is a “user interface”. In other words, ForeUI lets program/application developers design what their interface will look like before they actually start creating it.
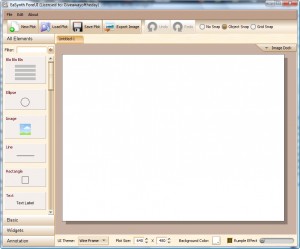
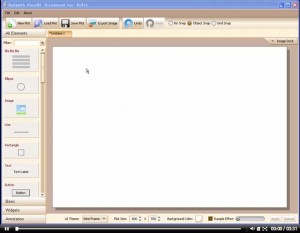
This is what ForeUI looks like:
All the elements that you can use in your UI are on the left and the big white rectangular space in the middle is where you create the UI. By default the rectangular space is 640×480 but you can change that from the bottom toolbar:
To start creating your mock-up, all you do is drag + drop the elements you want in your UI into the rectangular space. These are all the elements available for you to use:
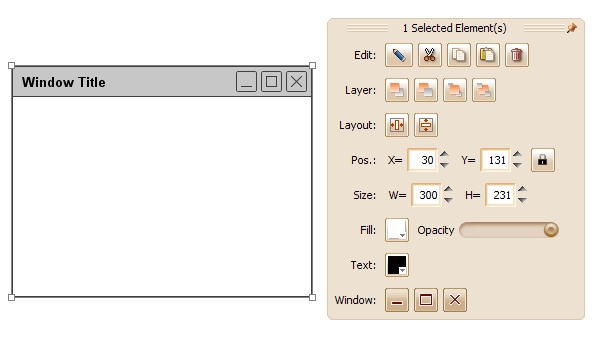
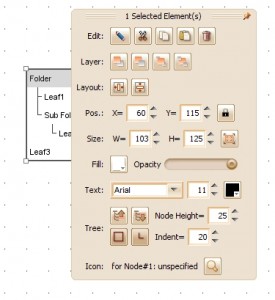
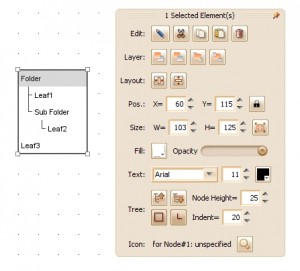
Once you have placed an element into the rectangular space, you can resize it, move it around, change the opacity, change the various parts of the element (such as Window buttons), change the color, edit the text (if applicable) etc.:
The element customization will vary depending on which element it is.
To help align up the elements properly, there is a grid system:
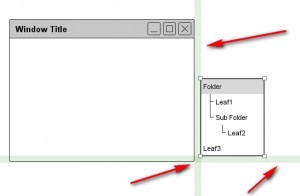
“Object Snap” helps you line up elements relative to other elements. When you bring one element close to another it will activate:
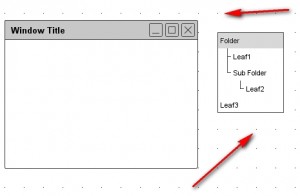
“Grid Snap” also helps you line up elements, but relative to a grid as opposed to other elements:
When you are all done with your UI mock-up, in addition to saving the mock-up as a “Plot” so you can edit it later, you can export the UI mock-up as a PNG image:
To reinforce all that I have said above, here is a short 3 minute tutorial video by the developer demonstrating how to use ForeUI:
To view the tutorial, click above. If you are unable to view the tutorial by clicking above, click here.
Okay so overall I must say that I like this program. It is easy to use and helps you create great, traditional UI mockups. Thumbs up from me. However there are a few cons worth mentioning:
- You can only export your UI mock-up as a .PNG image. I at least expect to be able to export as the four common image types, JPG, GIF, BMP and PNG. If you create a mock-up with ForeUI but would like a JPG or GIF or BMP or [insert image format here] image instead of a PNG, use FormatFactory to convert it.
- ForeUI is fairly resource intensive. Just sitting idle it uses ~75 MB of RAM. As you use ForeUI, the RAM increases dramatically. For example, right now ForeUI is using ~160 MB of RAM for me. I have not even done anything big yet – only added an few elements so that I could take screenshots for this review. CPU usage is not too bad.
- ForeUI only has “traditional” elements. Granted in the description it says “…provides many common UI elements” but this is still a con in my eyes. What if a developer wants his program window to be circular instead of a rectangle/square? Or maybe they want the window to be more free form? Or [insert non-traditional UI request here]. ForeUI would be a much better program if it catered to more than just traditional UI mock-up needs.
- This may just be an Ashraf thing but I find it very annoying that you must drag + drop elements in order to use them. I would like to be able to select an element and create it by clicking + dragging. This way I can take care of the creating and resizing of the element in one step instead of having to drag + drop the element then resize it.
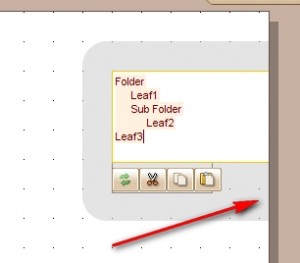
- There is one small annoying bug I found. If you have an element close to the edge of the white work space and you try to edit the text, some of the text editing interface may be cut off:
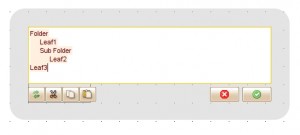
What it should be is this:
- Remember that element editing options I showed you earlier? Well that element editing options window is not set relative to the element you have selected. In other words, the element editing options window may actually cover up your element which is very annoying:
You can click + drag and move the element editing options window away though:
Where ever you put the window keep in mind that it will show up there the next time you click on any element. So if you place a new element under it, the window will once again cover the new element when you select it.
This review was conducted on a laptop running Windows Vista Home Premium 32-bit. The specs of the laptop are as follows: 3GB of RAM, a Radeon HD 2600 512MB graphics card, and an Intel T8300 2.4GHz Core 2 Duo processor.
{rw_freea}All of what is done in ForeUI can be done via a Photoshop like tool. It won’t be as easy to create a UI mock-up with the Photoshop like tool but you will have more freedom in areas like the shape of your UI window for example.
Please see comments below for various free alternatives.
{/rw_freea} –>
{rw_verdict2}True ForeUI has limited usefulness for most people. Also true that it is resource intensive, it caters to only traditional UIs and it has a few annoying bugs. However overall I like ForeUI. I give it a thumbs up and recommend it to anyone that needs to create a UI mock-up.
{/rw_verdict2} –>

 Email article
