 Email article
Not only does it come with many new features, but Windows 8 also improves on features from previous versions of Windows. One of them is Maintenance – the feature that automatically diagnoses your system. It can scan for viruses, spyware, update the system, and other works to keep your Windows healthy. By default, Maintenance is set to start at a specific time (3:00 a.m.) daily; if it can’t run at that time, it will do it when the system is idle. In this article, I will show you how to control this feature – include set time, and start and stop it manually.
HOW TO START OR STOP MAINTENANCE MANUALLY
Note: in Windows 8, it doesn’t allow you to turn off Maintenance completely. You can only start it manually and stop it when you know it is running.
To start or stop Maintenance, you should do following.
- Open Action Center by click/tap on the flag icon in the system tray (the place at the right bottom of the desktop screen) and choose “Open Action Center.” By some reasons, if there is not that flag icon, you can press Windows + W hotkey (on a tablet, swipe from the right edge, choose Search then select Settings on the right) then start typing “action center” (without the quote); after that, running the “Action Center” result on the left.

- In Action Center window, you will see “Security” and “Maintenance” section; you need to click/tap on the section Maintenance to expand it. Then, the part “Automatic maintenance” shows you the latest time of maintenance and you can choose “Start maintenance” to start maintenance.

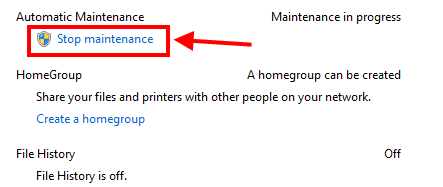
- Once maintenance has started, you can see a flag-with-clock icon appears in the system tray. If you want to stop maintaining, even it started automatically, you can click “Stop maintenance” in Action Center like the way to start maintenance above.

HOW TO CONFIGURE MAINTENANCE
As I have said before, the system automatically runs maintenance at 3:00 a.m. every day by default. If you want to change that time, you can follow these steps.
- Pressing Windows + W hotkey (on a tablet, swipe from the right edge, choose Search then select Settings on the right) then start typing “maintenance” (without the quote).
- After that, you should choose “Change Automatic Maintenance settings” result on the left.

- In this window, you can select what time you want the system to start maintain. If you want to wake up the computer at that time to maintain, you can check the box “Allow scheduled maintain to wake up my computer at the scheduled time.”
- Then click/tap OK and you are good to go.

CONCLUSION
Maintenance uses a lot of system resources, so make sure that you didn’t set the automatic time during work time. Otherwise, enjoy!


