When managing social media pages, it is a must for you to think of ways to efficiently manage your time. After all, your goal is to boost your productivity. So why would you spend an hour posting on a single page when you can post on two to three pages at the same time? Why would you compromise other important matters just to update your page followers when you can schedule your posts ahead of time?
So if ever you’re managing a page on Facebook, you can start scheduling your posts without using any third-party software or app. Just refer to the steps listed below to learn how.
How to schedule posts for a Facebook Page
- Log in to your Facebook account.
- Switch to the Facebook page that you’re managing.
- Once you’re on your Facebook page, create the post that you want to schedule for later. You can even include photos, location, mood, activity, etc.
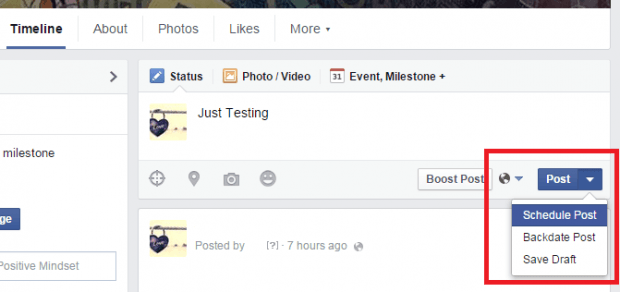
- When you’re done creating your post, do not click the “Post” button. If you do this, then your post will be automatically published to your page. Instead, click the small arrow next to the “Post” button.
- After you click the small arrow, you’ll see a sub-menu. Just select “Schedule Post”.
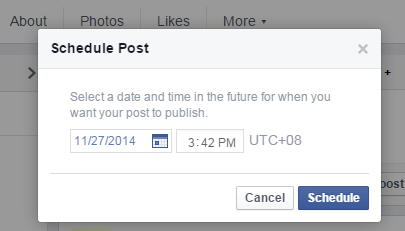
- After which, you will be asked to set the time and date for your future post. Click “Schedule” to confirm. Remember, your scheduled posts must be shared between 10 minutes and 6 months from the date that you created them. For example, if the time that you’ve created your post is 10:45 p.m. then you should schedule it at 10:55 p.m. It mustn’t go earlier than that.
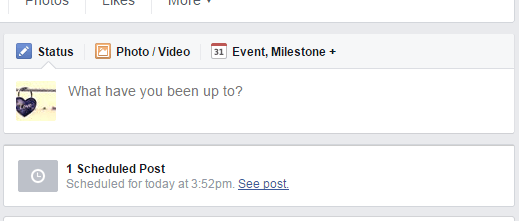
- So that’s it. Once accepted, you will see your scheduled post on your timeline. Since it’s not yet published, it won’t appear as a public post until it’s designated publish time.
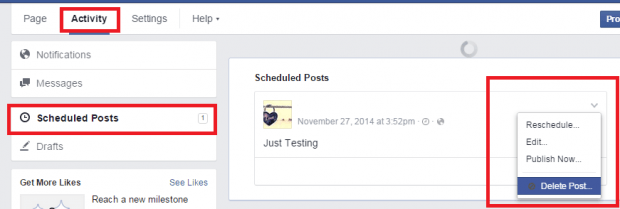
- To check all of your scheduled posts, all you need to do is to go to your page’s “Activity” tab. From there, you’ll see a separate section for “Scheduled Posts”. It is also where you can reschedule or delete your scheduled posts.
So that’s it. You’re done.

 Email article


