{rw_text}Software reviewed in this article:
Version reviewed:
v2.1.2.2.312
Software description as per the developer:
Genie Timeline Home 2.0; revolutionary backup software that is designed to meet the data protection needs of day to day home users. With 3 simple, straight forward steps you can enjoy enhanced features such as; disaster recovery, backing up a wide variety of data types, multiple performance modes, and much more. No need to worry about disasters to your system, Genie Timeline Home can restore all of your settings and data. Include Disaster Recovery in your backup selections and create a Disaster Recovery Startup Disk on a virtual partition, a USB disk, or an ISO image so that you could restore your data in case of failure. That’s not all; Genie Timeline Home will backup Windows’ folders, program files, and user’s data every 24 hours for faster and safer data protection.
Supported OS:
Windows XP/Vista/Win7
Price:
$39.95 (USD)
Ashraf’s note:
Please forgive the low-quality screenshots in this article. I changed a setting in my screenshot program and forgot to change it back. Genie Timeline Home Edition’s interface is not as low-quality as shown in my screenshots; for today please ignore the quality of the screenshots and focus on the content of the screenshots.
{/rw_text} –>
{rw_good}
- Extremely easy to use:
- Gives recommendations on what drive to backup to.
- Allows for easy one-click selection of important files to backup, such as e-mails, documents, and eBooks.
- Has support for easy backup of iPod/iPhone/iPad and BlackBerry files.
- Has intelligent drive detection; automatically starts/stops backing up process based on if the backup drive is connected or not.
- Adds entries to Windows’ right-click context menu for easy access.
- Allows users to search the contents of backups.
- Has multiple different backup “modes”, allowing Genie Timeline Home to adapt to the current environment and not hinder a user’s work.
- Has the ability to create bootable recovery media (CD/DVD, USB/flash drive, or partition-based).
- Allows users to not only recover the most recently backed up files, but also previous versions of backed up files.
- Users can receive e-mail notifications about backup status, errors, and warnings.
- Has the ability to display a graph which breaks down the contents of the backup drive for the user.
- Backups up to non-proprietary .ZIP format (when compression is used).
{/rw_good} –>
{rw_bad}
- Lacks any sort of security measures in regards to protecting backed up files, such as encryption or password protection.
- Users can only create one backup “job” at a time; lacks the ability to support multiple different backup “jobs”.
- Lacks easy backup support for Android and Windows Mobile devices.
- Lacks easy backup support for Thunderbird.
- Features list on the developer’s web page and the Help file claim to allow the user to modify the files included in the “smart selection” filters, but I could not find any such feature while testing the program.
- Needs “include” filters when manually selecting files and folders to backup.
- Does not create an actual bootable CD/DVD – only provides an ISO which the user must burn themselves.
- Fairly large download size.
{/rw_bad} –>
{rw_score}
{for=”Ease of Use” value=”8″}Genie Timeline Home Edition’s selling point is user friendliness; it is extremely easy to use. However, there are still a few caveats such as the lack of easy backup support for Android and WinMo devices (iPod/iPhone/iPad and BlackBerry are supported, though) and lack of the ability to support more than one backup “job” at a time.
{/for}
{for=”Performance” value=”9″}Performs extremely well; different “modes” allow Genie Timeline Home Edition to adapt to a computer’s current environment allowing for a good balance between computer resource usage and backup speed. The only problem in regards to performance is the lack of any security for backed up files (i.e. no encryption or password protection).
{/for}
{for=”Usefulness” value=”8″}I can see quite a few people finding this program useful.
{/for}
{for=”Price” value=”5″}Genie Timeline Home Edition, in my opinion, is overpriced. If I am going to dish out $39.95 for a program, I expect it to be fully loaded including backup security features, ability to have more than one backup “job” at a time, and the ability to do file and image backups. (For $10 more – i.e. $49.95 – I can purchase rival backup software that will allow me to perform file and image backups, albeit those backup software may be a bit different than Genie Timeline Home Edition.) This program is better priced $20-30; $25 sounds about right.
{/for}
{for=”Final Score” value=”8″}
{/for}
{/rw_score} –>
{rw_verdict}[tup]
{/rw_verdict} –>
Genie Timeline Home Edition is a file-level backup software (as opposed to being image-level). However, GTHE (Genie Timeline Home Edition) is not your stereotypical file backup software. Rather, GTHE is more focused than other software on making the backup process as hassle-free as possible. I have not personally talked to the developer of GTHE but if I was able to I am sure the developer would tell me the ultimate goal for GTHE is to have as minimal user interaction as possible after the initial setup; afterall, the program’s tagline is One time setup, a lifetime of protection.
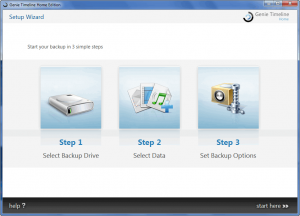
When you first run GTHE you are prompted to perform the initial setup. The initial setup involves three main steps – set the backup location, set the files to be backed up, and set the backup options:
- Step 1
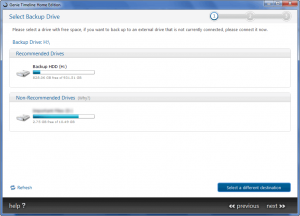
In step 1 users must set the location where backed up files will be stored. GTHE allows users to store backed up files to local hard drives, external hard drives, or network locations.
To make it easier to select a location, GTHE provides recommendations. External hard drives and network locations are listed under “Recommended Drives” because those are the idle locations to store back ups (storing off-site is more safe for backups); local hard drives and hard drives with minimal free space are listed under “Non-Recommended Drives”. While users are encouraged to select a recommended location, users can also use non-recommended locations if they wish. Similarly, users can opt to manually select a backup location via the “Select a different destination” button.
- Step 2
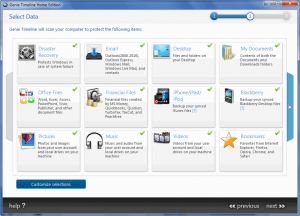
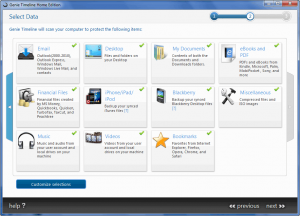
In step 2 users must set which files are to be backed up. To make it easy to backup important files, GTHE has built-in “smart selections”. These “smart selections” automatically backup specific types of files on your computer (from your main system partition only – C:/):
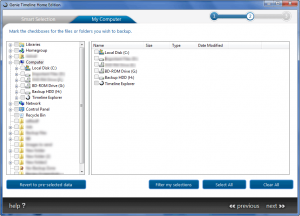
By default all the “smart selections” are checked. However, users have the ability to selectively select which of the “smart selections” they want to use and/or manually select files and folders to backup. (Manually selecting files and folders allows you to backup files and folders from locations other than your system partition.) To do this, one must first click on the “Customize selections” button. After that button has been clicked on, all the “smart selections” are unchecked and users have the ability to select whichever ones they want. Similarly, a “My Computer” tab appears at the top from which users can manually select files and folders to backup:
As already mentioned, from this “My Computer” tab users can select whatever files and folders they want, regardless of if they are stored on the main system partition or not.
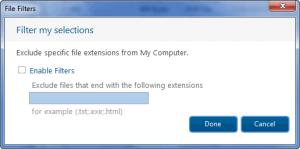
To enhance the ability of manually selecting files, there is a filter feature which can exclude specific files based on extensions:
Take note you may make use of both “smart selections” and manually select files and folders via “My Computer” – it is not an either or.
- Step 3
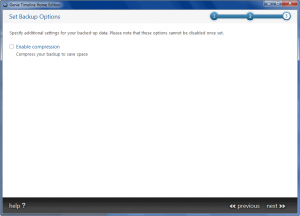
Step 3 involves just one simple question: To enable compression, or not to enable compression. GTHE stores backed up files in .ZIP format if users opt to compress. Take note once you opt to compress or opt not to compress, you cannot change this setting without starting a whole new backup.
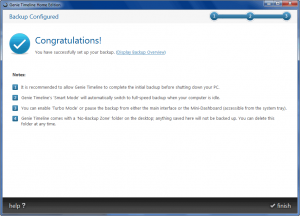
After step 3 has been concluded, users are shown a confirmation screen and the initial backup beings:
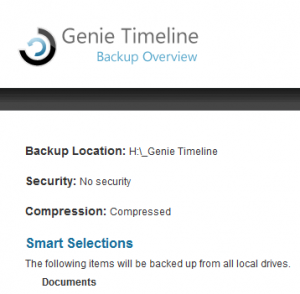
At the confirmation screen users can view a basic overview of the backup that was just setup by clicking on “Display Backup Overview”. The overview opens in the default Internet browser, but it accesses a local file – it does not access the Internet or send any data anywhere:
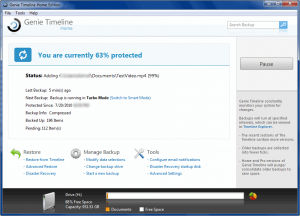
Clicking “Finish” at the confirmation brings up what can be considered to be GTHE’s main program window (the “dashboard”):
While the initial backup is in progress, you can view its status via this window. Take note by default the backup is being conducted in “Smart Mode”. “Smart Mode” is a backing up mode which allows GTHE to intelligently balance computer resource usage and backup speed based on how much computer resources are being used by other programs. In other words, if you are doing something else on your computer while the backup is running, “Smart Mode” will make GTHE use less computer resources so as to not hinder your work. If you would like GTHE to work at full speed (but use a lot more computer resources) you have the option to use “Turbo Mode” instead. “Smart Mode” typically uses less than 15% CPU while “Turbo Mode” typically uses 50%+. Take note you also have the option to pause/resume the backup.
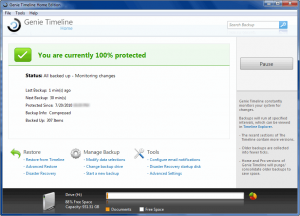
After the initial backup has been finished, the dashboard should look something more like this:
From then on, after the initial backup and setup has been conducted, this dashboard is how you will interact with GTHE shall the need ever arise. However, the idea behind GTHE is to setup the backup, run the initial backup, and not ever worry about GTHE again (unless you want to change the settings, modify the backup, etc.) so you may find yourself hardly ever coming back to this dashboard. GTHE always intelligently works in the background without ever bothering you; if you store your backups to an external drive, GTHE automatically detects when that drive in plugged in and when it isn’t, and accordingly makes backups. Heck, you may even forget GTHE is running considering how little impact GTHE has on your computer while it runs in the background thanks to “Smart Mode” and GTHE’s “IntelliCDP”. (“IntelliCDP” is a mode that tells GTHE to intelligently decide when to conduct backups, as opposed to always conducting a back every X minutes.) (Take note after the initial backup, all backups are done in “Smart Mode” automatically. You are still given the option of running GTHE in “Turbo Mode” though. To do this, just single left-click on GTHE’s system tray icon to open the mini-dashboard and select “Turbo Mode”.)
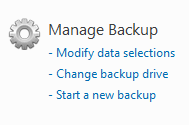
However, if the need does arise to modify backup settings, GTHE allows users to go back and change which files are being backed up, change the location of where the files are being stored, and/or create a new backup “job”:
- “Modify data selections” allows you to go back to step 2 of the initial setup and make changes to the “smart selections” and/or files and folders under “My Computer” that you selected.
- “Change backup drive” allows you to go back to step 1 of the initial setup and change the location where files are being backed up to.
- “Start new backup” allows users to create a new backup “job”. One thing to note about GTHE is that it only supports one backup “job” at a time. In other words, you cannot tell GTHE to backup files A to drive A and tell GTHE to backup files B to drive B – you can either do files A to drive A or files B to drive B. Creating a new “job”/backup overwrites the settings of the previous backup.
Restoring files from a backup involves three different methods:
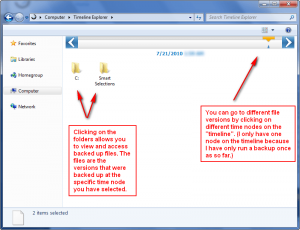
- “Restore from Timeline”. The “Timeline” – also accessible via My Computer – is a feature of GTHE that allows users to access/view/restore previous versions of files:
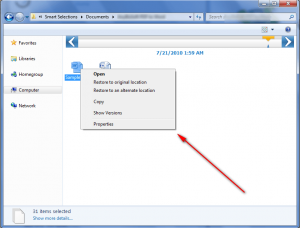
Clicking on a node on the “timeline” gives you access to the file version which was backed up at that specific time. (With the timeline you can, of course, access the latest versions of files also in addition to previous versions – just click on the latest node.) You simple need to browse the respective folders and find the files you want; right-click on the files you want to restore:
GTHE “saves backups for the past 4 hours, hourly backups for the past 48 hours, daily backups for the past week, and weekly backups onwards, files created and then deleted before the next backup will not be included. When your backup drive becomes full, Genie Timeline will automatically delete old versions of files not showing on Timeline to free space.”
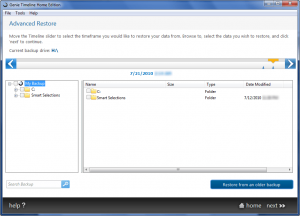
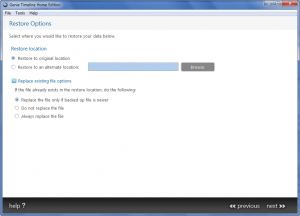
- “Advance Restore” is very similar to the timeline, except it provides an easier way to restore items in bulk:
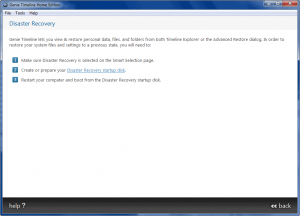
- “Disaster Recovery” allows users to restore “Disaster Recovery” files, if those files were selected via “smart selections” for backup:
Because of the nature of the “Disaster Recovery” files, you cannot restore these files from within Windows – you need to use GTHE’s bootable media to restore the files.
Aside from the already mentioned, here are the other features of GTHE:
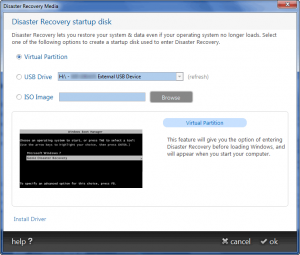
- Ability to create bootable recovery media (“Disaster Recovery startup disk”):
GTHE allows for the creation of partition-based bootable recovery, USD/flash drive based, or CD/DVD based. Take note that for CD/DVD you are given an ISO file which you much burn onto a CD/DVD yourself with a program like Ashampoo Burning Studio 2010 – GTHE does not burn the ISO onto a disc for you.
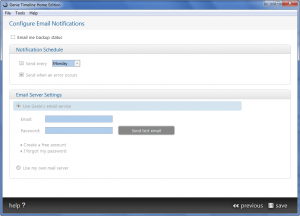
- E-mail notifications – users can receive e-mail notifications about backup status, errors, and warnings:
You can either signup for a free e-mail via Genie-Soft’s service, or you can input the SMTP settings for a different e-mail service such as Gmail.
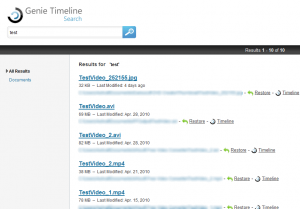
- “Search” (“Tools” -> “Search Backup”) – GTHE gives users the ability to search the contents of their backups:
The search page opens up in your default Internet browser but it is a local page and no connection to the Internet is made.
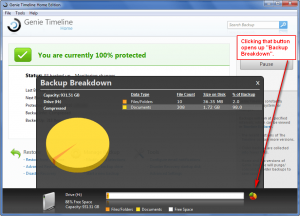
- “Backup Breakdown” – GTHE has the ability to show users the contents of their backups in a nice pie chart:
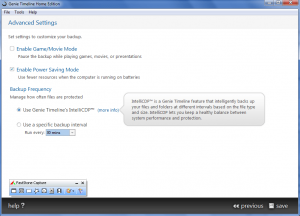
- “Advanced Settings”:
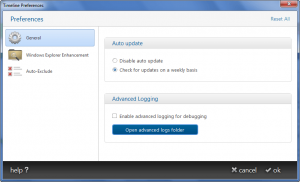
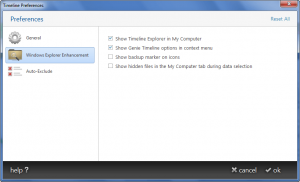
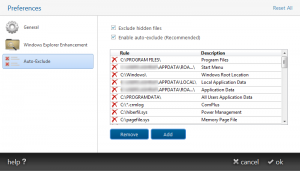
- Preferences (“File” -> “Preferences”):
That said, Genie Timeline Home Edition is definitely a really good program; its main attraction is how hassle free it is to setup, and how painless it is to continue using. However, there are still areas where the program can be improved:
- GTHE lacks any sort of security measures in regards to protecting backed up files, such as encryption or password protection. AES 256 encryption is available in Genie Timeline Professional Edition ($59.95), but I honestly believe encryption should also be available in Home Edition considering protection of data is extremely critical to many people.
- The inability to support multiple backup “jobs” is a real bummer. I would like to be able to setup GTHE to send files A to drive A, files B to drive B, files C to drive C, etc. without having to go in and create a new backup “job” every time. For example, it would be very convenient if GTHE had the ability to detect which external hard drive is plugged in and run that backup job accordingly.
- GTHE supports iPod/iPhone/iPad and BlackBerry for “smart selection”, so why not Android and Windows Mobile devices? Of course you can still backup files for Android and Windows Mobile devices by manually selecting them, but a “smart selection” for them would be very convenient.
- Similarly, GTHE supports Outlook and Windows Mail for “smart selection”, so why not other desktop clients such as Thunderbird?
- In regards to the “smart selection” filters, the developer’s web page and the Help file claim to allow the user to modify what types of the files are included in each “smart selection” filter. However, I unable to find any such feature while testing the program which sucks because being able to modify “smart selection” filters would be a great plus to the software (Professional Edition may have this feature, I am not sure since I did not test Professional Edition).
- Currently there are exclude filters when manually selecting files and folders to backup (as I already mentioned). Why not have include filters also?
- GTHE does not create an actual bootable CD/DVD – only provides an ISO which the user must burn themselves, as I already mentioned. While most people will have other programs that allow them to burn the ISO, it would be more convenient if GTHE itself was able to do this.
- GTHE is a fairly large download (about 150 MB). Now, most of this download size is because of the recovery media that GTHE comes with. The recovery media itself takes up over half of that size (about 80-90 MB I would say), so effectively the program itself is really 60-70 MB. Still, though, 60-70 MB is a lot for a file backup program especially considering other file backup software are much smaller.
This review was conducted on a laptop running Windows 7 Professional 32-bit. The specs of the laptop are as follows: 3GB of RAM, a Radeon HD 2600 512MB graphics card, and an Intel T8300 2.4GHz Core 2 Duo processor.
{rw_freea}
Genie Timeline Free is the freeware version of Genie Timeline Home Edition. (It seems to be 100% freeware; in other words the developer’s website does not mention that it is limited for home or non-commercial use only.) Genie Timeline Free has many of the same features that Genie Timeline Home Edition has, but lacks some important ones such as recovery media.
GFI Backup – Home Edition allows you to back up your important documents, photos, music, emails and program settings using a simple but smart wizard-driven interface to most popular storage devices (including local and external disk drives, LAN, CD/DVD, removable devices, remote FTP servers, etc.). Download and use GFI Backup Home Edition today – a FREE easy-to-use backup software solution, designed for secure backups of all your important data. Because we care!
-Developer
FBackup is a free backup software for both personal and commercial use. It protects your important data by backing it up automatically to any USB/Firewire device, local or network location. The backed up data can be either compressed (using standard zip compression) or an exact copy of the original files.
-Developer
Cobian Backup is a multi-threaded program that can be used to schedule and backup your files and directories from their original location to other directories/drives in the same computer or other computer in your network. FTP backup is also supported in both directions (download and upload).
Cobian Backup exists in two different versions: application and service. The program uses very few resources and can be running on the background on your system, checking your backup schedule and executing your backups when necessary.
Cobian Backup is not an usual backup application: it only copies your files and folders in original or compressed mode to other destination, creating a security copy as a result. So Cobian Backup can be better described as a “Scheduler for security copies”. Cobian Backup supports several methods of compression and strong encryption.
-Developer
{/rw_freea} –>
{rw_verdict2}Although there are still a few key features I would like to see added to Genie Timeline Home Edition, Genie Timeline Home Edition is an excellent backup software; the focus on the user experience is especially exemplary. I give Genie Timeline Home Edition a thumbs up – it is a very good product. However, with the features it has and the features it lacks, I feel Genie Timeline Home Edition is a bit overpriced at $39.95 so I am not going to officially recommend it, rather leaving it up to you to decide if you want to get it. The program is a genuine steal if ever found at $20-30, however.
{/rw_verdict2} –>

 Email article
