Here in dotTech, we’ve already covered a lot of online file sharing services. The thing is you wouldn’t want to use a service with lacking features such as custom viewing permissions and user collaboration.
Speaking of which, this post covers a basic feature in Google Drive which is the ability to send and receive files through shared folders. So if you’re still new to Google Drive and would like to know how to turn a normal private folder into a shared folder, then go ahead and read on.
How to create a shared folder in Google Drive
- Log in to your Google Drive account.
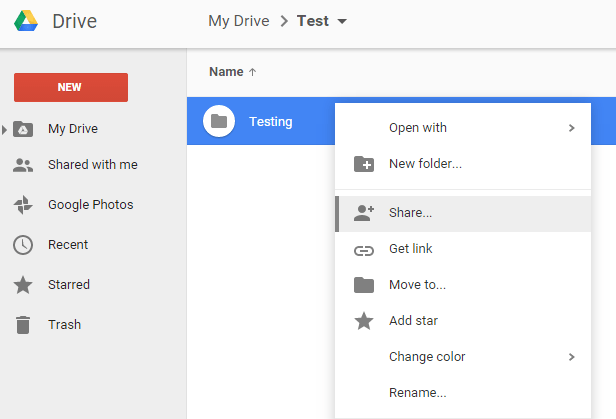
- After logging in, select the folder that you want to share and then right-click on it. On the context menu, select “Share”.
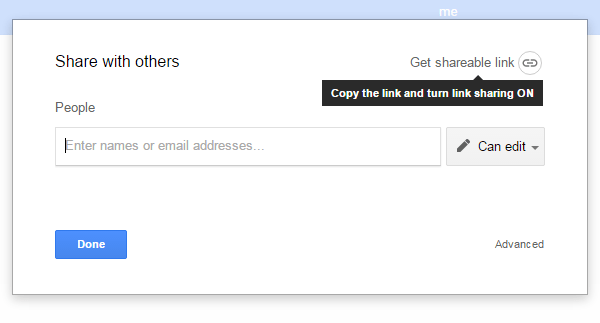
- On the overlay window that appears, you will have the option to share the folder via “shareable link” or via special invite.
- If you choose to share the folder via shareable link, then just click the “Get shareable link” option.
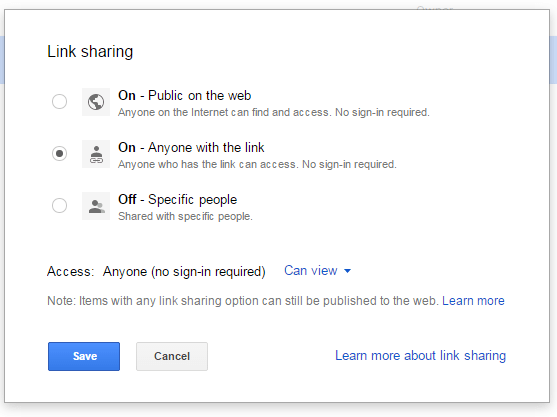
- After which, you will be asked to update the viewing permissions via shareable link. For example, you can allow anyone who has the link to view and edit your files. You can also make your folder available to the public with no sign-in required.
- Just don’t forget to click “Save” to confirm.
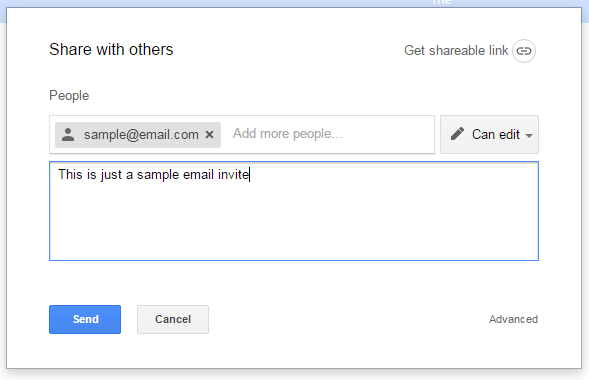
- Now, if you want to create a shared folder by inviting specific people, just enter the names or email addresses of the users that you wish to give access to your files. You may also choose whether to allow them to edit your files or to simply view your files.
- So that’s basically it. Once shared, all of the contents inside your folder will be made available to those whom you’ve shared it to. By doing so, you can easily work with others on a joint project or task.

 Email article


