 Email article
 Most image editing software packages have various options for showcasing your photographs. However, you might not find one with which you can add your favorite photos to a 3D museum gallery. For that, a more original package is required, and that software is Photo! 3D Album. Read on to learn more.
With Photo 3D! Album you can set up stunning 3D museum galleries. The software includes various 3D museum templates which you can add your photos to. Then the photos are displayed as framed pictures on the walls. You can add the freeware software to the Windows XP, Vista, 7 and 8 platforms from this page. (Note: It may or may not contain bloatware during install, keep your eyes open.)
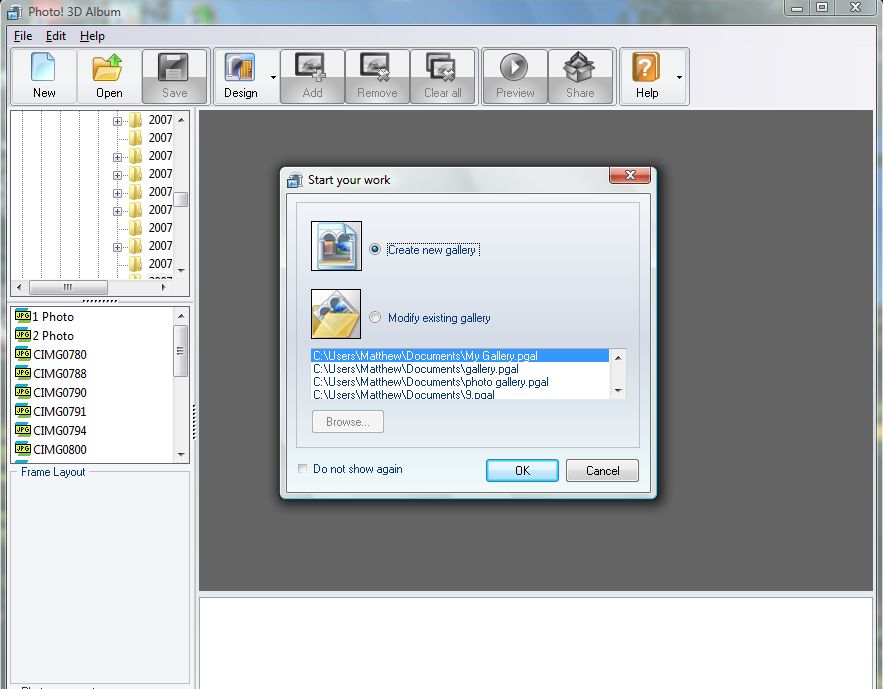
When you have the software up and running, the window in the shot below should open. Click on the Create new Gallery option, and then select either the Exhibition Hall or Showroom templates. They are the templates that most closely match museum galleries. Others such as Chinese Gardens and Pyramids display your photos in outdoor settings.
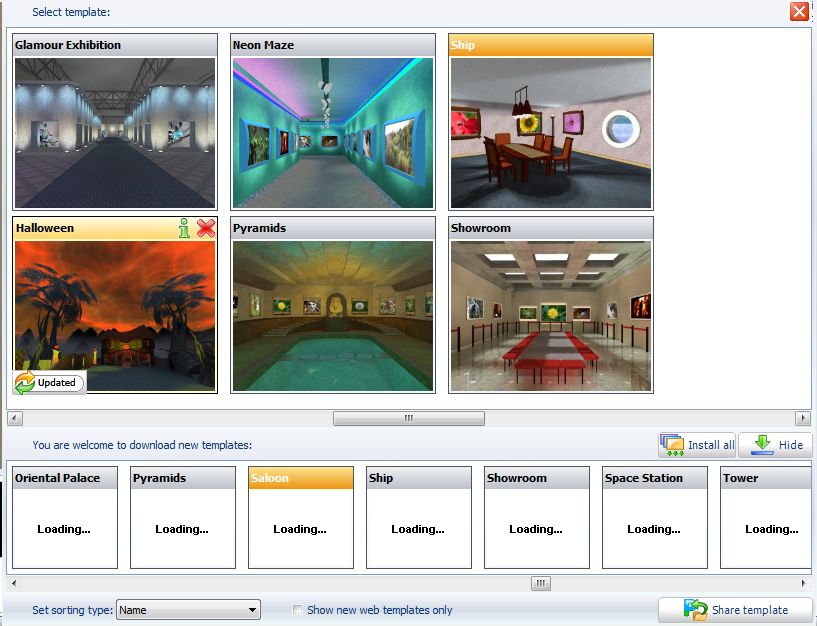
To install new galleries, click the Design option to open the window below. Then click on one of the gallery template thumbnails at the bottom. Select the Install option to add it.
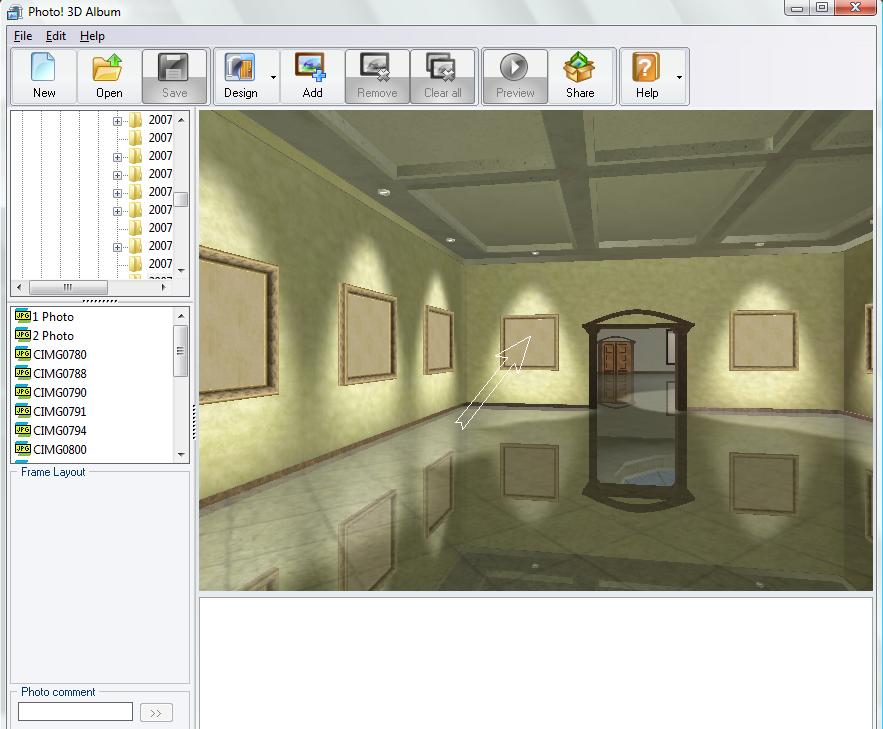
When a museum template is selected, an empty 3D gallery is opened within the software’s window. You can move through this gallery by left-clicking its window, and then dragging the mouse in alternative directions. When holding left mouse button, drag the arrow forwards to move ahead in the gallery.
Select a folder from the directory tree at the left of the software window, and then click one of the image files for a small thumbnail preview. To add a photo to the gallery, left-click and drag an image file onto an empty gallery frame on the wall. Alternatively, click a frame, select an image file and then click the Add option near the top of the window. Then the photo should be displayed on the wall as below.

If it isn’t then it might be that either the Crop or Fit options are selected. Click the Adapt option to ensure that the picture fits the frame exactly. Then add a variety of your fave photos to the museum gallery.
At the bottom left corner of the Photo! 3D Album window you can add alternative photo text. Select a photo, and then input some alternative text into the box. Click the double-arrow to open the small window below. There you can add further photo text.
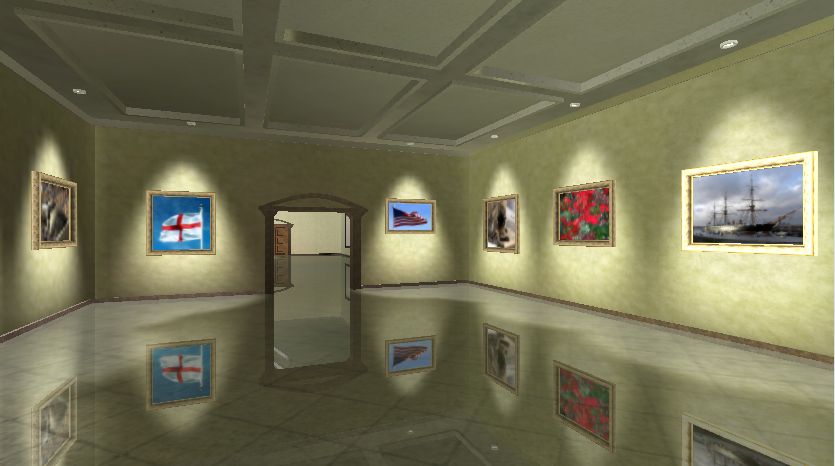
When the gallery is filled with photos, click on the Preview option. That will then open the gallery in full-screen mode. Press F1 to switch to free move mode. Then you can move around the gallery by left-clicking the mouse. Press space to jump, and return to enlarge the photos. Press Esc to return to the Photo 3D! Album window.
Click Save to save your photo gallery template. Then you can return to, and add more photos to the 3D museum gallery. Or set up new galleries comparable to the Louvre!


