{rw_text}Software reviewed in this article:
Watermark Software by AoaoPhoto Digital Studio
Note: This software is also known as Aoao Watermark
Version reviewed:
v3.6
Supported OS:
Windows 95 or higher
Price:
$24.90 (USD) but you can get it for free for a limited time at Giveawayoftheday.com!
Software description as per the developer:
Watermark software is a professional photo watermark creator. It can help you add text,image and logo to your pictures to protect your copyrights, only photo watermarking software can verify your pictures and protect them from unauthorized using. The program is not only a watermarking tool, it also can help you add pretty frames to your photos, crop images, batch rename and photo resize etc. Watermark software is a fast batch photo processor and support most popular photo formats.
{/rw_text} –>
{rw_good}
- Allows users to add image and/or text watermarks.
- Users can add as many watermarks as they want.
- Allows users to add “frames”, crop, resize, rotate, flip, rename, or convert images.
- Supports batch processing.
- Support many image formats.
- Users can save watermark templates and reuse them as they wish.
- Has the ability to resize watermarks automatically to properly fit images of different sizes.
{/rw_good} –>
{rw_bad}
- Doesn’t properly resize image watermarks automatically for some images.
- No undo/redo capabilities.
- Rotating and flipping or images is done in real time – changes are made to your actual original image as you rotate or flip.
- Needs a better way to change font size in text watermarks.
{/rw_bad} –>
{rw_score}
{for=”Ease of Use” value=”8″}Is very easy to use. However, there are some annoyances like the lack of undo/redo, rotating and flipping is done in real time (you are not even warned of this fact), there are no tooltips when you hold your mouse over buttons, the two step process makes it cumbersome to add/remove images, etc.
{/for}
{for=”Performance” value=”9″}Performs very well with one exception: With some images (it seems like the ones that are small in height but long in width) the image watermarks are not properly resized when using the “resize watermarks to adapt to all images” option.
{/for}
{for=”Usefulness” value=”5″}Hit or miss – some people will find it useful, while some won’t.
{/for}
{for=”Price” value=”8″}$24.90 is a very fair price for this software in my opinion, although $20 would be much more attractive.
{/for}
{for=”Final Score” value=”8″}
{/for}
{/rw_score} –>
{rw_badb}The developer lists multiple “awards” on Watermark Software’s homepage:
First of all, PCMag and PCWorld logos do not represent an “award” – they are just logos. Secondly, and more importantly, Watermark Software has not received CNET’s Editors’ Choice September 2009 or Softpedia’s 5/5 Excellent awards, so those are fake awards listed on the developer’s website. However, it is worth noting that Aoao Watermark did get a 4.5/5 by CNET Editors when Aoao Watermark was reviewed by CNET back in August 2009; however even Aoao Watermark did not get any awards from Softpedia.
{/rw_badb} –>
{rw_verdict}[tup]
{/rw_verdict} –>
Watermark Software is, well, a software that can add watermarks to your images. Watermark Software allows you to add image and/or text watermarks, and in addition allows you to flip, rotate, crop, resize, rename, convert, and add frames to your images.
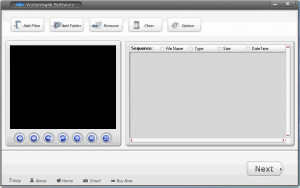
Watermark Software works in a “two step” process. When you first run the program, you will see this window:
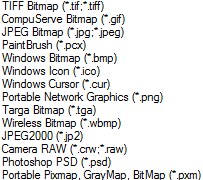
You add the images you want to watermark at this window. You can either add individual images, or add a whole folder of images. Batch processing is supported, but drag + drop is not. These are all the supported input image formats:
After you have added images, you can rotate them clockwise or counterclockwise, or flip them horizontally or vertically (see the 3rd-6th blue buttons from the left under image preview box to access these features). Take note that the rotates and flips are done in real time. In other words, as you rotate or flip the image in Watermark Software, the actual image file is being rotated or flipped. I learned this the hard way (thankfully, though, restoring my image to normal rotation was not that tough).
One other noteworthy feature mentioning is that you can also view the EXIF data on an image…
…by right clicking it and selecting “Exif Info…”.
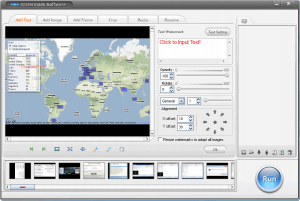
When ready, you need to click the “Next” button which takes you to the second step, where you do the actual watermarking and editing (if applicable):
From this second window you can
- Add text watermarks
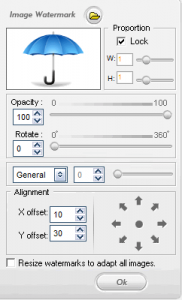
- Add image watermarks
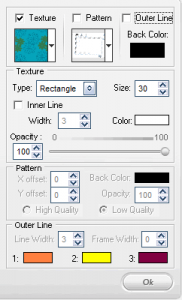
- Add “frame”
NOTE: You can add a texture, pattern, and outer line at the same time if you wish – you don’t have to pick just one. Also, you can only use the textures and patterns that come with the program – you can’t add your own.
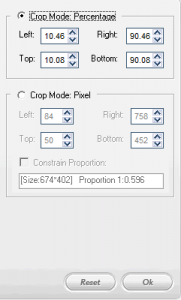
- Crop the image
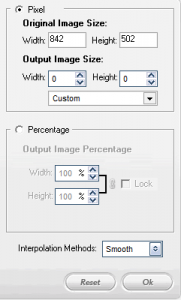
- Resize the image
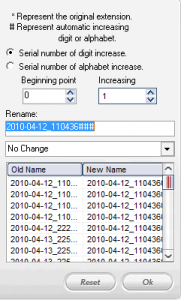
- Rename the image
If you are making use of the batch processing feature of Watermark Software (i.e. you have multiple images loaded into the program), realize that any and all changes you make will be applied to all the images in question – you can’t make custom changes to each individual image.
Unlike the previously mentioned rotate and flip functions, any changes you make with any of the features I just mentioned will not be made in real time. In other words, your original file won’t be affected. On a similar note, take note that you *must* click the “OK” button after you have used any of the features before. Pressing the “OK” button tells Watermark Software that you want to it to make the changes in question when you output your images. If you don’t press the “OK” the changes that you made will not be applied.
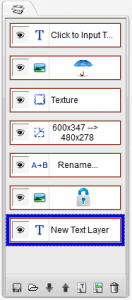
Whenever you press “OK” the changes in question are added to “layers list”:
Think of this “layers” list as being similar to the layers in Photoshop (or GIMP, or Paint.NET, or any other image editor), except with a twist. Like how layers work in Photoshop, you can “turn on” or “turn off” the layers from the “layers list” and the order of the layer in the “layers list” will determine what happens if two watermarks overlap (i.e. which watermark will be shown above the other). However, in addition to showing watermarks, the “layers list” also lists any other changes that you made, like crop, add frame, resize, or rename. So, via the “layers list” you can remove any changes you made by simply deleting the layer. Furthermore, if you want to add multiple text or multiple image watermarks, you can do it via the “layers list” – just click on the “Add New Text Layer” and “Add New Image Layer” buttons (5th and 6th buttons from the left at the bottom respectively), select the new layer that is created, and customize the watermark. Note that you can only have multiple watermark (text or image) layers – you can’t have more than one crop, frame, resize, or rename layer.
While on the topic of the “layers list”, take note that you are allowed to save your settings as a template which you can load and reuse at any time (all the layers are saved as a template not just the watermark layers). Saving/reloading can be done via the 1st and 2nd buttons respectively from the bottom of the “layers list”.
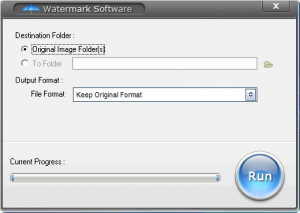
When all is set and done, and you are ready to process your images, click on the “Run” button. You will be asked to select where you want to output your images, and which image format you want to output them as:
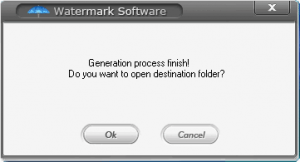
In terms of output image format, “keep original format” is selected by default, so you only need to change the option if you want to convert your images to a specific format. If changing the output format, you can select from .JPG, .BMP, .TGA, .GIF, .TIF, .PCX, .PNG, and .ICO. Hit the “Run” button again when you are ready, and your images will be processed. Watermark Software works at a fairly good pace, so you shouldn’t be waiting long. After the images have been processed, you will be given the option to open the output folder, if you wish:
In addition to the already mentioned, there are two features of Watermark Software that I really like and would like to highlight these points:
- Watermark Software has the ability to automatically resize watermarks (text and image) so that the watermark scales in size relative to the image being watermarked. In other words, if you are watermarking multiple images at once, and these images are of all different sizes, the watermarks you add will be automatically resized so that they appear properly on all the images. To make use of this automatic watermark remarking feature, you need to check the checkbox by “Resize watermarks to adapt to all images” found at the bottom of the text and image watermark option screens.
- Watermark Software gives you the ability to position watermarks either via coordinates, or predefined positions accessible via buttons. However, it also allows you to click + drag around watermarks and place them wherever you want easily, which is something I really like. (To make use of this feature, click on the watermark that you see in the preview box and drag it to the position you want to place it.)
On the other hand, however, there are aspects to Watermark Software that I also dislike/that need improvement:
- I really don’t like the two step process; it just makes adding/removing images a hassle (you need to close the second program window, which opens up the first program window, add/remove images, and go back to the second program window via the “Next” button). I see no reason why both windows can’t be consolidated into one.
- There seems to be a bug with the “Resize watermarks to adapt to all images” feature. For the most part, this feature works just fine. However, for some images, the watermarks are not properly resized:
See the umbrella in the image shown above? The umbrella is the image watermark I applied; it should have been properly resized to fit the size of the image, but it wasn’t. I noticed that this problem occurs on images that have short height and long width, comparatively speaking; for other images this problem does not occur.
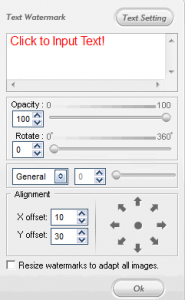
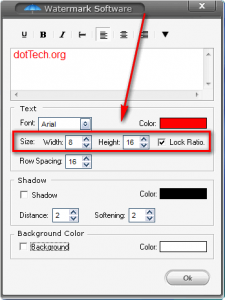
- Selecting the size of the font in text watermarks is very cumbersome. Instead of being allowed to select the font size, you are given the ability to set the font height and width:
I realize the fact that modifying a font’s height and width allows you to resize the font. However, I prefer the traditional method of selecting font size and I am sure many other people do also – it is just less cumbersome.
This review was conducted on a laptop running Windows 7 Professional 32-bit. The specs of the laptop are as follows: 3GB of RAM, a Radeon HD 2600 512MB graphics card, and an Intel T8300 2.4GHz Core 2 Duo processor.
{rw_freea}
PhotoWham! is an excellent tool that allows you to add text watermarks very easily and very, very quickly.
Amongst the abundance of features FastStone Photo Resizer has, adding text and image watermarks are two of them. However users can only add one text and one image watermark per image.
PicMarkr lets you to add custom watermark (image or text) to your images online and free.
It is useful when you need to protect your copyrights or if you want to add comments
to your photos.-Developer
Picture Shark allows you to add image watermarks to multiple images easily and quickly. It is old, but it still works!
Your local image editor
You can use any image editor such as Photoshop, or free ones such as Paint.net or GIMP to add watermarks. IrfanView will also work for this task. However, programs like uMark make it a lot easier, especially for multiple images, but you have a lot more control if you use an image editor.
{/rw_freea} –>
{rw_verdict2}While it does require some finishing touches/bug fixes, Watermark Software is a very good watermarking software. I give it a thumbs up. The only reason I stop short of formally recommending the software is because I deplore the fake awards the developer uses to try to get people to buy this software; however the program itself I really like.
{/rw_verdict2} –>

 Email article

