In a previous post, you have already learned how to create creative pop art photos without downloading any third-party software. You can just do it online and right within your web browser.
Speaking of which, did you know that you can also create cool pop art photos in Chrome? If you want to learn more about it, you better read on.
How to create pop art photos in Chrome
- First and foremost, you will need to download and install the “Pop Art Studio Online” app for Chrome.
- After installing the app, open it. You may open it directly from its Web Store page. You can also open it via Chrome’s app launcher.
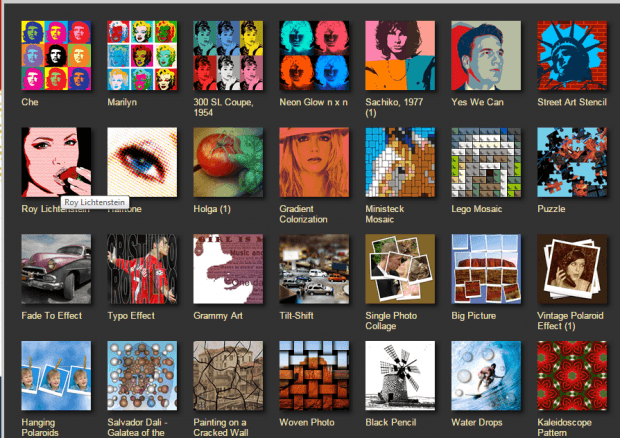
- Next, select a pop art photo style that you want. There are a lot of options. Just select one style at a time.
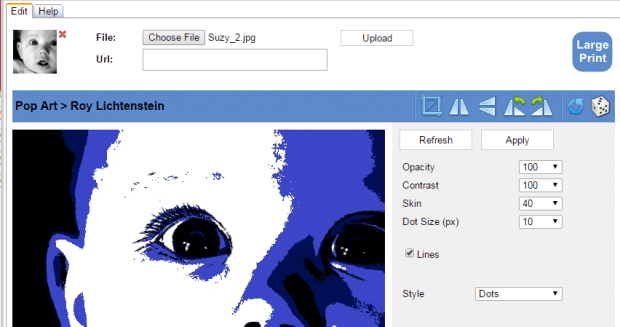
- On the following page, you will be asked to upload your photo. Just click “Choose File” then “Upload”.
- Wait while the app generates a pop art version of your photo.
- Once done, you can see a draft of the pop art that was automatically generated out of the photo that you’ve uploaded.
- Use the tools provided in the toolbar to crop the photo and adjust its color levels. Continue editing the photo until you are satisfied with the outcome.
- Once you are finished, right-click on the photo then select “Save image as” to download and save the photo to your computer. Alternatively, you can just click the “Save” button on the toolbar to download the pop art photo in high-resolution (only available for paid and registered users).
That’s it. You’re done.
You may then use the pop art as background image, profile photo, calendar cover, etc.

 Email article


