 Email article
If online privacy is one of your major concerns, then you should carefully inspect the privacy settings on your web browser. If you are using Firefox, you can do this in the about:config page but things can get really confusing especially if you’re just a typical Internet user.
To avoid confusion when it comes to dealing with complex stuffs, you can just add a quick access button for altering privacy settings in the Firefox toolbar. Still don’t know how to get it done? Just read and follow the instructions listed below.
How to quickly update Privacy Settings via Firefox toolbar
- On your Firefox web browser, open this link to download and install the “Privacy Settings” add-on to your browser.
- Click “Install” when prompted. There’s no need for you to restart your web browser.
- Once successfully added, the Privacy Settings add-on will instantly add its icon to your browser’s toolbar. Just look for the shield icon on the toolbar and then click on it.
- Right after clicking the Privacy Settings icon, the privacy settings toolbar panel will immediately show up and it will display a list of important privacy settings including the ones listed below:
- Geo-location
- Search suggestions
- Encrypted media extensions
- Usage stats
- Data reporting for Firefox stats
- Safe browsing (Google)
- Just toggle the on/off switch for each setting to enable/disable it.
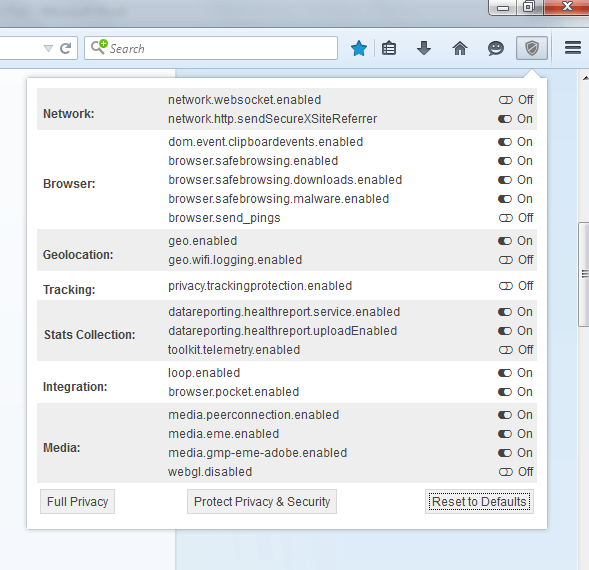
- If you click “Protect Privacy & Security”, then all the options required to protect your online privacy will be automatically enabled.
- If you want to switch back to your browser’s usual privacy settings, just click “Reset to Defaults”.
So that’s it. You can go ahead and give it a try.


