{rw_text}Software reviewed in this article:
Version reviewed:
v1.3
Supported OS:
Windows 2000/XP/Vista
Windows 7 is not officially supported but it seems to work fine on Win7.
Price:
$19.99 (USD) but you can get it for free for a limited time at Giveawayoftheday.com!
Software description as per the developer:
Uconomix presents uMark – a utility for marking the images and photos with a copyright notice or your company logo or both. If you are an online seller, a hobbyist or professional photographer, a graphics designer or anybody who has ever shared an image on the net – then this is something you must know! Digital images are very easy to copy and anyone who can see your image can copy and use it without your consent. Some people do it unknowingly, some do it purposely. How can you prevent people from using your personal and professional images and photos? We have the answer – mark them. Mark the images with your name, your company name, a logo or a copyright notice. Let people know that you are the rightful owner of that particular image.
{/rw_text} –>
{rw_good}
- Provides users with the ability ability to add a text or a image watermark (both can be added to the same image).
- Supports batch processing.
- Gives users a fair bit of control over how the watermark looks (opacity, position, tilt, etc.)
- Output images can be renamed, converted to a different format, and resized.
- Users can save watermark settings and reload them to use in the future.
{/rw_good} –>
{rw_bad}
- Users can not add multiple text or multiple image watermarks on the same image.
- Users can’t resize the image that is going to be used for image watermark.
- Does not support PNG image format for image watermarks (only BMP, GIF, and JPG).
- Watermark are not automatically resized to be relative to image size.
- Users are not allowed to click + drag watermarks to easily position them – they must use the buttons provided.
- Does not support drag + drop.
{/rw_bad} –>
{rw_score}
{for=”Ease of Use” value=”6″}Mostly easy to use, but has more than its fair share of annoyances: multiple text or image watermarks cannot be added to the same image, image watermarks cannot be resized, PNG images are not supported for image watermark, there is no ability to click + drag watermarks to easily position them, and drag + drop is not supported.
{/for}
{for=”Performance” value=”9″}Performs well for what it does with one caveat: watermarks are not automatically resized to be relative to image size, so if you are watermarking multiple images and they are of different sizes, the watermarks may not properly show on some images.
{/for}
{for=”Usefulness” value=”5″}Hit or miss – some people will find it useful, while some won’t.
{/for}
{for=”Price” value=”7″}$19.99 is a fair price, but if I were a customer I would look for the developer to fix all the problems with the program before purchasing.
{/for}
{for=”Final Score” value=”7″}
{/for}
{/rw_score} –>
{rw_verdict}[tup]
{/rw_verdict} –>
uMark Professional is a watermarking software that allows you to watermark (text and/or image) your images.
When you first run the program, you will be prompted with a message box asking you if you want to “Add uMark to Explorer Context Menu”. If you click “yes”, an “Add Watermark” entry will be added to the right-click context menu of images. Take note that if you are on Vista or Win7 you should run uMark Professional as administrator the first time around because if you do not, the context menu entry will not be properly added.
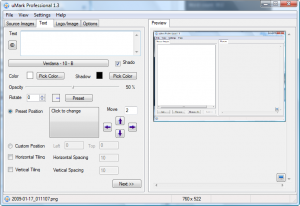
This is what uMark Professional’s main program window looks like:
Using uMark Professional is fairly straightforward. First you have to load the images you want to watermark (you may watermark multiple images at once – batch processing is supported). There are three ways to load an image into the program:
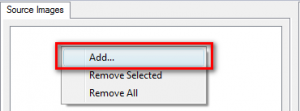
- Right click under the ‘Source Images’ tab -> Add…
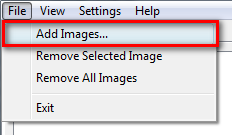
- File -> Add Images…
- The “Add” button at the bottom left of the window
Drag + drop is not supported, fyi.
Regardless of what method you use, you will be prompted with a window that allows you to browse your computer for image files. uMark supports 5 input image formats:
While you are browsing for an image, if you Shift + Click or Ctrl + Click on the images you want, you can add more then one image into uMark at once. If you add multiple images at once just note that you will be adding the same watermark to all of the images you have added to the program with one click of the button. There is no way around that – once you hit “Start” (which we will get to later on), all the images in the “Source Image” tab will be watermarked with the same settings that you set.
Once you have added the images, the program window will look something like this:
As you can see, I added two images into the program. Also note that on the right of the program window, under the tab labeled ‘Preview’ there is a preview of the picture I have loaded (yes I have a screenshot of uMark loaded =D). As I make changes, meaning I add a watermark and change it around, the image under the preview tab will change to reflect that change.
By default uMark is set to make the picture ‘fit to screen size’ when previewing (the actual size of the picture is not effected). However, you can change this to show the picture in its actual size, or show it in fullscreen. There are three methods on how to do this:
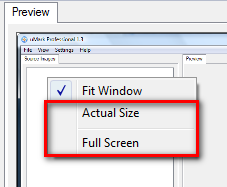
- Right click on the image under preview tab -> Actual size or Fullscreen:
- View -> Actual size or Fullscreen:
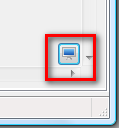
- Press the little button that is located at the bottom right of the preview tab to view the image fullscreen:
Okay so you have loaded your image and you have set the preview tab to how you like it. What to do now? Either:
- Hit “Next”, which is located at the bottom of the window:
If you hit “Next” you will be taken to the next time in line. So since we were on the “Source Images” tab, by hitting “Next” you will be taken to the “Text” tab. If you were on the “Text” tab and you hit “Next”, you would be taken to the “Logo/Image” tab, so on and so forth.
Or
- Navigate to the relevant tab (i.e. if you want a text watermark go to “Text” – for demonstration purposes go to the “Text” tab please):
Regardless of what method you use, you should now be at the “Text” tab:
Type in whatever you want to appear in your text watermark in the text box:
Whatever/however you type in this box, is how it will appear on your image as a watermark. So for example if you type on two lines, your watermark will be two lines. If you capitalize the letter in the middle of a word, on your watermark that same letter will be capitalized.
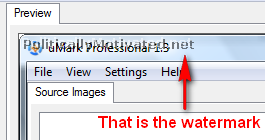
After you have finish typing it, look at the preview tab. You should see your watermark in the top left corner (I set my preview tab to ‘Actual Size’ so I could show the watermark since it was kinda small):
I know it is kind of hard to see the watermark in my screenshot because the watermark is, coincidentally, right over the program title bar, but I pointed it out for anyone having trouble.
I know that under the text box there is the ability to change the font (color, size, etc.). However, how are we supposed to know what size/color we want if we do not have the watermark in the right position? So first lets change the position of the watermark. You can do this in three different ways:
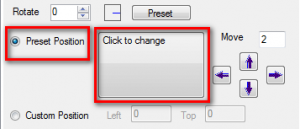
- Leave the “Preset Position” option selected and click on “Click to Change”:
This will cycle your watermark through 9 preset positions (I have them marked in red):
Of course my red Xs are not exact, but they give you the general idea.
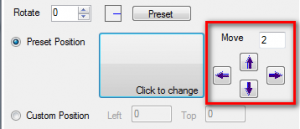
- Use the arrow buttons:
The value in “Move” represents how many pixels the watermark will be moved each time you click on of the arrow buttons. Currently, and by default, it is set to 2, so everytime you click one of the buttons, the watermark will move 2 pixels in that respective direction. You can enter any value between 1 and 99 in this box. You can use the arrow buttons in conjuction with the “Click to change” button. Meaning you can cycle through the 9 preset positions and then press the arrow buttons to move the watermark from that location.
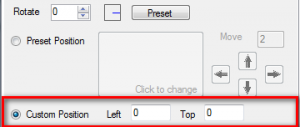
- Click on “Custom Position” and manually set values:
The values in “Left” and “Top” represent how many pixels your watermark is away from the left edge and the top edge of the image.
Everythime you change the position of the watermark, it is reflected in the preview tab of the image. I decided to set mine to the exact middle:
While we are on the of choosing where you put the watermark, let me make it clear that I wish the developer had given us the ability to click + drag the watermark and place it wherever we can. It will become very anal to manually set value or use the arrow button if w do not like the preset positions provided by the developer.
Okay, so now we have the position of the watermark set. Now lets go back and change the size and other goodies. To change the size and font of the watermark, click on the “Verdena 10 – B” button that is located directly under the text box where we entered the text for the watermark:
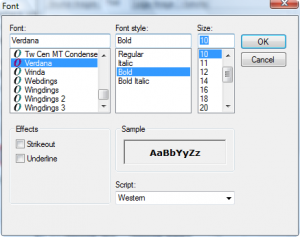
This will bring up the typical font editing window that we see everywhere:
Change the settings to however you see hit and hit “OK”. Note that the changes will not be shown on the image in the preview tab until you hit “OK” so don’t expect them to =). Once you hit “OK” the changes will be reflected on the image in the preview tab as always. I changed mine to Times New Roman font, regular font style and 48 font size:
Also note that the button that said “Verdena 10 – B” should now reflect your new font settings:
Now that we have decided upon the font type/style/size/etc. we can focus on other ways of how to enhance/change the look of the watermark:
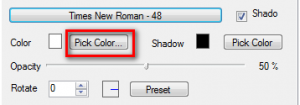
- Font color – click on the “Pick Color” button next to “Color”:
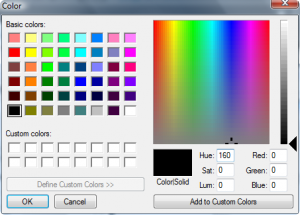
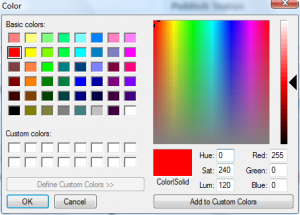
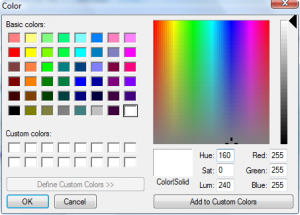
That should bring up your typical pick a color box (I have “Define Custom Colors >>” clicked on for this screenshot”:
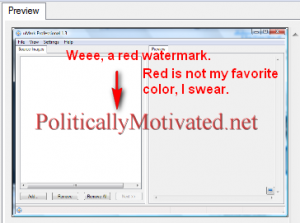
Choose your color, make a custom one if you like, and hit “OK”. The image under the preview tab should now reflect your change. I made mine red:
Please ignore those smart-ass comments. I can’t control myself.
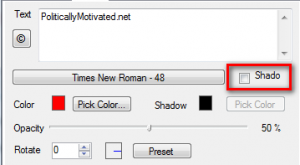
- Shadow/Shadow Color – you have the ability to give your font watermark a ‘shadow’. The program actually my default gives your font a shadow, so just uncheck “Shado” to remove the shadow:
My above screenshot (the one above the shado one) showed the watermark with a shadow. This is what it looks like without:
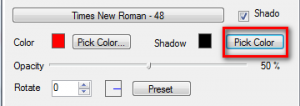
However, if you do add a shadow, you can choose the color of that shadow. The method is the same as with font color – click on “Pick Color”, choose your color from the window that pops up and hit “OK”:
This is what my watermark looks like with a green shadow:
It kind of looks like I changed the font color but it is still red.
- Opacity – you can change the opacity of your watermark. Just move the slider until you get the opacity you like. 50% is default. As you move the slider, the change will be reflected in the image under the preview tab (you don’t even have to release the slider). I made my watermark 100% opacity:
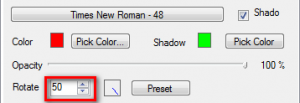
- You can also rotate your watermark so it appears at a tilt. You can either do this manually by enterting a value in the box or pressing the arrow buttons (you can only go from 0-360; no negatives):
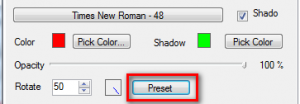
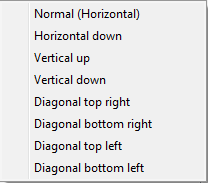
Or you can use a preset rotation by clicking on “Preset” and selecting what shows up:
I manually set my rotation at 50:
- Horizontal Tiling – your watermark will be titled horionztally. For anyone that does not know what tiling is, think of the tiles in your kitchen (assuming you have some there). It is just placed the same image/watermark back to back. The value “Horizontal Space” represents the distance between one ’tile’ and the other. You can enter a negative value here – that just means that they will be closer then a positive value:
This is what horizontal tiling with the default 10 spacing looks like:
I changed my rotate back from 50 -> 0 and made my font size smaller just for this tiling.
- Vertical Tiling – samething as horizontal tiling except the tiles will be vertical:
You can also do both horizontal and vertical tiling – it is not an either or:
And that is it for the text watermark. You can always go back and change the settings if you like. At this point you can go directly to the “Options” tab if you need not add an image watermark, but for demonstration purposes, hit “Next”:
This will take you to the Logo/Image tab. uMark allows you to add an image watermark along with a text watermark if you want (it is optional – you don’t have to have both text and image watermarks; you can have either or):
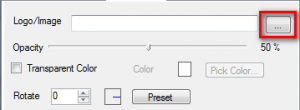
To add an image as your watermark, obviously instead of typing in text, you must browse for an image to add as the watermark. Hit the “…” button:
This will allow you to browse your computer for the image that you desire. Only .BMP, .GIF and .JPG image formats are supported for image watermarks – there is no .PNG support. Also, the program does not resize the image that you are going to use for a watermark nor do you have the option to resize it in this program, so be sure that the image you want to use as a watermark is small enough to fit your image you want watermarked. I added the Pakistani flag as my image watermark:
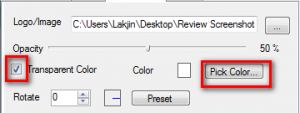
As with text watermark, with a image watermark you can change the opacity, rotate it, change the position, and tile it vertically/horizontally. However instead of font color/size/style and shadow you have the option of making one color transparent on your image. What this does is that whatever color your select, that color will be made transparents on your image. For example, if I select white, the white bar of the Pakistani Flag (the one on the left hand side) will be made transparent. The white color surrounded by the green, however, will not. The purpose of this feature is to enable you to remove background colors. To do this, check “Transparent Color” and pick the color you want to make transparent:
I chose to leave the color for ‘transparent color’ white:
As you can see the white bar that is on the left of the flag is no longer there – it is transparent because uMark thought it was a background color.
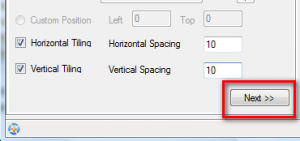
After you are done with all your image watermark settings and you have it looking how you want, hit the “Next” button:
This will bring you to the “Options” tab:
From this tab you will be able to chose what folder you want to save your resulting image in, and what format you want that image in. You can also chose to rename or resize the image. The only required part of this tab is chosing where you want to put your images – the rest is optional.
- To chose what folder to save it in, click on “Select the folder where…”:
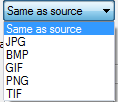
- To change the format of the image once you save it (if you want to leave it the same format as the original, you don’t have to do anything), click on “Same as source” and select the format you desire:
- To rename your image, check “Rename watermarked Image” (if you don’t want to rename your image, skip this step):
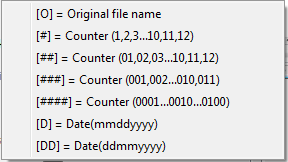
Then, you have two choices. You can either manually enter the desired name for your image by entering that name in the text box that has “[O]” in it by default (delete the “[O]”) or you can use a naming convention. Note that if you decide to manually enter a name and you are adding a watermark to more then one image, they will overwrite each other, meaning only the last image will be saved properly, because you gave them all the same name. If you decide to go with a naming convention, hit “Insert Macro” and a list should come up:
From this list select the ‘macros’ you want to use. You can add as many as you want. Depending on how you structure the macros will depend on the name of your file. For example, lets say the original name of the image you are adding a watermark is “Cool.jpg” and today is Dec 14 2009. If you have this in your text box:
[O][#][D]
The name of the file that is watermarked after you hit “Start” will be Cool1121409.jpg (assuming that you left the format as “Same as source”).
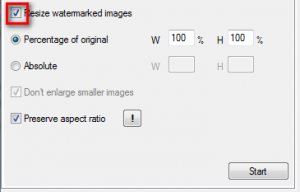
- To resize your image, check “Resize watermarked image” (if you don’t want to resize your image skip this step):
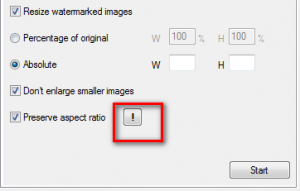
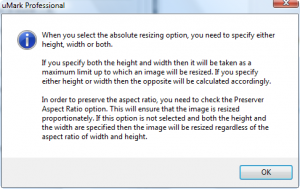
By default “Preserve aspect ratio” is checked – this makes sure that your resulting image is not a different shape, just resized. If you want to just resize by the percentage of the original just change the value in the W/H boxes. If you want to do an absolute resize, meaning you want to specify how big, in pixels, you want the image to be then first you should click on that “!” button and read what uMark says:
After reading and understanding that resize however you see fit.
After you are satisfied with your option settings and you are satisfied with how your watermarks look (you can always go back and change them right now), then hit “Start”:
This will start the actual process of watermarking your image. As I said earlier, if you have multiple images loaded into the program all of them will be watermarked with the same settings – there is no way to chose which one gets what font size, etc. After the watermarking is finished, and it does not take very long, you will get a message telling you “Done”. Also the “Source Images” will have a green checkmark next to them indicating that they have been successfully watermarked:
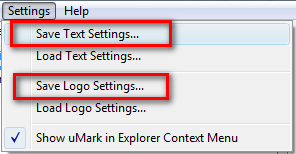
Now that you have successfully watermarked your image, you have the ability to save the text and/or image watermark for future use so you don’t have to recreate them every time:
Whenever you want to use a watermark that you saved previously, just load it and you are good to go – the settings will be imported. All you have to do is hit “Start”.
That said, I feel uMark Professional is a bit “half-baked”, if you get what I mean. The developer still has more than a few corners to rough out:
- The ability to automatically resize watermarks relative to image size needs to be added. If you do batch processing (adding watermark to more then one image at once), and your images are of different sizes you may run into a problem. uMark Professional does not resize any watermark, text or image, to fit the image you are trying to watermark. So if you setup your watermark on an image, and watermark all your images with that setting, the watermark on other images (that are of different size than the first image) may not properly show.
- .PNG support needs to be added for image watermarks.
- Users should be allowed to add multiple text and/or image watermarks.
- Users should be able to resize the image that is going to be used for the watermark image.
- There should be a click + drag interface when it comes to positioning watermarks on the images.
- Drag + drop needs to be added when loading images.
- Whenever you “Load Text Settings” from a previously saved text watermark, the button that shows your font information (“Verdena 10 -B” by default) does not reflect the proper font information in relative to the settings of the loaded watermark. What I mean is every time the tab will display the name of the font that you last used, i.e it will show “Verdena 10 -B” if you just opened the program and loaded the setting. Not a huge bug but still annoying.
This review was conducted on a laptop running Windows 7 Professional 32-bit. The specs of the laptop are as follows: 3GB of RAM, a Radeon HD 2600 512MB graphics card, and an Intel T8300 2.4GHz Core 2 Duo processor.
{rw_freea}
PhotoWham! is an excellent tool that allows you to add text watermarks very easily and very, very quickly.
Amongst the abundance of features FastStone Photo Resizer has, adding text and image watermarks are two of them. However users can only add one text and one image watermark per image.
PicMarkr lets you to add custom watermark (image or text) to your images online and free.
It is useful when you need to protect your copyrights or if you want to add comments
to your photos.-Developer
Picture Shark allows you to add image watermarks to multiple images easily and quickly. It is old, but it still works!
Your local image editor
You can use any image editor such as Photoshop, or free ones such as Paint.net or GIMP to add watermarks. IrfanView will also work for this task. However, programs like uMark make it a lot easier, especially for multiple images, but you have a lot more control if you use an image editor.
{/rw_freea} –>
{rw_verdict2}uMark Professional is OK; it has the potential to be a really good program, but as of right now it is only half-finished – the developer has left out too many small details which have all added up to be a big pain. You are more than welcome to get uMark Professional if you wish, but honestly if I were you I would spend my money on a different watermark software, or use one of the free alternatives mentioned above (PhotoWham, Picture Shark, and FastStone Photo Resizer are all good).{/rw_verdict2} –>

 Email article

