{rw_text}Giveaway of the day for February 5, 2009 is Expense Tracker v1.4
Software description as per GOTD:
Expense Tracker is a simple-to-use accounting system that allows home and business users to track and manage income and expenses. The software is easy to setup, provides one click transaction entry, and it includes a powerful reporting system. With Expense Tracker you can keep all of your accounts in order. You are even given the ability to track you investments and savings accounts. All of this comes in one easy-to-use package, which really is the only financial software tool you’ll ever need.{/rw_text} –>
{rw_good}
- Simple and easy to understand/use.
- Integrates transactions w/ accounts.
- Automatically charts and graphs transactions.
- Can make automatic backups of your data.
- Has a built in currency/exchange rate calculator.
- Ability to update currency rates every day.
- You can password protect the program.
- Has a lot of predefined categories.
- You can export most of your data, including transactions and ‘summary’, to a PDF, HTML, .XLS (Excel) or RTF file.
- Sets X type of payment with X payee as default.
- Supports many different currencies.
- Ability to transfer money from account with X currency to account with Y currency.
- Powerful ability to sort data.
- Nice integration between multiple currency accounts.
{/rw_good} –>
{rw_bad}
- Uses a fair amount of computer resources, especially when launching.
- “Update Currency Rates” is checked automatically.
- You cannot have more then one ‘profile’.
- Once X type of payment is set with X payee, you can’t change the default.
- Doesn’t really display much warning if you are running in the negatives.
- No ‘budget planning’.
- You can’t view daily, weekly or yearly pie graph – only monthly.
- A couple of bugs when transferring money from account to account.
- No ability to ‘reoccur’ events/transactions.
- “Number” for “Accounts” is not replaced with asterisks/hidden.
- Once you create an account, you can’t manually change the balance (you must do it via transactions).
- You can’t ‘archive’ data.
{/rw_bad} –>
{rw_score}
{for=”Features as Described” value=”10″}True I did run into a few bugs concerning the currency exchange, but nothing big enough to lower this score from a 10.
{/for}
{for=”Ease of Use” value=”7″}While this program is pretty easy to use, I feel there could be more automation involved. I felt like I was doing repetitive steps a lot.
{/for}
{for=”Usefulness” value=”7″}Everyone has finances.
{/for}
{/rw_score} –>
{rw_verdict}[tup]
{/rw_verdict} –>
Before I go on, yes I know this requires .NET. But ladies and gentleman, you are on Windows, there should be no question about “should I get .NET?”. Even if you are on 56k, .NET is an essential tool many programmers use…find some way to get it! Leave it to download overnight if you have to. You also don’t need the biggest 150 MB one. You can settle for the ~22 MB .NET 2 or ~56 MB .NET 3; many programs will not need the newest.
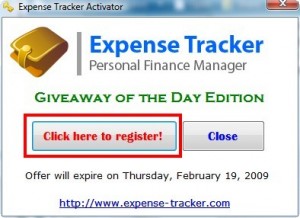
Back on topc: Registration and install went fine. Note that after you run Setup.exe, Expense Tracker will automatically start up (I don’t remember if there was an option during installation to stop Expense Tracker from starting up after install or not). You have to first close Expense Tracker then run Activate.exe. Today’s Activate.exe is not like the normal where you just run it and the program is activated. To activate today’s program, you actually have to click a button after running Activate.exe:
Am I the only one that sees “Offer will expire on Thursday, February 19, 2009”? That is 2 weeks from now. I thought you are only supposed to be able to activate a program within 24 hours. Mmmm…
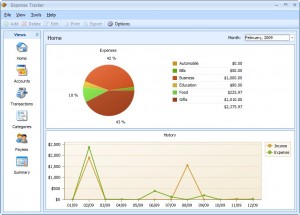
Anyway, the program itself is pretty well organized. Before we go on, let me say that when you first run the program, there is no data what so ever entered. It is all blank. However, my screenshots will contain inputted data because I have been messing around with the program for a while now. And since there is no way to create a new ‘profile’, I am just taking screenshots of what I have. This is what the program looks like:
Basically the program is broken up into 3 parts. The left part, which is the “Views”, you use to navigate from feature to feature. The part of the window left of that is where all the information is displayed. Then there is the top menu where you can access things like options. In the above screen you are actually looking at what you would see if you go to the “Home” view. As you can see there is a pie graph that displays monthly expenses. If you click on the drop down menu in the top right, you can chose different months to view. However, you can only view monthly expenses on the pie graph – you can’t do daily, weekly, yearly, etc. Under the pie graph, as you can see, is a line graph; this line graph plots all the expenses that you have incurred in the past. I was curious as to how far back this graph would go, so I made an entry in 1967 and sure enough the graph graphed it.
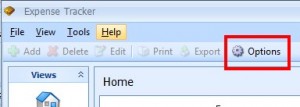
I sort of jumped the gun explaining the “Home” view before I got to the other more important views, but what the heck – you gotta live life on the edge sometimes. So back on topic, what you should do when you first open this program is go to options:
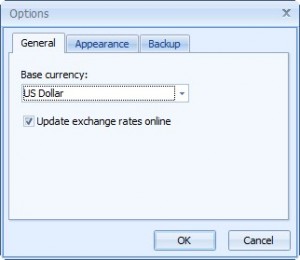
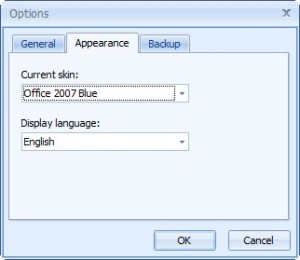
I say go to options first thing because there are a few things I would like to point out that may interest you before you input any data. There are three tabs in the options window: General, Appearance and Backup.
General:
If you do not live in the USA, be sure to change the “Base currency” to the currency used in your country. There are many currencies supported by this program, too many to name. Chances are your currency will be there. Now note that if you, for example, chose “US Dollar” as base currency, this means that the graph, chart and transactions will be done in US currency; when using the currency/exchange rate calculator the US currency will be the base. However, you will still be able to create accounts in currencies other then the US Dollar.
However, more importantly, you see that “Update exchange rates online” checked? Well this option is checked by default. If you leave this checked, the program will periodically connect to some server online (I don’t know which) and update the exchange rates for the day of all the currencies this program supports (there is a built in exchange rate calculator in this program). However, some people, including me, may not be comfortable with letting a program that holds our financial information connect to the Internet. So if you are one of those people, be sure to turn this off.
Appearance:
If you don’t like the Microsoft Office look, you can change the skin. There are 30+ skins available to chose from. Also, you can change the language this program is in. You can chose from English, Russian and Portuguese.
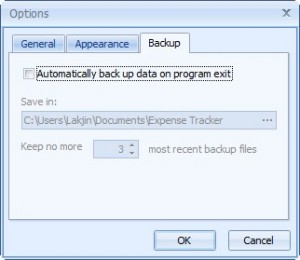
Backup:
This is one of the main reasons why I said go to options first thing. By default, the backup feature of this program is displayed. You may want to consider turning this backup feature on. You see the number “3” where it says “Keep no more…”. That number can go up to 99.
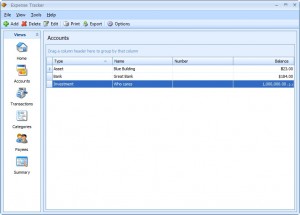
Okay so you set your options and you ready to go. First thing you want to do is go to the “Accounts” view:
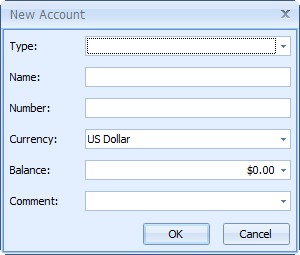
From this view you can add accounts, such as checking or savings account. The “Accounts” in this program are the main foundation because all transactions involve some sort of an account. However, the name “Accounts” is kind of misleading because generally when someone hears “Accounts” he/she thinks “bank account”. Rather, with this program you can create many different types of “Accounts” including credit card, asset, investment, retirement, loan, and more. To add an account, just hit the “+ Add” button that is located at the top. This will bring up a window where you can input your account information:
If you click on the drop down menu for “Type” you will be able to chose checking, savings, loan, credit card, etc. For name, type in whatever you want to name the account. Number is a relative term (like bank account number, or credit card number, etc.) and you can leave it blank if you want. In fact, leaving Number blank might not be a bad idea because the number is not hidden/replaced with asterisks. So if you have like your credit card number in there, and people you don’t trust are around you, you could be in trouble. From currency you can chose what currency you want associated with this account. Since US Dollar is my base currency (what we set in options earlier), by default US Dollar is selected. But I can make this account in UAE Dhiram if I want (in fact I did – look at my third account in the above screenshot). If you change your currency, the dollar sign in “Balance” will change to whatever new sign is associated with your new currency. When you chose your new currency, type in the balance that you want the account to hold. For example, a checking account could have a balance of $1,000.00 or a credit card could have a balance of $1,000.00. Now in both cases, the balance is treated as positive meaning you have that much money. If the balance was put in parenthesis, like ($1,000.00) that would mean that you owe that much money or are in debt that much. Be sure to set your balance carefully because once you create an account you will not be able to manually change the balance – you can only change the balance via transactions.
While we are on the topic of accounts, I should mention that as you make transactions, the appropriate balance is deducted to added (depending on what you are doing) to the respective account you are working with. As I mentioned above, if you go in the negative, the balance will be put in paranethesis: ($1,000.00). However, besides those parenthesis, there is no other visual confirmation/warning that you are going in the red. I really think the developer should add something like this.
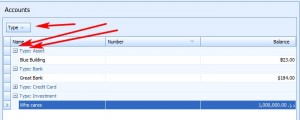
Lastly, see that above the left most column, it says “Drag a column header here…”. If you click + drag a column header there, the accounts will be sorted by that column header and appear in expandable tree formats. For example, I dragged “Type” in the area and now my accounts are sorted by type:
Also, if you right click on a column header, you can chose what columns to view by going to “Column chooser”. A little window will appear with all the columns listed and you just have to drag + drop them wherever you see fit. Keep this dragging + dropping column headers to filter entries and adding/remove columns in mind because this feature is repeated in Transactions, Payees and Summary.
Stay at this account window until you have created all the accounts that you desire to enter transactions about.
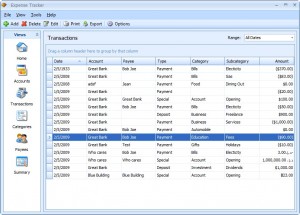
Okay after you have made your accounts, you are ready to start recording transactions. If you go to the “Transactions” view you can see all your past transaction, edit them, delete them, add new ones, and also export your transactions:
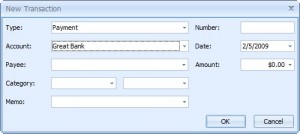
As you can see, I already have many transactions entered. To add a new transaction, just hit the “+ Add” button up top. This will bring up a window where you can input your transaction information:
The three “types” are payment, deposit and transfer. Payment, you are obviously paying the bills or paying someone or paying something. This payment is associated with an account and whatever amount you pay is deducted from that account balance. You can either type in a Payee’s name, which will automatically create a ‘profile’ for that payee that you will find under the payee view, or you can chose a Payee that you have already created a profile for from the drop down menu. Same thing with category and sub category (there are lots of already predefined categories that come with the program you can always add your own). Lastly, “Memo” is just an area to enter notes. One thing to note is that the categories and subcategories associated with the first transaction that occurs with a Payee are the ones that are set by default for that Payee. Meaning that every time you select that Payee, those category and and subcategory will appear by default (although you can always change them from the drop down menu). I have found no way how to alter the default categories associated with the Payee – it just seems the first one sticks. When you are done inputting the appropriate information, hit “OK” and the payment will be recorded on the “Transaction” page. It will also be recorded on the “Summary”, and the “Home” views.
The same thing happens with deposit except you are not paying anyone but rather recieving money.
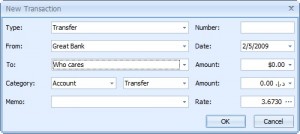
Transfer is a bit different because you are transferring money from account to account:
You just input the amount you want to xfer from one account to another. The one good thing about this program is that it allows you to transfer money from account to account even if they are no in the same currency. Like in the above screenshot, I can transfer from Great Bank, which holds money in UAE Dhiram to Who cares, which holds money in US Dollar. The “Rate” is set to the rate of the currency associated with the “From” account per 1 unit of the currency associated to the “To” account. For example, in the above, the rate is 3.6730 Dhiram per dollar. As I type in the amount of Dhiram I want to transfer, the amount is automatically calculated in dollars. This is pretty handy tool not doing to lie. However, there are a few problems with this tool:
- If you enter an amount in the second “Amount” box, meaning the amount associated with the bank account that is to recieve money, the “Rate” screws up and display “1.000” instead of the correct rate. To fix this, just click on the “…” button then click close on the window that opens up.
- If you type in something in the top box, then backspace it to delete it out to bring it back to 0.00, the rate also messes up. Fix it in the same manner as mentioned above.
When done with your transaction, hit “OK”. The transaction will appear in the list and will be reflected in the “Accounts” view.
Recall earlier that I mentioned you can export your list of transactions. You do this by hitting the “Export” button up top. You can export to PDF, HTML, Excel or RTF formats.
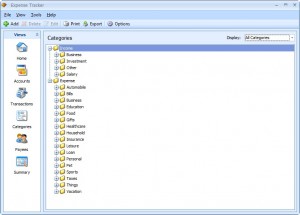
Lastly, before we get to the summary view, there are two ‘house keeping’ views, per se: “Category” and “Payee”. These views help organize your transactions because you can list what category the transaction belongs to and who you are paying.
Category:
All the categories you see above came with the program. “Expense” are the categories that appear if you chose “Payment” when doing a transactions and “Income” show up when you chose “Deposit”. You can add, delete and edit as you please here.
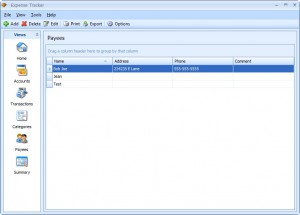
Payee:
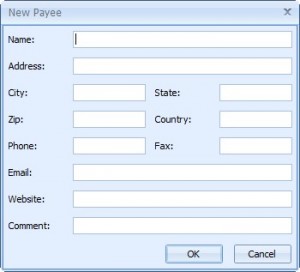
Here you just enter entities that you pay money to (they can also double as people who pay you since you can use them in “Deposits”). They don’t have to be people, but can also be companies, like the city water utility company. This is the type of information you can input for a Payee:
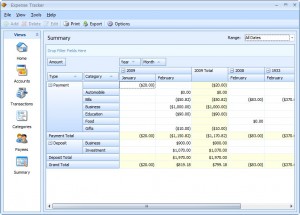
Lastly there is the “Summary” view. This view displays all your transaction in chart/excel format making it easier to digest large amounts of information:
Worth noting is that you can also export these (you can actually export everything but what is in “Home” view”) and that you can change from which time period transactions you view (change “Range” from the top right).
In addition to every thing I mentioned above, there are two more ‘features’:
- Password protection – go to File -> Password to set a password.
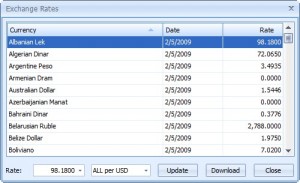
- The Exchange Rates – go to Tools -> Exchange Rates:
Listed are the rates of all the currencies this program supports per 1 unit of your base currency. For me it happens to be US Dollars. Also notice in the bottom left there is “Rate” then a text box. You can use that as a makeshift currency converter. Type in the amount, then click on the tab next to it. Change it and the rate will change. For example, I type in “55” and the tab is “ALL per USD”. I change the tab to “USD per ALL” and I get 0.0102. That means 55 ALL = 0.0102 USD. You can do it the other way around too.
Finally, it is worth pointing out that this program uses a fair bit of computer resources. While it was opening, I saw my CPU usage go from anywhere from 15-84%. Sitting idle, the program used ~30 MB of RAM and quickly jumped to ~50 MB under minimal stress.
Overall, I think this program strength is in how simple it is. However, I think that at times it is too simple and needs more automation. I found myself doing many repetitive acts that I wished the developer had automated somehow (such as repeat transactions of similar things). There should be some sort of “Budget Planning” feature and there should be a huge visual/audio warning when you surpass your budget or go in the negatives in any of your accounts. Also, this program really needs the ability to be able to archive transactions/records because if you use this program for a long time, you will have TONS of transactions and records sitting there annoying you. Lastly, the developer should add the ability to create multiple ‘profiles’ instead of just having one default one.
{rw_freea}
Microsoft Office Accounting Express
This is basically Microsoft’s software to help accountants and business keep track of their finances. It has a great UI, and is feature filled. However, to be fair, it really is not an ‘alternative’ to Expense Tracker because MOAE is definitely for the business environment while Expense Tracker is for the home user. But I just wanted to mention it here. This program is ~170 MB download size fyi.
This program is aimed at home users like Expense Tracker. The features are similar, but Expense Tracker has a more aesthetically pleasing GUI and is easier to use. However, HomeBank uses about 1/3 less RAM then Expense Tracker just in idle and it has a Budgeting option.
This program is very much like Accounting Express in the idea that it is aimed at business. However, I found Accounting Express to be better. But GnuCash is only ~70 MB download size as opposed to ~170 MB of accounting express.
Grisbi is basically another HomeBank, more or less. However, I find it to be a little bit more advanced. It can’t be ruled definitely for home use or definitely for business. It kind of is in between.
{/rw_freea} –>
{rw_verdict2}
For home use, Expense Tracker is pretty good. It is simple, easy to use and easy to understand. The ability to visualize transactions via graphs and a built in currency list/calculator is nice. Password protecting gives you piece of mind. The strength of this program is its simplicity. True there are a few things I would like the developer to add to make this program even better, such as a little bit more automation. Also true that for more complex transactions, and anything bigger then the typical household this program probably won’t be of much use. But as it is now, I see no reason not to recommend it for home use. Thumbs up.
{/rw_verdict2} –>

 Email article
