{rw_text}Giveaway of the day for November 24, 2008 is Smart Diary Suite 4.
[rssless]————————-{/rw_text} –>
{rw_good}
- Password protection.
- You can schedule tasks, events, write notes, and make diary entries.
- Good clean interface.
- Spell check for diary and note entries.
{/rw_good} –>
{rw_bad}
- Too many features ‘disabled’ in Home edition (Home edition is the giveaway).
- A bit of a learning curve to understand all the features.
- You are forced to create a diary before you register the software.
- Password recovery seems to be buggy (a fix should be released in an update soon).
- “Sample entries” does not include a recipe.
{/rw_bad} –>
{rw_score}
{for=”Features as Described” value=”9″}One or two bugs and a bad method of password recovery earn this a 9.
{/for}
{for=”Ease of Use” value=”7″}Fairly easy to use, but still takes some getting us to to understand all the features.
{/for}
{for=”Usefulness” value=”5″}I give this a 5 because it seems that a lot of people may be turned off by all the important features that are disabled.
{/for}
{/rw_score} –>
Installation was event less. Simply run Setup.exe and install the program. Registration was a bit more of a pain, kind of, but still easy to do. When you first run the program, a window will pop up asking you to either 1) Create a new diary 2) Open existing diary 3) Show help 4) Exit the program. There is no way around this window, and if this is the first time opening the program you must create a new diary (read below on how to create a diary). After you create a new diary, you have to go to the menu up top and go to Help -> Register and enter the following (you can copy and paste):
[Removed as per request of GOTD administrator. See Readme.txt that came in the .zip file for registration information.]
Okay so when you first run the program, as mentioned above, you are prompted with a window that gives you the following options:
- Create new diary – here you get to create a new ‘diary’. Creating a new diary is basically like creating a new word file in Microsoft Word. It is the overall file that contains all the information you will input (the file you can carry around with you, send to people, etc.).
- Open existing diary – you open a diary you already created. If you password protected that diary, you will be prompted to enter a password.
- Show Help – this will open up SDS4 help screen.
- Exit Smart Diary Suite – you will exit.
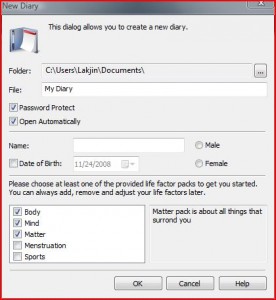
If you chose to create a new diary (which you have to if you are using the program for the first time), this screen will pop up:
The screen it self is pretty self explanatory – you chose the name of your diary, the location you want to save it as, if you want to password protect, your name, gender, date of birth, and ‘life factors’. There are a few things you should know though.
First, every time you create a new diary, this screen will be the default that pops up. What I am saying is that the name of the diary (“File”), by default will always be “My Diary”. So if you create a diary once under the name “My Diary” and you store it in Documents (“Folder”), for example, everytime you try to create a new diary with this default name and try to store it in Documents, you will get an error telling you that the name is already in use. Although the diary name (“File”) will always be displayed by default as “My Diary”, if you change the diary location (“Folder”), that is the location that will load up by default next time you try to create a new diary.
Secondly, the “Open Automatically” box refers to the idea that if you check this box, this specific diary will automatically open the next time you run the program (you will not be prompted with this initial window to create diary, open diary, etc.). You will be able to change this option later on if you want to (Tool -> Options -> General). If you password protect the diary, you will be prompted to enter a password every time you try to open the diary.
Thirdly, if you check “Password Protect”, you will get a chance to set up your password on another screen that will be displayed after you hit “OK”. You can also change this option later on if you want to (File -> Security).
Fourthly, the name, date of birth, and gender options are completely optional – you do not have to enter them or you can chose to enter one, or two, and not the others. I do not seem to find a way to change this after you have created your diary.
Lastly, the list at the bottom that you can check (“Body”, “Mind”, etc.) is the “life factor” list. As described by the developer:
A life factor can be absolutely anything you wish to track, e.g. diet, exercise, mood, energy level, medication and even dreams!
In Smart Diary™ Suite a life factor is a control that permits for monitoring and measuring of any factors that you, as a user, see worthwhile.
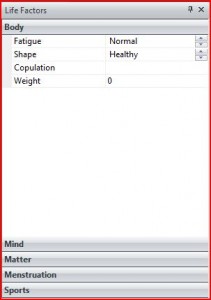
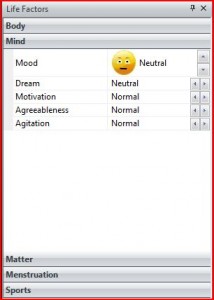
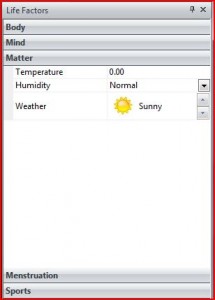
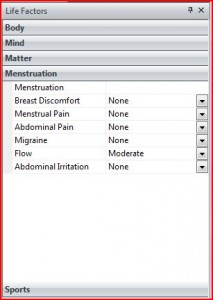
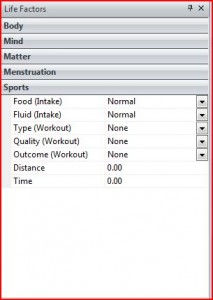
Basically, they are options that let you categorically keep track of how you are feeling, what you did that day, etc. These life factors are used when you create a new ‘diary entry’ in your diary (more on that later). In the home edition, you are limited to 17 life factors. This is kind of tricky, because it may seem that each “Body”, “Mind” thing is a life factor but it is not. It is a “Group” – the actual life factors you cannot see, they are listed under each “Group”. If you chose to use any of these predefined “groups”/”life factors”, you will not be able to create custom life factors because you will be over your 17 life factor limit. You do not have to chose any of them, or you can pick and chose between all of them.
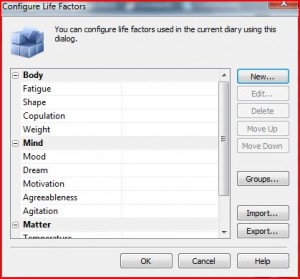
These are the “life factors” that are under the follow “groups” (each little entry, such as “Fatigue” is one “life factor”).
You will be able to change your “life factors”, or add in the predefined ones, even after you create your diary. See Dennis’ comment second comment for clarification.
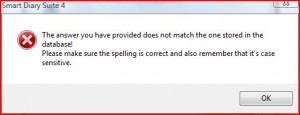
After you are done configuring your diary, and you hit “OK”, if you checked “Password Protection”, you will get a screen that will prompt you to enter your password, a hint and an answer. Whatever password you enter here you will be prompted for this password each time to try to open that specific diary. You do not have to same the same passwords for all diaries. The hint and answer is a way to recover your password if you ever lose it. They work much the same way as the “Secret Question” features do for your emails and such. If you lose your password, the program will display the “hint” and you must enter your answer. Once you enter your answer, you hit “OK” and, inferring from what Dennis said in the first comment below, it is supposed to give you your password. The only problem is, that whenever I enter the correct answer to my hint, and I have verified for sure I am entering the correct answer in the correct case, and hit “OK”, I get an error window that tells me my answer is wrong (there should be a fix for this bug in released in an update soon):
So, instead of hitting “OK”, I hit “Extract Password”. “Extract Password” is the method to recover your password if you forget the answer to your hint. Once you hit “Extract Password”, you will be prompted to save a file in a location on your desktop. A file will be saved in that location and your password will be saved in the file. Then you have to send that file to support in order to get your password back. This is method of recovering password is not the best way of doing things in my opinion and I would never use it because I do not want some technical support person working for some random company know my password since I may be using that password for many different things. Although as Dennis (see comment below) said that this file does not contain any information but your password, I would suggest avoiding this method.
Once you are done creating your diary, you will be prompted by the program to enter “sample entries” in your diary. This will create sample tasks, events, diary entries, and notes. I suggest doing this because this will help you understand how the program works a bit better. The one thing it does not enter is a sample recipe (under nutrition).
After that, you will be prompted to create a new “diary entry” since it is the first time you are running that diary. These two prompts only happen the first time you open your new diary. Each time after the first time you open you diary, if you do not have the diary set to open automatically, you will be prompted to set the diary to open automatically. It is very annoying and there does not seem to be a way to disable this feature yet (outside of setting the diary to open automatically).
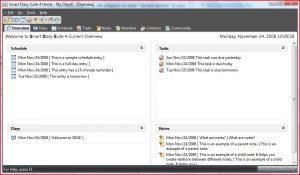
After you get through all of the above mentioned, you will be brought to the “overview” screen. What the “overview” screen does is that it displays your schedule (events that you set), your tasks, your diary entries and your notes. For example:
If you click on any of the items on the overview screen, the program will bring you to that item. What I mean is that if you click on the first diary entry (in my example it is “Welcome to SDS4!”) the program will switch to the “diary” tab and bring up that diary entry.
There is one small bug here that I would like to mention. When you open your diary for the first time, if you chose to let the program enter some “sample entries” for you, nothing will show on the “overview” screen until you navigate to another tab, such as “diary”. Other then that, every time you navigate to the “overview” screen, it will show you all that I mentioned above.
You can navigate the program by clicking on the tabs (“Overview”, “Diary”, etc.) located near the top of the window.
Under “Diary”, you can enter new diary entries. To create a new diary entry, you can either
- Right click in the box that is located right under the tabs (“Overview”, “Diary”, etc.) and chose “New Entry”.
- Press Ctrl + N
- Click the “New Entry” button from the top button menu (located under the “File”, “Go”, etc. menu)
You can also edit entries, delete entries, or add each entry onto your “schedule” (right click on diary entry -> add to schedule).
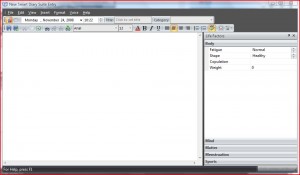
There is also a graph box near the bottom. The graphs work together with life factors, whatever you enter in life factors can be plotted on a graph and this is what shows the relation between your various life factors and diary entries (thank you Dennis for clarification). I did not really understand what the graphs were for (initially), so I hit “x” on the box and I could not figure out how to display the graph box again! But now I know (thanks again to Dennis): To turn the graph back on, go to the View menu and select Diary, then Graph.
When you create a new diary entry, a window will pop up where you can configure your diary entry.
The editor for diary entries is very flexible – it is a “rich text editor” very much like wordpad (not notepad!). You can type in there, add pictures, tables, text or image boxes, or voice recordings. You set the title of the diary entry and chose what category, if any, you want to place the diary in. You can also change the time and date of the diary entry. From the right hand menu, you can configure the “life factors” you have. Basically for each diary entry, you are combining your writings with how you feel for the day. After you are done, just hit save and exit (the second button from the left on the button menu bar).
To edit, add, remove “life factors” you have to go to “Diary” from the very top menu -> Customize -> Configure Life Factors. You can add, delete, edit, import, export, etc.:
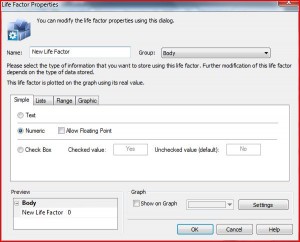
When creating a new factor, you will be able to mess with a lot of settings:
It is a very complicated process. Personally, I do like the “life factors” feature of this program because I do not find them very useful, but to his his own I guess.
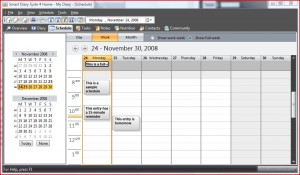
Under the “Schedule” tab, you can add events onto your schedule.
Just double click on the time spot you want to add a schedule or hit “New Entry” button from the top. A box will pop up were you can title your event, set the start/end times, add a reminder, add a description of the schedule and set it to reoccur if you wish. You can change your schedule view to show just the day, the week (work week or whole week) or the month.
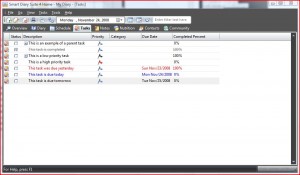
Under “Tasks” tab you can manage your tasks.
You can mark each task as complete by checking the box under “Status”. You can add each task to your schedule by right clicking -> Add to schedule. You can add, delete, or edit your tasks. You can also set “child tasks” – they will be displayed under the “parent” task in a drop down menu. You can right click -> New Task or you can hit the “New Entry” button from the top. A window will open where you can set the “Description” (aka title) of the task, task priority (low, normal, high), what category the task belongs in, the due date, what percentage of the task is complete, and a full description of the task. What is missing here is the ability to add reminders for the task. In order to add a reminder for the task, you must add the task to your schedule (hit “Create Schedule” button). After you are done, just hit “ok”.
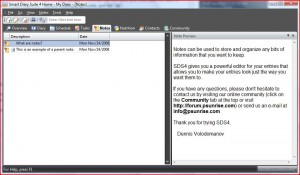
Under “Notes” tab you can add notes.
This section works very much like the “diary” tab, with a couple of differences:
- You cannot add “life factors” to your notes.
- You cannot edit the date or time of each note entry.
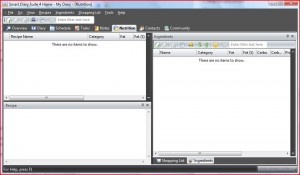
Under “Nutrition” tab you can manage recipes and keep track of the “nutrition” of those recipes.
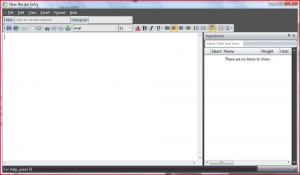
You add a new recipe much of the same way you added a new entry for diary: Right click -> New entry, Ctrl + N or the “New Entry” button from the top. When you add a new entry, the following window will pop up:
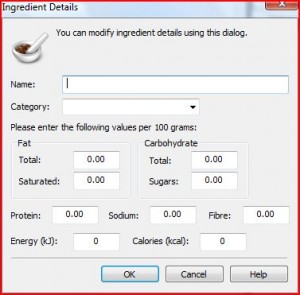
In the left side box, just type your directions for how to use/make the recipe. In the right side box, you can enter ingredients for the recipe. Right Click in that box -> New Ingredient and this box will pop up:
You can mess around with the values how ever you please. Once done with your recipe, hit “Save and Exit”. You will be brought back to the “Nutrition” tab. Now that you have a recipe, click on it and navigate to the right hand box. Near the bottom there is a “Shopping List” tab. Here you can create a shopping list which you need to create that certain recipe.
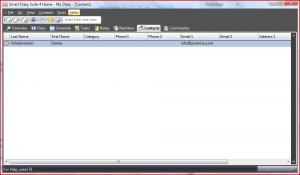
Under the “contacts” tab, you can manage your contacts.
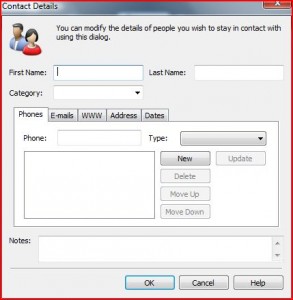
Right clicking on a contact will allow you to edit the contact, delete the contact, send an e-mail to the contact, or visit the contacts website. You add a new contact much of the same way you added a new entry for diary: Right click -> New entry, Ctrl + N or the “New Entry” button from the top. When you add a new contact, you will get a window where you can enter information on that contact such as name, address, phone number, email, etc:
Hit “ok” and you will be brought back to the “contacts” tab window.
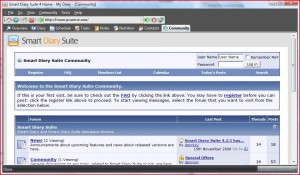
Under the “community” tab, you will be brought to the online forums on the developers website.
In all actuality, this “community” tab is just like a web browser – if you type in a URL in text box near the top, it will navigate you to that website.
Other then that, there are a bunch of options you can change when you go to Tools -> Options. Under “General”, as mentioned above, you can can if you want a specific diary to open at start up of the program. You can also set the program to open on windows boot, change the theme of the program, change which tab is displayed when the program opens up (default is “overview”) and a few other options. Under “Advanced” you can enable/disable any of the “tab” features I mentioned above. Under “Privacy” you can set the program to ask you for a password every time you minimize the program or if you have been inactive for X amount of minutes. All the other subheadings in menu give you some customization over their respective features – check them all out.
There is one major feature that is disable in the home edition, which I think the developer made a major blunder in doing because this is the one feature many people would need: the medical features.
- Pain Map, which allows you to mark sensations or areas of acute discomfort and strain on a body schematic (the pain map), is limited in the home edition (see Dennis’ second comment below).
- Medicine, which lets you keep track of medical prescriptions, when to take them and for how long, is disabled in home edition.
- Additional parameter module aimed at Fibromyalgia patients, which allows to track life factors specific to that sickness and provides an easy way to start keeping a detailed log of your condition, is disabled in home edition.
Overall, I think this is a unique program that has potential but seems to be it’s worst enemy by forcing people to pay 70 bucks for the best features – the medical features.
One thing I would like to address. Some other poster on GOTD mentioned that he is weary about allowing internet access to this program since it contains such personal information. Originally, I agreed with him, and to some extent still do. While I am not saying it is a malicious program, but you store very personal information on this program and allowing it to access the internet makes me uncomfortable. But Dennis, who is the developer for this program, has reassured me that no information is ever sent to him or any server via this program. See his comments (the second one) below for clarification.
One comical thing about this program: when you are creating a new diary, you get to chose your gender. Even if you chose “Male” you can still add the Menstruation “life factor” group XD.
Free Alternatives:
Rainlendar is an alternative to the schedule/task feature of this program.
Rainlendar is an excellent, excellent tool that helps you keep track of your events and tasks. With Rainlendar, you can:
- Create a “To Do” list, and an “Events” list.
- Set Rainlender to remind you of your task or event X amount of time before it happens (days, hours, minutes depending on what you choose.
- Set priorities to each tasks (high, medium, low, none) to help prioritize yourself.
- Once a task is completed, you can make it go away by Right clicking the task -> Completed.
- Set a task or event to be reoccurring.
- Display both lists directly on your desktop alongside a calendar in the form of “widgets” (kind of).
The interface is very easy to use and adding/removing a task/event is also easy to do. Excellent program!
Sunbird is also an alternative to the schedule/task feature of this program. Sunbird is a calendar/task/event management/reminder program by Mozilla.
EssentialPIM (thx Terence)
EssentialPIM does everything this program does without the “diary”, “nutrition” and “life factor” features. It has a few extra features life exporting/importing events and notes. You can use the “notes” feature as a diary if you want. EssentialPIM also uses less memory (~30MB vs ~18MB)
Health is a software package for monitoring and graphing of blood glucose, blood pressure (systolic, diastolic, and pulse), and weight. The data can be shown as a line or a bar graph. Various types of statistics are utilized to better interpret the data. The data and graphs can be printed for doctor visits. Various web site URL’s are contained in the Help menu to assist beginners in understanding and manage diabetes.
-Download.com
—-
Besides http://healthdiabeticsoftware.com/ I cannot seem to find much information on the developer, so just be weary while using it. I would not let it have internet access.
The Glucose Tracker simplifies glucose data logging. The software automatically saves glucose level, relationship to the meal, and time of measurement. In addition to being a convenient data logger the software is also a voluble tool for glucose level longitudinal trends analysis. This longitudinal analysis may help you and your doctor decide on the best medicine and help adjust daily drug dosage.
-Download.com
—-
The developer for this program seems to develop a lot of medical programs, but again I would not let this program have internet access, just to be safe.
The program features a full fledged calorie counter with over 30,000 foods. Enter in your foods with grams, or use easy units. The program can convert between almost any units automatically. To make keeping a journal even easier, you can create meals, meal plans or even download plans from the Internet. The search will learn your preferences and makes searching even faster. You can balance your diet with your exercise. The program features hundreds of activities, in a powerful, easy to use calculator. You will also be able to track your progress with the journaling function, and see how your body works with powerful progress reports. Also included are a recipe editor, and a tool to make shopping lists.
-Download.com
PMnet Verdict: Honestly, this could be a very nice program for anyone that wants a program that will let you keep a digital diary and sync it with your schedule, and tasks. The extra features of nutrition and contacts are a plus. But I do not think the “life factors” feature is very useful, especially since it is limited, but some people may find it useful. If this program had the “medicines” feature enabled, it would be a definite keeper.
As for keeping this program, I would suggest using EssentialPIM because it has less “bloat” features, uses less memory, and it always free. Combine EssentialPIM with Calorie Balance Diet, and you have everything SDS4 does.
Health and Glucose Trackers seems like good programs for diabetics, but I do not have diabetes so I really do not know how to use them.
[/rssless]

 Email article
