 Email article
Since Windows XP, multiple screens support has improved so much. I still remember the first time I set up a projector in Windows XP for my teacher- it seemed to be a hardest work for me. However, each versions after XP, the way to set up multiple displays got easier and easier. In Windows 7, I can say that multiple screens supporting was perfect with more options and faster switcher. But how about Windows 8? The answer is “better.” In Windows 8, not only there are so much new features, but you also have more ability to customize your screens. In this article, I will introduce you these new things and how to take their advantage.
HOW TO SELECT BETWEEN SCREENS
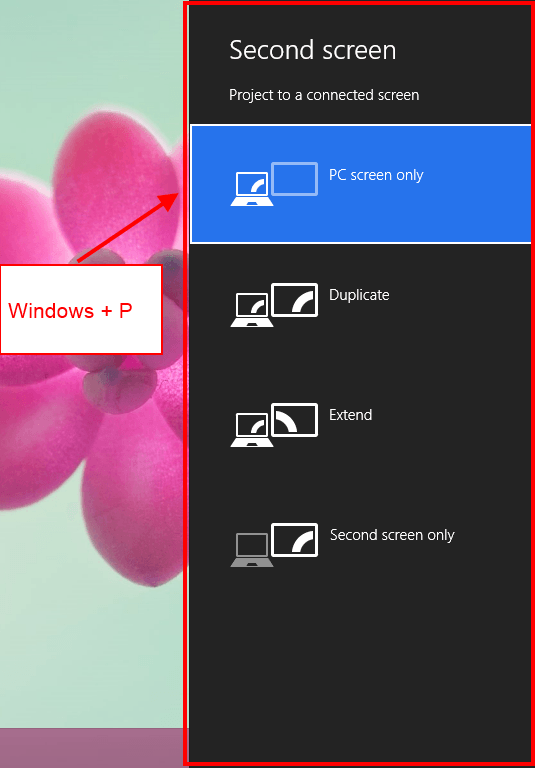
First of all, you have to plug all of your needed monitors in. If you have two monitors now, you can select the display mode by pressing Windows + P hotkey (on tablet, you can swipe from the right screen edge, choose “Devices” and select “Second screen.” You will see a panel that show four options, what you have to do is select the option you want.
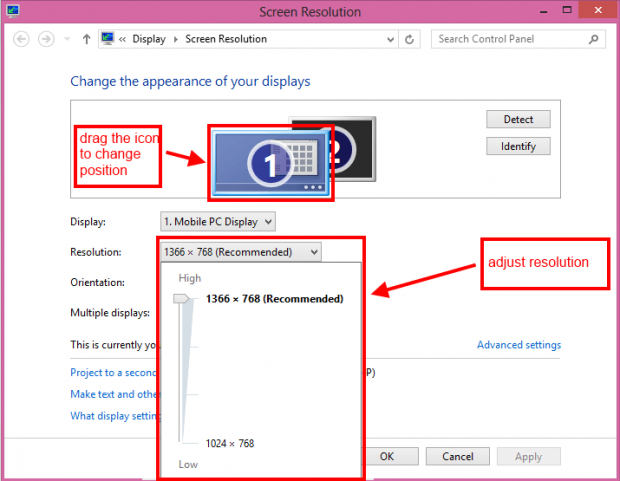
In most case, if screens are different in resolution, they will adjust automatically. However, you can also change their resolution and some advanced settings by right click/long tap on the desktop and choose “Screen resolution.” In the Screen resolution window, you can see how many screen you already connected and their size compare to each other. If you not sure which screen the number belongs to, you can click “Identify” button; it will show a big number on the screen.
By default, the screens are side by side. For example, I have screen number 1 is on the left and screen number 2 is on the right; that means when I move the mouse to the very right side of #1 screen, the cursor will be continued move to #2 screen. Otherwise, I may place #1 screen above #2 screen and what I want is the cursor will appear in #2 screen when I move it from the bottom edge of #1 screen. So that, the system allows me to change your screens’ position. To do this, you just simple drag the big screen icon in “Screen resolution” window to which position you want. After that, you need to click “Apply” to see your change.
In “Screen resolution” window, you can also change a screen’s resolution by select that screen and click the drop down “Resolution” menu to pick a screen resolution.
HOW TO CHOOSE A SPECIFIC WALLPAPER FOR EACH SCREEN
One of the improvements in Windows 8 about multiple screen settings is the wallpaper customization. Unlikely to Windows 7, Windows 8 allows each screen has its own wallpaper.
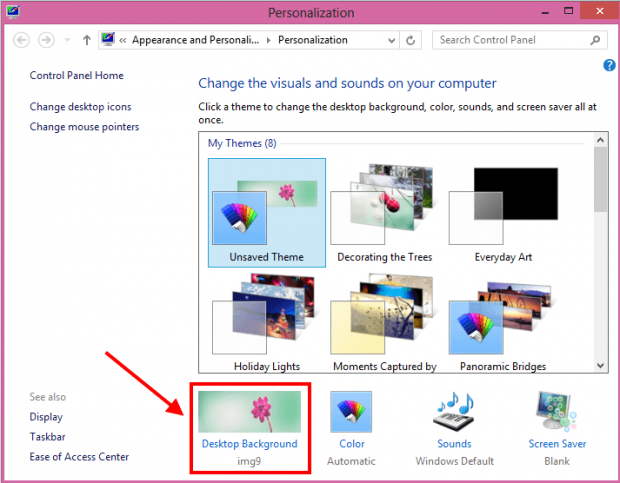
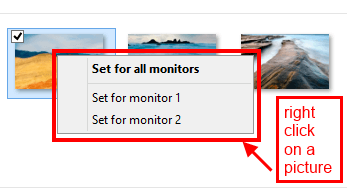
You can simple select a wallpaper for a screen by right click/long tap on the desktop and choose “Personalize.” In the new window, you need to choose “Desktop background” icon that places at the bottom. What you have to do next is right click/long tap on a wallpaper you want and select “Set for monitor x”(x is the order number of a monitor).
HOW TO USE “PANORAMIC WALLPAPER” FOR MULTIPLE SCREENS
In Windows 8, there is a new kind of wallpaper called “Panoramic wallpaper” which is a panorama photo that pans through your screens.
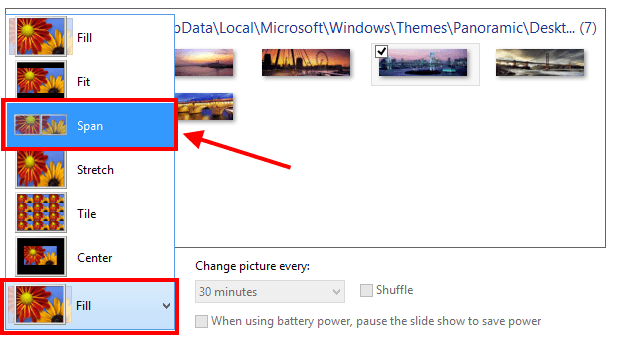
What you need first, of course, is a panorama photo. You can go to Windows website to download many Panoramic wallpaper packs. When you are ready to go, you need to choose a panorama photo in “Personalize” window then in the “Picture position” menu, you have to choose “Span” to make your wallpaper lay through the screens. After that, you just click “Save changes” button and you are done.
HOW TO MODIFY TASKBAR BUTTONS FOR MULTIPLE SCREENS
The biggest and most-wanted feature about multiple screens support in Windows 8 is the ability to show the Taskbar on all screens. Moreover, Windows 8 also have options to help you manage opened windows easier by using the Taskbar.
First of all, you have to right click/long tap on the Taskbar and choose “Properties” to open Taskbar Properties dialog. By default, the option “Show Taskbar on all displays” is selected, you just need to focus on “Show taskbar buttons on:” menu. There are three options in this menu.
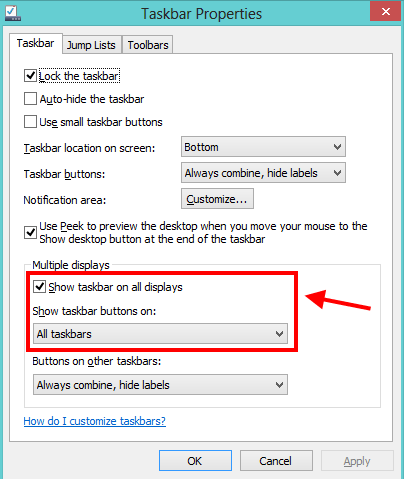
- All taskbars: show the same full Taskbar with the buttons of all windows on all screens.

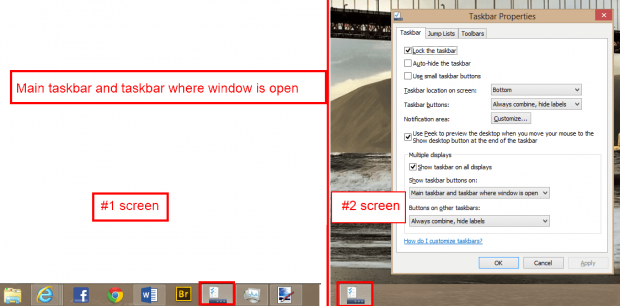
- Main taskbar and taskbar where window is open: show the full Taskbar on the main screen, and in another screen, just show the buttons of the windows in that screen.
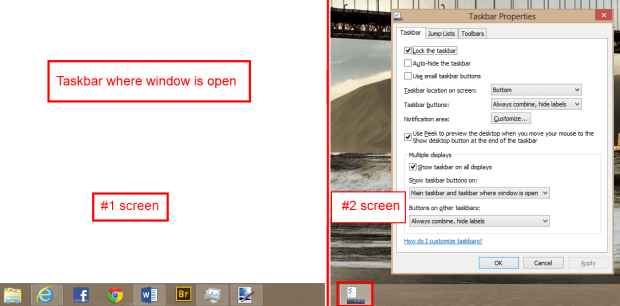
- Taskbar where window is open: show the full Taskbar in the main screen, except the buttons of windows that are not open in this screen; and in another screen, just show the buttons of the windows in that screen.
After you done with your settings, you need to click OK button to apply all changes.
Additionally, in Windows 8, each screen has its own hot-pots to open Start screen, App switcher, and Charm bar. Like desktop apps, Windows Store apps also can move between screens. To do that, you just drag the app to which screen you want.
CONCLUSION
In my opinion, these new functions in multiple screens support of Windows 8 are very helpful. It makes me work with two or three screens without any confusion. Hope you can feel like that too.


