{rw_text}Software reviewed in this article:
Version reviewed:
v10.0 Build 9105 (18.11.09), Professional Edition
Supported OS:
Windows 2000 Professional SP4/XP Home/XP Professional/Vista/Win7
Price:
$49.95 (USD) but you can get v9.5 for free for a limited time at Giveawayoftheday.com!
Note: v9.5 is the exact same as v10 except v9.5 does not include WinPE bootable media.
Software description as per the developer:
This highly-rated tool set for backup and recovery provides powerful features to effectively protect valuable company data and systems. Experienced Windows users, Boot Camp users, system administrators and IT experts leverage robust technologies and time saving wizards to safely backup – and restore – the company’s servers, workstations, and laptops. Use Drive Backup Professional regularly and profit from an absolutely reliable protection of your system.
{/rw_text} –>
{rw_good}
- Performs image-level and file-level backups.
- Multiple different backup methods, including full and differential backups.
- Can backup files which are currently being used.
- Can create bootable CD/DVD (Linux based and WinPE) or bootable USB/flash drives.
- Can backup to multiple different locations, including locally (on your computer or external media), or remotely (on a network computer or FTP).
- Can create copies of whole partitions or hard drives.
- Ability to automate tasks, either using a scheduler or cyclic backup.
- Handy “smart backup” feature.
- Users can do full restores, or selective restore.
- Has basic hard drive management features, such as partitioning and recovering deleted partitions.
- Has a feature to make migrating between different computers less painful.
- Has handy step-by-step wizards to guide the user when using a feature.
{/rw_good} –>
{rw_bad}
- Lacks a little bit in terms of speed of backup creation and compression level vs. rival software.
- Huge download size!
{/rw_bad} –>
{rw_score}
{for=”Ease of Use” value=”10″}Paragon Drive Backup Professional has many, many features so one may feel a little bit overwhelmed; however Paragon has fairly extensive documentation, and most every feature has a step-by-step wizard to guide you. So, yes you may feel overwhelmed by the amount of features available for you to use, but overall Paragon Drive Backup Professional is very easy to use thanks to the documentation and step-by-step wizards Paragon provides.
{/for}
{for=”Performance” value=”8″}Some aspects of performance can be a improved a bit when compared to rival software, but overall performs very well.
{/for}
{for=”Usefulness” value=”10″}With so many features, and backups being an essential task everyone should conduct, I don’t really know of many people that wouldn’t find this program useful.
{/for}
{for=”Price” value=”7″}$49.95 may seem a bit high, but it is about the same as other rival software, so it is a fair price; however a drop in $10 would make the product even more competitive.
{/for}
{for=”Final Score” value=”9″}
{/for}
{/rw_score} –>
{rw_verdict}[tupr]
{/rw_verdict} –>
Paragon Drive Backup Professional is a data backup program that aims to provide you with all capabilities related to backing up data, plus a few extra features to add icing on top of the cake, so to speak.
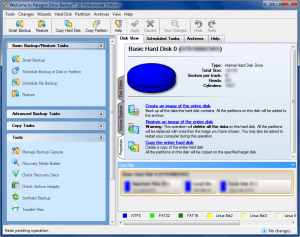
This is what Paragon Drive Backup Professional’s main program window looks like:
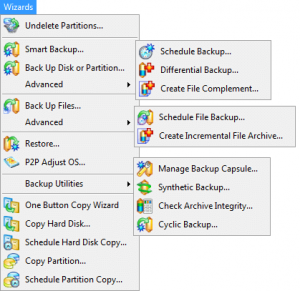
PDBP (Paragon Drive Backup Professional) allows you to perform two different types of backups: image backups, and file backups. Image backups are intended for backing up whole hard drives or partitions; file backups are intended for backing up only select files or folders. Image backups provide much better compression, and are the better option for conducting backups of your whole computer. File backups provide better backing up and restoring speed, and are the better option if you want to backup only a select number of files or folders. (Note: Both “image” and “file” backups create same type of archives.) Clicking on the “Wizards” drop down menu gives you access to both image and file backing up capabilities, in addition to the other main features of PDBP:
- Undelete Partitions – this feature allows you to, well, undelete partitions. In other words, it helps you try to recover deleted partitions on your hard drive(s). The thing you should note, however, is that you must have unallocated space on your hard drive to run use feature; if you don’t have unallocated space, the “Undeleted Partitions” wizard won’t even start.
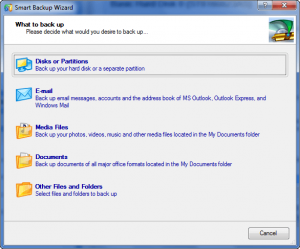
- Smart Backup – smart backup can be considered a user-friendly feature of PDBP. In other words, smart backup is not an explicit feature – it isn’t a special backup mode; rather it provides users with easy access to create backups of specific things:
Aside from the “Disks or Partitions” and “Other Files and Folders” options (which basically are the same thing as the “Back Up Disk or Partition” and “Back Up Files” selections that I will discuss later on), the other three you can’t access from anywhere else in the program. That is not to say you can’t make backups of your e-mail, media files, or documents from places in PDBP, but rather I mean that you won’t find such quick and easy access to these particular files anywhere else.
- Back Up Disk or Partition – this option allows you to create image backups of whole hard drives or partitions; you are allowed you select multiple hard drives/partitions to store in the same image backup if you wish. For each image backup, you are allowed to control the compression level, make the backup archive automatically split at a specific size, password protect the archive, and use filters to filter out which types of file are not included in the backup. You also can select if you to make it an incremental backup as opposed to a full backup (incremental backup only stores the changes that were made since the last incremental or full backup whereas a full backup makes a backup of the whole partition or hard drive, not discriminating between new or old files), and some other housekeeping options.
You are allowed to store the backup archive locally (on your computer or external media connected to your computer), remotely (to a network location or to FTP), to a “physical partition”, or on a CD/DVD.
You can either opt to run the backup immediately, schedule it to run automatically at a later time, or create a “script” out of it (discussion on what scripts are later).
(“Back Up Disk or Partition is the same feature as “Disks or Partitions” from “Smart Backup”.)
- Advanced -> Schedule Backup – this options allows you to schedule image backups to automatically occur, similar to the scheduling option I just mentioned for “Back Up Disk or Partition”. You are allowed to schedule the backup to occur once (you specify the time and date), at system startup, at logon, on a daily basis (you set the initial date and time, and set what daily intervals you want the backup to rerun), on a weekly basis (you set the initial date and time, and set what weekly intervals and on which days of the week you want the backup to rerun), or on a monthly basis (you set the initial date and time, and set what day of each month you want the backup to rerun). You can set it so your computer is automatically shutdown after a scheduled backup is run. You can’t schedule a backup to be stored on a CD/DVD (for obvious reasons), but you can select to store it locally, remotely, or to a physical partition.
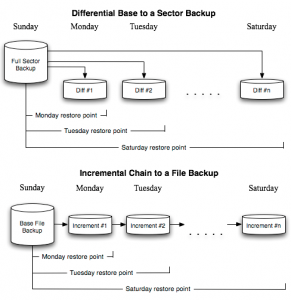
- Advanced -> Differential Backup – this option allows you to perform differential image backups. A differential image backup is a backup that “adds on” to an already existing image backup archive – it backups up all new or changed data since the last full image backup, but ignores the data already present in the backup archive. In that regard, using differential backup is different to the already mentioned image backup features because you must have an already existing backup image archive to use differential backup. The difference between a differential backup and an incremental backup is the fact that with differential backups you can restore from each point of the differential backup. Take a look at these two charts (made by Paragon) if you are confused:
- Advanced -> Create File Compliment – this is similar to the incremental backup feature I have already discussed, except instead of creating an incremental image backup, it creates an incremental file backup of select files and folders and attaches it an already existing full image backup archive. You need an already existing image backup archive to use this feature.
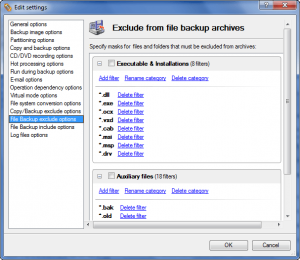
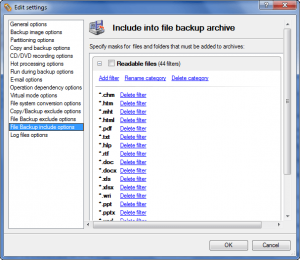
- Back Up Files – this feature allows you to create file-level backups instead of image-level backups. Instead of specifying whole partitions or hard drives, you select specific files and folders to backup (technically you can still select a whole partition to backup, but if you are going to do that you are better off doing an image backup). When creating the file backups, you are allowed to specific “file masks”. There are two types of file masks you can use: include masks and exclude masks. Exclude masks allow you to designate which types of files to not include in a backup, while include masks allow you to exclude all files from the backup that are not specifically the type that you specify in the mask. You can specify multiple masks (include and/or exclude), each for a different file type, if you wish. There are actually very handy pre-created groups of masks that you can use, if you want, for easy inclusion exclusion of specific types of files, like executable, images, etc. You can, of course, create your own masks. You are allowed to run the backup immediately, schedule it, or create a script out of it.
Unlike image backups, however, you cannot store file backups to FTP or on CD/DVD; and you can only store to network computers if you have direct access to network folders. Otherwise, you must store locally or external media connected to your computer.
- Advanced -> Schedule File Backup – this option allows you to schedule file backups to automatically occur, similar to the scheduling option I just mentioned for “Back Up Files”. You are allowed to schedule the backup to occur once (you specify the time and date), at system startup, at logon, on a daily basis (you set the initial date and time, and set what daily intervals you want the backup to rerun), on a weekly basis (you set the initial date and time, and set what weekly intervals and on which days of the week you want the backup to rerun), or on a monthly basis (you set the initial date and time, and set what day of each month you want the backup to rerun). You can set it so your computer is automatically shutdown after a scheduled backup is run.
- Advanced -> Create Incremental File Archive – this option allows you to create an incremental file backup, similar to how you can create incremental image backups. You must already have an existing file backup archive to use this.
- Restore – this option allows you to restore from your backups. You can either restore whole hard drives, whole partitions, or select files from backup archives.
- P2P OS Adjust – this option is actually very interesting. It aims to make it easier for you to migrate from one computer to another (i.e. you made a backup of your old computer and then restored the backup of the old computer onto a new computer with different hardware). It does this by “by injecting the required drivers crucial for a migration of this kind.” However note that 1) You need to already have the drivers on hand for the new computer (unarchived and not in an .EXE format) 2) You need to have already restored the image backup onto the new computer 3) You must have burned a WinPE bootable media – you can’t use this feature from Linux based bootable media or from within Windows.
- Backup Utilities -> Manage Backup Capsule – PDBP has a nifty feature that allows you to create a “backup capsule” on your hard drive. Essentially, a backup capsule is a dedicated partition on your hard drive used solely for the purposes of storing your backup archives. When creating a backup capsule, you are basically partitiong off a section of your hard drive. After creating a backup capsule via you will have the option to “Save to Backup Capsule” when creating image or file backups.
Aside from allowing you to have a dedicated space on your hard drive to store backups, another advantage of the backup capsule is the fact that it allows you to “embed” recovery media onto your computer; in other words you will no longer have to insert a CD to boot from recovery media – you will be able to boot from recovery media directly from the backup capsule. (That does not mean you shouldn’t create CD/DVD/flash drive recovery media; it just means that for this specific computer you won’t need one – if the computer crashes you will need a CD/DVD/flash drive recovery media that you can use on a different computer.)
- Backup Utilities -> Synthetic Backup – this feature allows you to change the properties of an already existing backup archive (i.e. password protection, compression level, etc.)
- Backup Utilities -> Check Archive Integrity – this feature allows you to verify the quality/integrity/consistency of already existing backup archives (i.e. check for possible corruption of data).
- Backup Utilities -> Cyclic Backup – this feature is basically the same thing as “Schedule Backup” for image backups, except it adds in the option for you to create a differential backup instead of only being able to do a full/incremental backup.
- One Button Copy Wizard – this feature allows you to copy a whole hard drive to another whole hard drive. You must have am empty hard drive for this operation to occur. You are allowed to perform incremental copy (as opposed to full copy), perform a full sector-by-sector copy (as opposed to only copying data), use exclude masks, automatically resize partitions so that their size is proportional on the second hard drive as it was on the first hard drive, and to eliminate any unallocated blocks between partitions. Take note that “One Button Copy Wizard” automatically selects which hard drive to copy from and which hard drive to copy to, and the operation automatically occurs after 10 seconds.
- Copy Hard Disk – this is the exact same thing as “One Button Copy Wizard” except you must manually select which hard drives to copy from and which hard drives to copy to, and the operation does not automatically occur after 10 seconds.
- Schedule Hard Disk Copy – this option allows you to schedule a hard disk copy. You are allowed to schedule the copy to occur once (you specify the time and date), at system startup, at logon, on a daily basis (you set the initial date and time, and set what daily intervals you want the copy to rerun), on a weekly basis (you set the initial date and time, and set what weekly intervals and on which days of the week you want the copy to rerun), or on a monthly basis (you set the initial date and time, and set what day of each month you want the copy to rerun). You can set it so your computer is automatically shutdown after a scheduled backup is run.
- Copy Partition – this option allows you to copy a partition from one hard drive to another. You must have enough unallocated space on the second hard drive to perform this task, and the partition is exactly copied. The thing to note here is that all file systems can be copied, not just NTFS.
- Schedule Partition Copy – this option allows you to schedule a partition copy. You are allowed to schedule the copy to occur once (you specify the time and date), at system startup, at logon, on a daily basis (you set the initial date and time, and set what daily intervals you want the copy to rerun), on a weekly basis (you set the initial date and time, and set what weekly intervals and on which days of the week you want the copy to rerun), or on a monthly basis (you set the initial date and time, and set what day of each month you want the copy to rerun). You can set it so your computer is automatically shutdown after a scheduled backup is run.
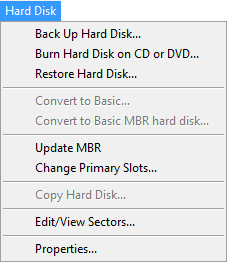
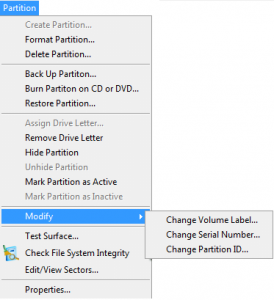
Aside from the main features of PDBP that I just mentioned, PDBP has other basic hard drive management features also:
(“Back Up Hard Disk”, “Burn Hard Disk on CD or DVD”, and “Restore Hard Disk” are the same feature – except with different interfaces – as the backup and restore features I already discussed under “Wizards”.)
(“Back Up Partition”, “Burn Partition on CD or DVD”, and “Restore Partition” are the same feature – except with different interfaces – as the backup and restore features I already discussed under “Wizards”.)
Like all other Paragon software, PDBP supports FAT16/32, NTFS, Linux EXT2/3/4, Linux Swap/Swap2, and Apple HFS file systems.
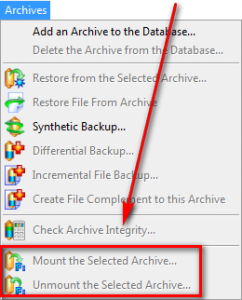
PDBP allows you to “mount” and “unmount” backup archives and explore them, similar to how you would mount and unmount disk images. To do this, go to “Archives” -> “Mount the Selected Archive” or “Unmount the Selected Archive”:
Once an archive has been mounted, you can interact with it similar to how you interact with any partition on your hard drive (i.e. via My Computer).
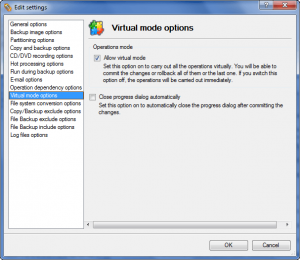
Take note that all actions you take in PDBP are done “virtually”. In other words, you tell PDBP to do something, it adds that task onto a “to do” list – you must execute that “to do” list by clicking the “Apply” button. Until you hit the “Apply” button, no changes will be made to your computer.
Last but not least
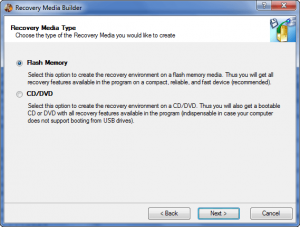
- You can create CD/DVD or USB/flash drive recovery media (Linux based or WinPE) via “Tools” -> “Recovery Media Builder”:
If you want to make WinPE recovery media, you first need to download the WinPE ISO from Paragon’s website (login to your account, a download should be available for you there). If you are making Linux based recovery media, there is no need to download anything extra – just run this wizard and make the media.
- You can heck the integrity of recovery media via “Tools” -> “Check Recovery Disks”.
- There is a “Files Transfer Wizard” (“Tools” -> “Files Transfer Wizard”) that allows you to easily transfer files from location A to location B. It is primarily intended for use via recovery media (when you can’t boot into Windows but want to recover some files), but can also be used while not using the recovery media.
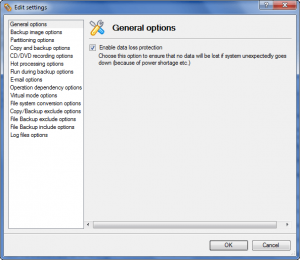
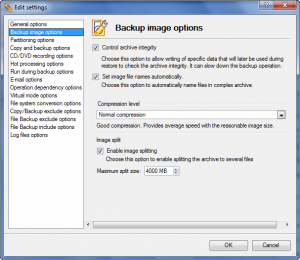
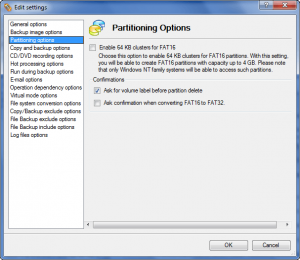
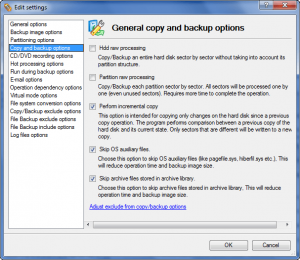
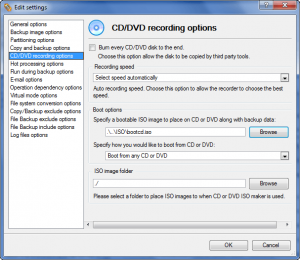
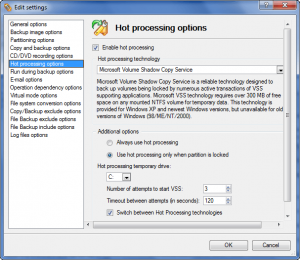
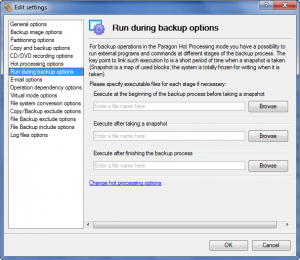
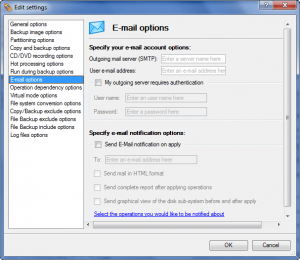
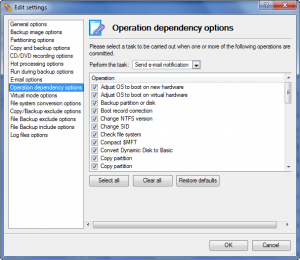
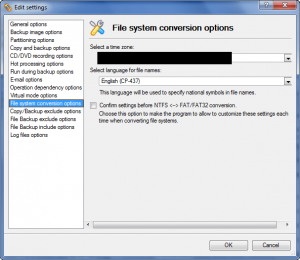
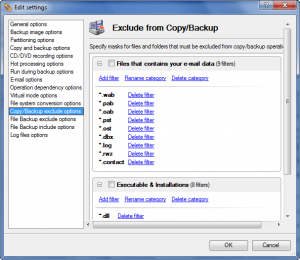
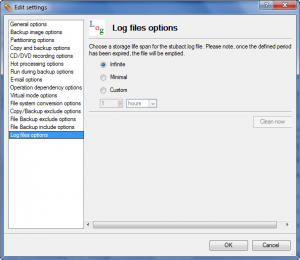
- Here are all the settings for PDBP (“Tools” -> “Settings”):
Note that all the settings are *default* settings – you can still manually change the settings for each individual backup job as you create it.
In terms of performance, Paragon Drive Backup Professional does well – there are no bugs that I have found so far, and all features work as claimed. However, it is worth noting that Paragon Drive Backup Professional does not always perform “the best” in all categories when it comes to performance.
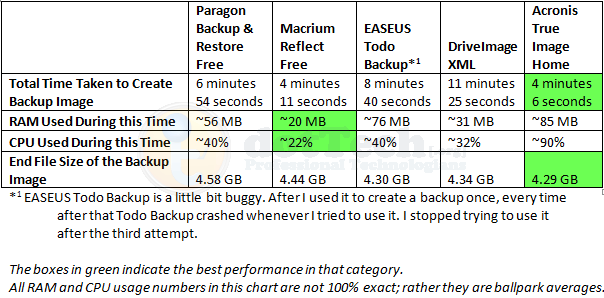
A few months back I ran a comparative test Paragon Backup & Restore Free vs Macrium Reflect Free vs EASEUS Todo Backup vs DriveImage XML vs Acronis True Image Home. In the test I found the following:
Now I realize the fact that for the test I used Paragon Backup & Restore Free and not Paragon Drive Backup Professional. However, trust me when I say this that the results would be the exact same regardless of the fact if it was Backup & Restore Free or Drive Backup Professional because both software use the same core engines; they both perform similarly. The only difference is Drive Backup Professional has more features than Backup & Restore Free, but features don’t affect performance, which is what we are evaluating currently.
As the tests clearly show, Macrium Reflect and Acronis receive the kudos when it comes to backing up performance, not Paragon. That is not to say Paragon performed “badly” – it didn’t. Rather it means that Paragon did not perform “the best”.
One other caveat for Paragon Drive Backup Professional is that is has a huge download size: ~150 MB. In fact, Paragon’s software in general are really large. Now, in defense of Paragon, most – if not all – of their software comes with recovery media; it is the recovery media that take up a large portion of the download size. So, effectively, PDBP is actually only about ~60-70 MB with the rest being attributed to the recovery media. ~60-70 MB is not too bad, although it is still larger than many other backup software I have used, considering that it is an image and file backup software.
This review was conducted on a laptop running Windows 7 Professional 32-bit. The specs of the laptop are as follows: 3GB of RAM, a Radeon HD 2600 512MB graphics card, and an Intel T8300 2.4GHz Core 2 Duo processor.
{rw_freea}
There are tons of free backup software. If you are interested in free image backup software, I suggest you read the following articles:
- Paragon Backup & Restore Free vs Macrium Reflect Free vs EASEUS Todo Backup vs DriveImage XML vs Acronis True Image Home: Which one should you use?
- 8 free software to image/backup/ghost your computer (free alternatives to Acronis True Image, Norton Ghost, etc.).
If you want free file backup software, consider:
{/rw_freea} –>
{rw_verdict2}Paragon Drive Backup Professional may not necessarily always have the best performance in some areas when compared to rival software, but it makes up for its shortcomings by having a lot (a lot) of features and being easy-to-use thanks to Paragon’s helpful documentation and thoughtful inclusion of step-by-step wizards for just about every feature. I give Paragon Drive Backup Professional two thumbs up and recommend it to anyone that wants or needs it.
{/rw_verdict2} –>

 Email article
