 The Linux distributions from desktop environments give people a chance to use the root user account by default. The first person who sets up the computer typically does so using the root user account and then can continue logging into that same root user account with the same username and password whenever it suits them. Windows and Mac users also set up computers using the equivalent of the root user account which is called the administrator’s account.
The reason it’s called the root user account on Linux is because the root account is the only account that has the write permissions in the root directory. That means if you were to login with another account that isn’t the root user account you can’t modify just any files.
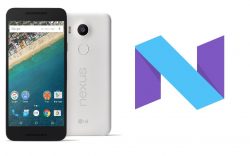
The same root user account exists on the Android mobile operating system because it too is based on the same Linux kernel as the desktop versions, but you don’t get given the access to the root user account when you first set up the Google Nexus 5X smartphone. Instead, you need to rely on the work from third-party developers such as Chainfire and his SuperSU program that keeps your device safe and secure by blocking root access to everything, to begin with, and then only allowing the root permissions to the apps that you manually choose to let have root access.
REQUIREMENTS
- You need to have a computer that is running a version of the Windows operating system to use this guide because the version of the ADB in this post is only available for Windows.
- You need to have the Google Nexus 5X smartphone to flash the version of the custom recovery image that is available in this guide; attempting to flash this file on another device might not work.
BEFORE WE BEGIN
- Have the Developer Options menu unlocked on the Google Nexus 5X smartphone and the USB Debugging Mode enabled from the Developer Options menu so you can make the necessary changes to the Android software for the custom recovery image installation to work and thus allow for the rooting with the SuperSU application.
HOW TO ROOT GOOGLE NEXUS 5X SMARTPHONES RUNNING ANDROID 7.0 NOUGAT SOFTWARE UPDATES BY FLASHING SUPERSU
- Download the SuperSU for the Google Nexus 5X smartphone directly to the computer and then open up the Downloads folder on the computer to find your file.
- Connect the Google Nexus 5X smartphone to the computer with the USB cable and then copy the SuperSU zip file from the Downloads folder over to the internal storage SD card folder available on the computer for the smartphone.
- Set up the ADB for Windows operating systems on the computer you are using and then come back and continue with this guide when you are finished.
- Install the ADB Driver on the computer also so that you can run the ADB commands that you need to run and expect them to work.
- Download the TWRP Recovery for the Google Nexus 5X smartphone on the computer and extract the file to the Downloads folder and then copy the files from the TWRP extracted file to the ADB folder, so everything is available in the one directory.
- Hold the Shift key down on the keyboard inside the ADB and TWRP folder and then right-click the background of the folder and choose to open a new command window here from the menu.
- Type the command “adb reboot bootloader” and the Google Nexus 5X smartphone then gets into the bootloader mode that it needs to be in for the flashing of the custom recovery image to work.
- Type the command “fastboot flash recovery twrp-3.0.2-0-bullhead.img” to flash the custom recovery image on the Google Nexus 5X smartphone.
- Type the command “adb reboot” to reboot the smartphone from the Bootloader Mode back into the normal mode and as soon as you see it reboot hold down the hardware key combination for the Recovery Mode so that the custom recovery that you just installed now boots up on the screen.
- Tap on the “Install” button from the main Recovery menu and then browse the SD card and find the SuperSU zip file and follow the guidelines to install that SuperSU package.
- Choose the “Reboot” and “System” options once the SuperSU is flashed to reboot the system back into the normal mode and out of the Recovery Mode.
In conclusion, that is all you need to root Google Nexus 5X smartphones running on the Android 7.0 Nougat software updates by flashing Chainfire’s SuperSU program from a custom recovery image. The custom recovery you just installed is the TWRP Recovery which is the most popular custom recovery image in the world and gives you the greatest chance for success when wanting to flash custom ROMs because it is compatible with all of them. What’s more, the custom ROMs are available for you to flash right sway if you want them because you have everything you need to start installing them from the custom recovery image.

 Email article


