 Don’t you sometimes feel the need to change how your Windows looks like? I’m not just talking about the colors and the wallpaper, I’m talking about the way it feels; the way it captures your attention at a deeper level. For a long time, I’ve used the classic theme that comes with all Windows versions, not only for performance purposes but also because something was bugging me on the Windows 7 Aero look — something that I couldn’t really put my finger on. Then I realized it were the round corners.
NO MORE ROUND CORNERS
I guess this post is more a fashion article than a technological one but when you spend so much time in front of a computer screen I think you’re entitled to really, really like what you’re looking at. I think Windows 7, more than any other previous Windows version, really gave the opportunity for designers to go wild with their creations using themes. And at the end of the day, it´s all about productivity; the happier you are the more productive you became and that is the reason why, here on dotTech, we have a pool, gym, tennis and basketball court, arcade games and much, much more just to keep us happy and productive.
WHERE HAVE ALL THE THEMES GONE?
There are plenty of places to find Windows themes but I’ve not yet found a better collection than the one at the Windows 7 Design (W7D) website. Every once in a while I jump on my bike and give W7D a visit; not to change my theme at every single visit but to be amazed by the new themes, the skills, and the art of the designers that place their works available for free… just to help us to have a better, more enjoyable time in front of our computers.
SEE IT TO BELIEVE IT
Note: All of the following can be done on Windows XP, Vista, and Win7.
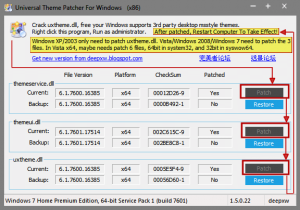
Now, before you can start using any third party themes like the ones you can find at W7D on your Windows, you need to patch some files using a little portable application called Universal Theme Patcher (UTP). Don’t be alarmed — the patching is completely harmless and very easy to do. You’re probably asking: why do you need to do this?The answer is: because Windows is not entirely cool about using other themes than the “official” ones you can find in the Microsoft Windows website. So, moving on, once you’ve downloaded UTP (download link available at the end of this article), you need to run it (run as an administrator [right click on the file and choose Run as Administrator] if you are on Windows Vista or Win7). Be sure to choose the x86 (32 bits) or the x64 (64 bits) file accordingly to your system attributes:
UTP works with Windows XP, Vista and Win7. I’ve only tried it on Windows 7. According with the information UTP supplies, on XP/2003 you only need to patch one file: uxtheme.dll; on Windows 2008, Vista, Windows 7 (v6519) you need to patch 3 files: uxtheme.dll, themeui.dll, shsvcs.dll; and on Windows 7 (v6801) and above you need to patch 3 files: uxtheme.dll, themeui.dll, themeservice.dll. If you are confused, don’t worry. The files should automatically appear accordingly to your system when you run UTP. On Windows 7 you´ll see something like this:
As you can see, backup files for the patched ones are created, so you can go back anytime. Once the files are patched, it’s reboot system time.
BACK WITH A VENGEANCE
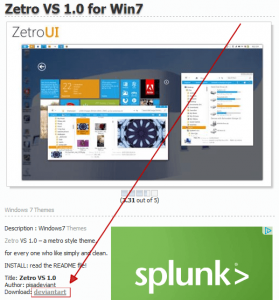
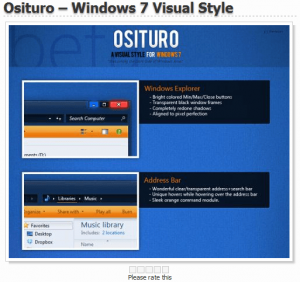
Now that the system has rebooted, grab your bike cause we’re going to the market to choose a new theme for our Windows. Let’s imagine that at Windows 7 Design you see a theme that pleases you, for example this one:
We need to go to deviantART to download it. Pretty much every theme is hosted at deviantART and if you are following the article for XP or Vista you should go directly to deviantART and search for XP and Vista themes. Please be sure that the theme you select is appropriate for your system.
At deviantART you can find the download link for themes at the top right of the screen:
Once the download finishes, unzip the downloaded file. There will be a Themes folder and there may be an Extras folder. The Themes folder is the important folder. Not every theme has extras; the particular theme being used in this example one has extra and if you wanna wanna go wild with the extras you have the README file to help you do so. I just go with the Themes (I’m just not that “wildcat”).
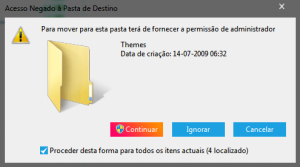
Copy the content of the Themes folder to C:\Windows\Resources\Themes – you need to have and grant permission to do so if you are on Vista or Win7:
NEW THEME IS IN THE HOUSE
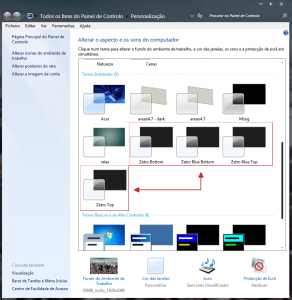
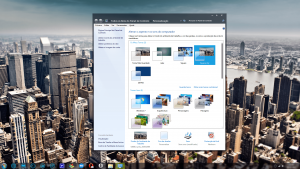
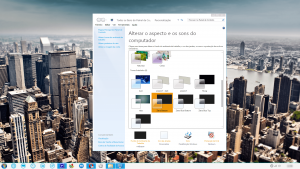
Once you copy the files over, the new theme has been installed and you will be able to see it in the Installed Themes folder at the Personalization option in the Control Panel just like any traditional Windows theme (note: XP users may need to look in a different location in Control Panel but it is there, trust me):
Let’s try one. This is the before the new custom theme…
…and this is the after:
JOIN THE THEME
The process is straightforward and there are plenty themes to choose from. I’m certain that there is out there, somewhere, a theme you will want to call yours.
Here are the links for what you need to get started with custom themes:
Universal Theme Patcher
Malware Status: VirusTotal Scan Report (0/43)
Universal Theme Patcher homepage [direct download]
Themes
Windows 7 Design homepage
Update: Please don’t use Windows 7 Design. It is a website full of junk. To get themes, go directly to deviantART (link below). My apologies for not catching this when I reviews this article prior to approving it for publish. Thank you Safe and Sane and Orchid for informing me about this issue. -Ashraf

 Email article

