 Email article
Everybody who wants to use the Windows 10 operating system needs to have a user account. Users can choose between creating a Microsoft account or a local user account. Back when Windows 10 was new, the Microsoft account had a huge advantage in that it could allow account holders to download apps from the Windows Store. The local user account could not. If you are running on one of the later versions of Windows 10 at the time of writing this article, you don’t need to worry about that anymore because the local user account now has the necessary privileges to download applications from the Windows Store also.
If you share a computer with your family, friend, or partner, then you should each create a unique account. Most people jump at the chance of creating different user accounts for privacy reasons, but if you use Windows 10 for more than just browsing with your favorite web browser, you should also find some additional advantages working in your favor if you go to the effort of creating individual accounts. For example, if using a Microsoft account, you can set wallpapers and themes to how you want them and find them the same way you left them the next time you jump on the computer. The same can be said for all of your saved pictures and documents from File Explorer and so forth. Not only can you expect to find everyone else leaving your files alone if you have a personal account, but you also bypass the clutter of having somebody else’s files in your view.

Naturally, if you are going to be going to the effort of creating a bunch of individual user accounts, there might come a time when you want to have some of those accounts deleted. Similarly, if you have allowed a user account to be using the computer that you were the first administrator on, there could come a day when you no longer want that account to be allowed to use your computer.
For those two examples listed above, you have the option of either blocking a user from a computer or completely deleting the user account from the computer. It doesn’t matter what method you choose to follow found in the guide below for either blocking or deleting accounts; they all do the same thing. However, it’s important to note some of the methods will not be available for all versions of Windows. An example of that is if you were to try to use the Local Users and Groups in Windows 10 Home, you would be greeted with an error message that starts with “Windows cannot find” and is referring to the program that you are trying to run. That’s because the Home version cannot open the Local Users and Groups that you would find associated with Group Policies. For that, you need a version of the Windows 10 Pro, Enterprise or Education.
There are a few other things to note before getting started with the guide. Firstly, you can only delete a user account if you are signed in as an administrator. Further, it is possible for you to block and delete other administrators if you too have the administrator permissions. Also, you cannot delete a user account that you are currently using. So, if you wanted to remove the user account you have, it requires you creating another account with administrator permissions and then signing into that account to delete the account you are using now. Lastly, make sure you are not deleting all administrator accounts. You should always have at least one account that has the administrator permissions granted to it so you can perform the functions that can only be done with those permissions.
How to Block a User Account in Settings
If you want to block a user, then you can do that from the Windows Settings application that is available in all versions of Windows 10, including the Windows 10 Home.
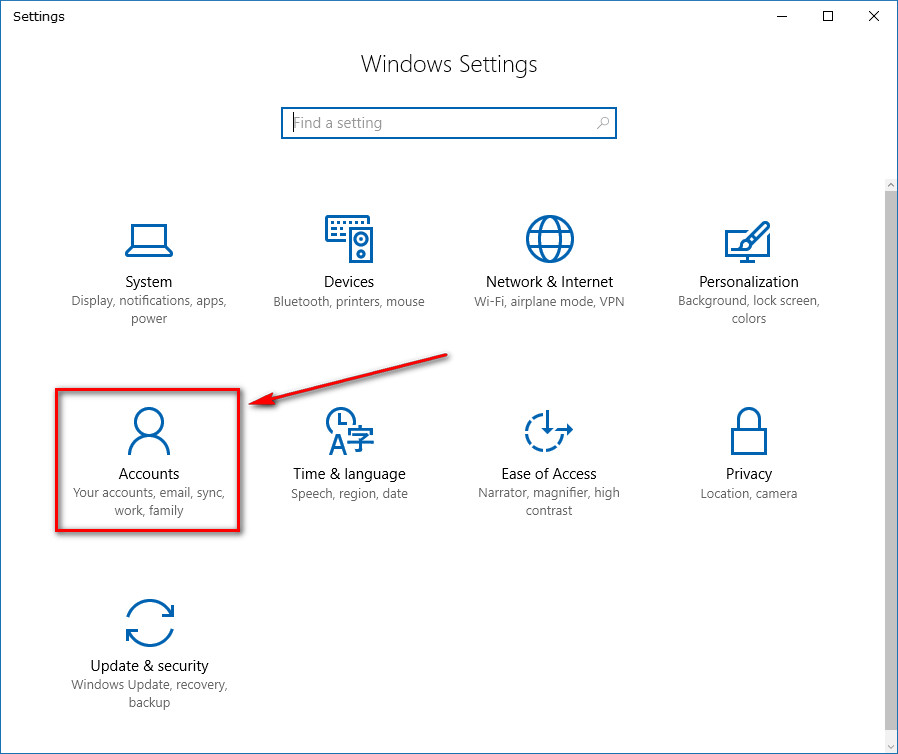
Open the Settings app in your version of the Windows 10 operating system. With the Settings application open, click on where it shows the “Accounts” link to get access to all things associated with the user accounts created and connected to the computer.
Click on the “Family and other people” link in the left side pane and then you can see the other accounts—not including your account—available in the right side pane under where it says “Your family as a heading.” If you click on the account (just once) that you want to block, a drop-down menu opens up where you can then click on the “Block” button to block that user.
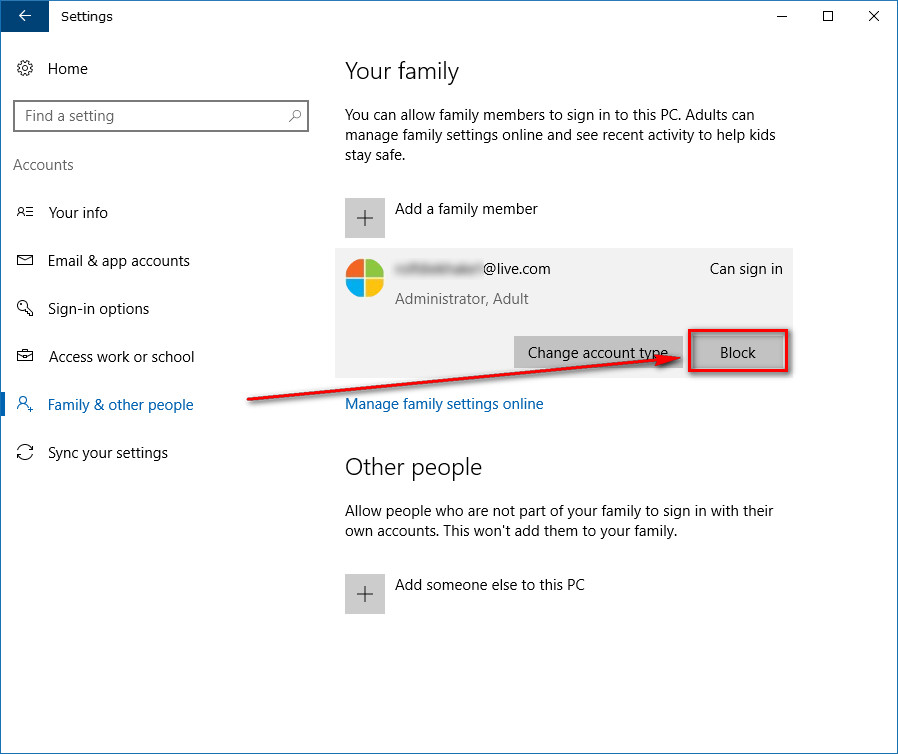
As with most things within the Microsoft operating system, the block won’t happen right away. Instead, you’ll then be shown a pop-up box making you confirm that you do want to block the user after it gives some additional details about what blocking the user precisely means. Click on the “Block” button to go ahead with the blocking of the account.
Now, if you view the “Your family” section again where the “Family and other people” are, it will now show the “Allow” button instead of the “Block” button. That’s an easy way for your to confirm that the user is indeed blocked for now. You should also take note of the new “Allow” button so you know what you need to do if there ever comes a time that you want to unblock that user so they can use the PC again.
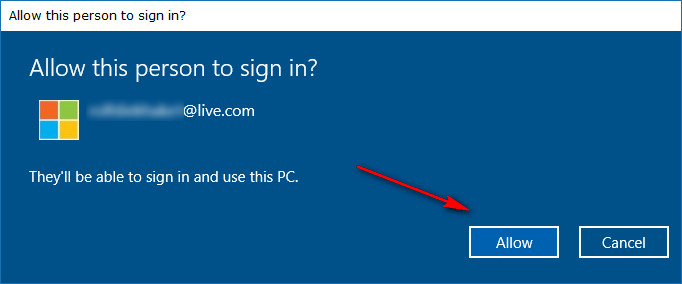
To be clear, the user you have blocked still has complete access to their Microsoft accounts on other computers, but if they were to try to sign into their Microsoft account on your computer, they wouldn’t be able to do that since you have blocked them. Clicking on the “Allow” button from the same menu enables them to start using the computer again.
That is after you click on the “Allow” button that Microsoft shows you in another pop-up message that goes into detail about what allowing a user to use the computer precisely means again.
The user account is now deleted.
How to Delete a User Account in Control Panel
The Control Panel offers another way that all users of Windows 10—including everyone who uses Windows 10 Home—can delete a user account. Unlike the Settings app that provides a way to block an account, the Control Panel is where you can completely delete a user account instead.
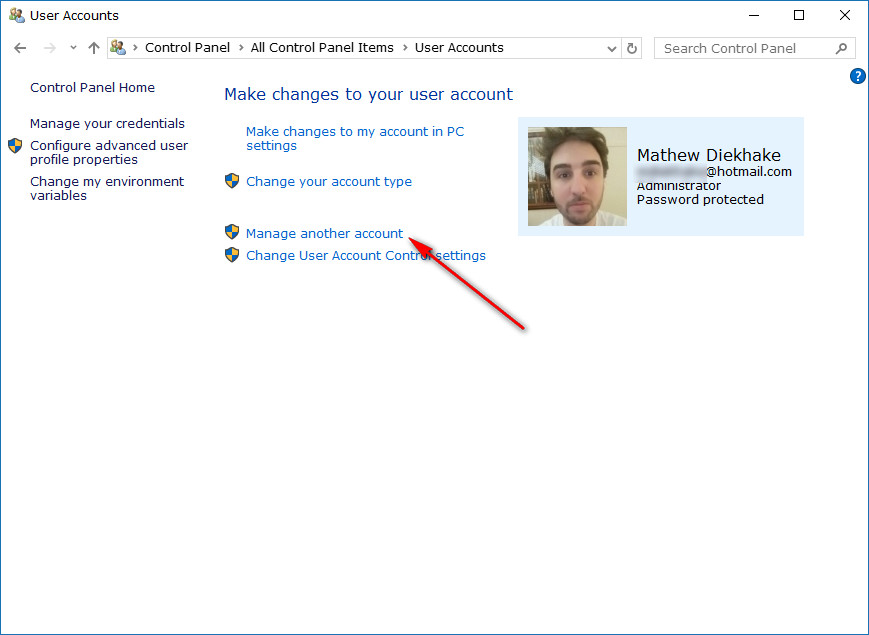
To get started, open the Control Panel with the small icons view and then click on the “User Accounts” link from the menu.

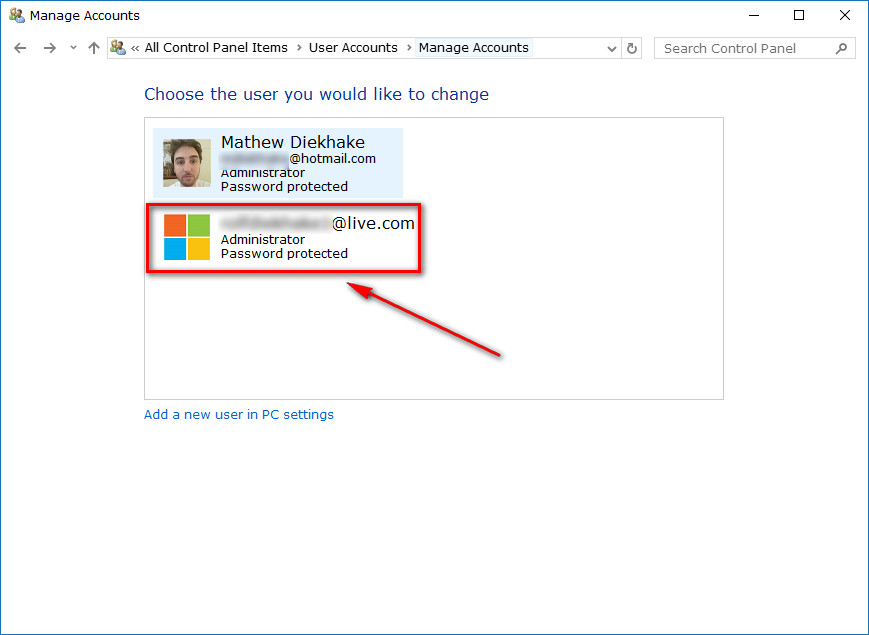
You’ll only see the account that you are logged into now on the next screen, so don’t panic if it is not showing the account that you want to delete here. Click on the “Manage another account” link roughly in the center of the computer’s screen.
You’ll now see all of the accounts that can use on the PC, including the account that you wanted to delete. Click anywhere over the account that you want to be deleted from your PC.
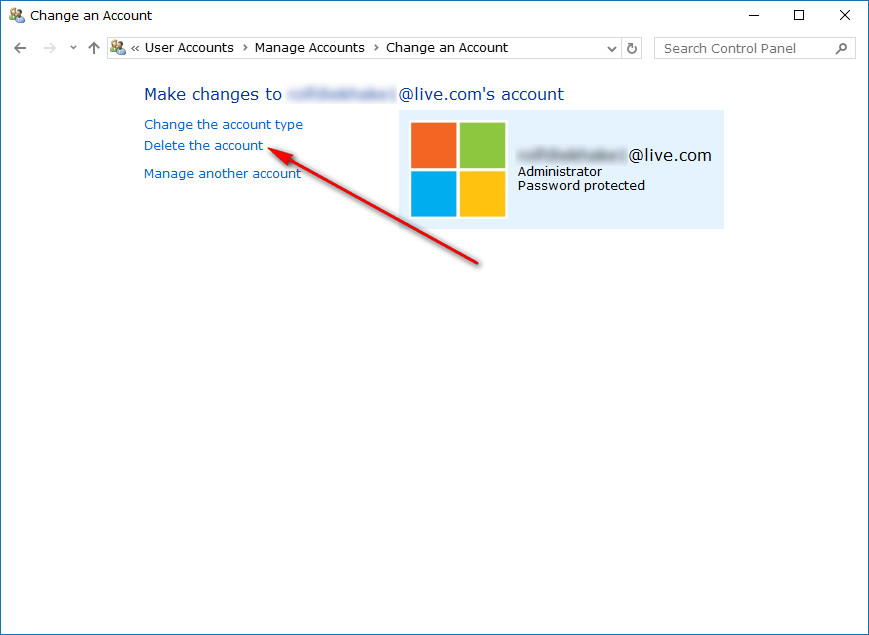
On the next screen is another link that says “Delete the account.” Do that now by clicking on it.
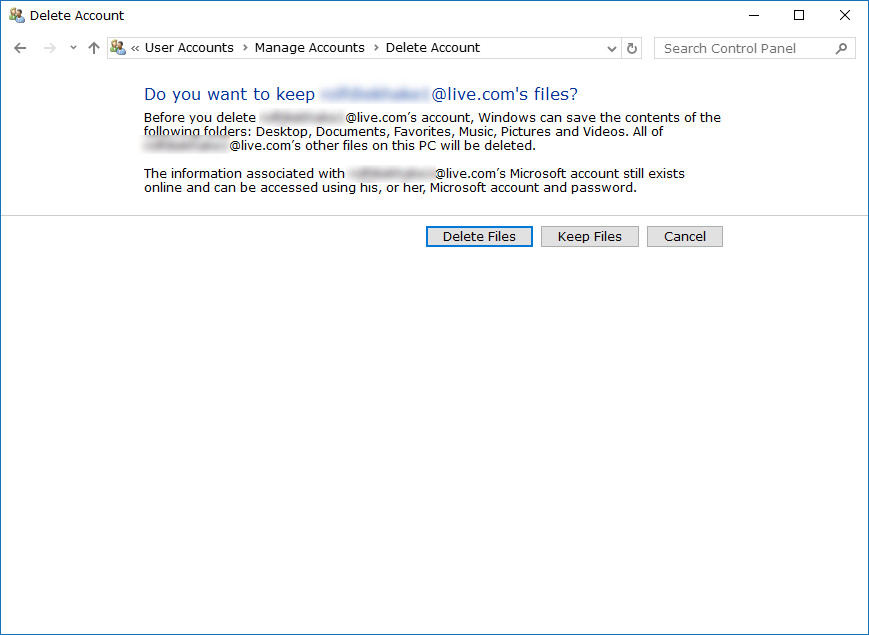
Along with giving you additional information that Microsoft always does, there is another option on this screen that allows you to choose between deleting the files that are associated with the user account that you are about to delete or keep them. You’ll also see that it goes into detail about what things Windows can keep for you if you read the paragraph that is available (everything from the desktop, documents from File Explorer, etc.) Click on the option that you want to proceed.
After Microsoft gives you the lowdown about what you are about to do, click on the “Delete Account” button under the writing to finally delete the account that you want to be removed.

The user account is now deleted.
How to remove a User Account in Netplwiz
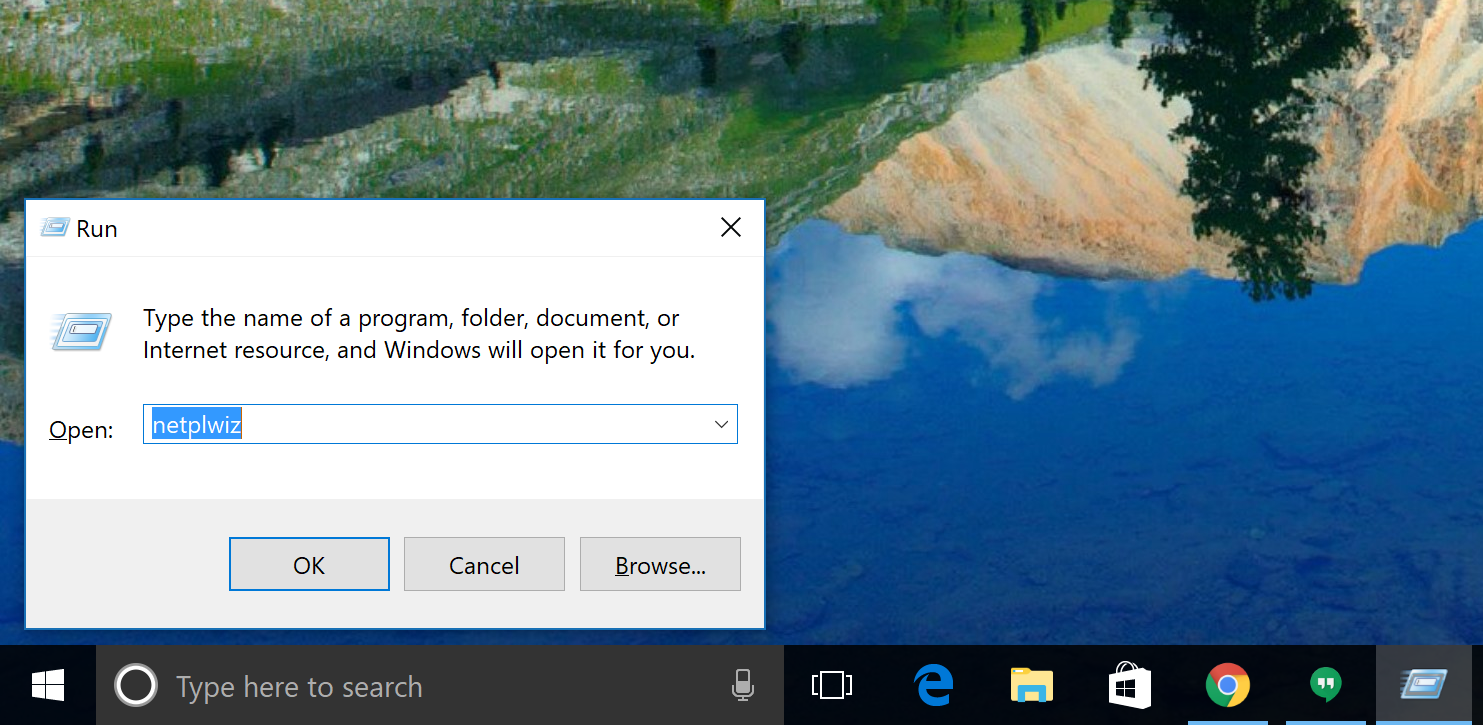
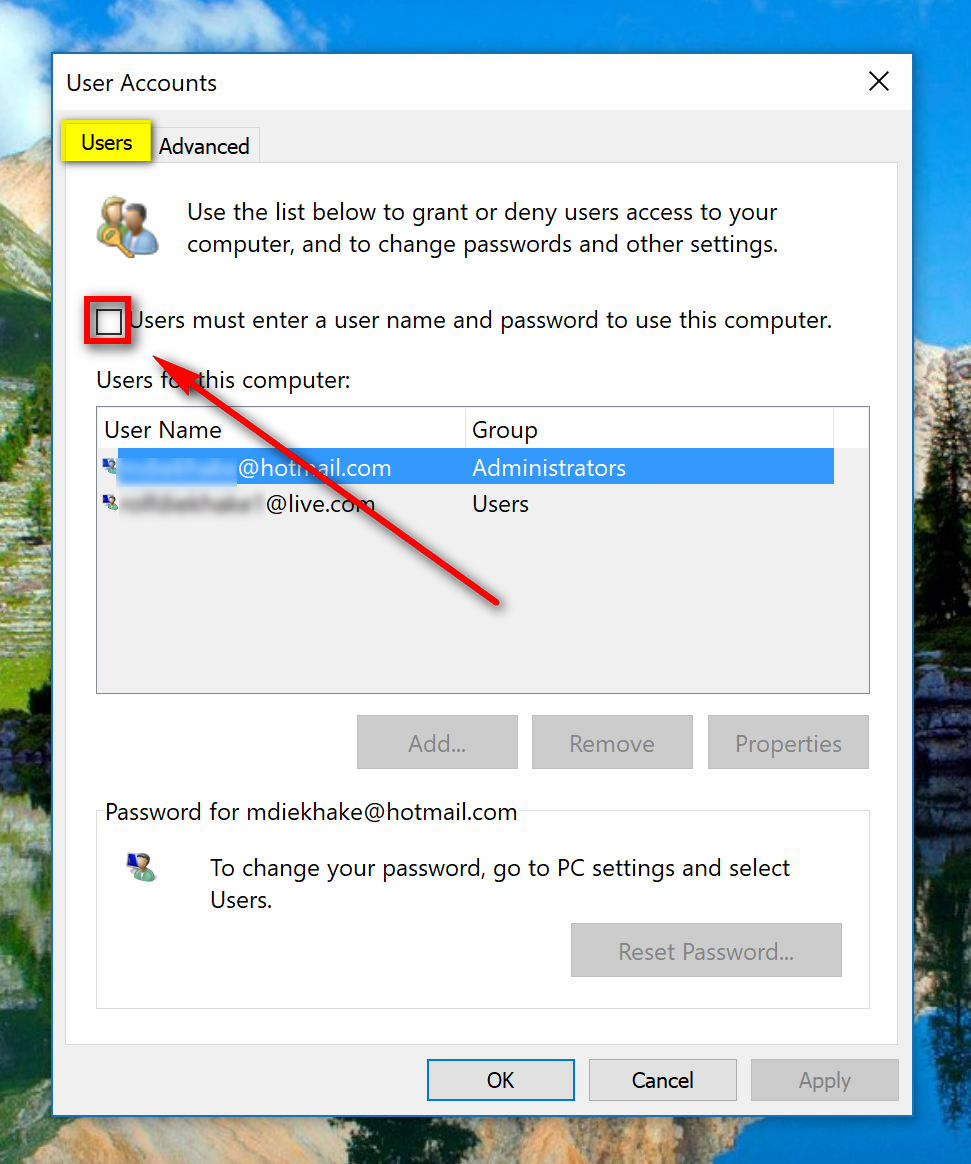
Open the Run dialog box by pressing the Windows logo key + R on your keyboard and then type “netplwiz” into the field. It opens up the User Account dialog box when you click on the “OK” button. Do that now.
From the “Users” tab, click the mouse or touchpad (or press the touchscreen when applicable) to checkmark the checkbox for “Users must enter a username and password to use this computer.”
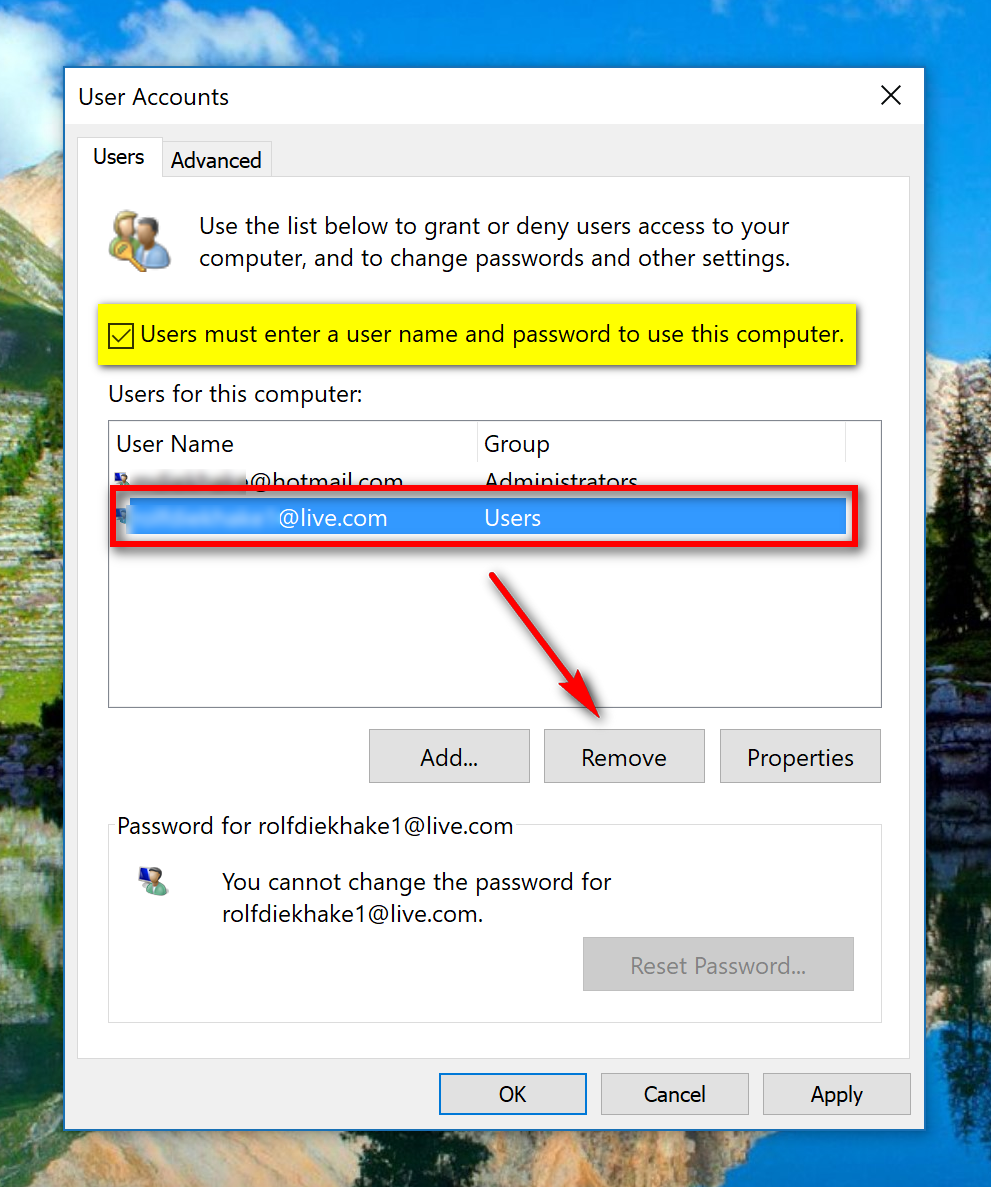
After you have applied the checkmark to the box, you can then start clicking on account names from the dialog box. Highlight the name of the user account that you want to be deleted by clicking on it. With the name highlighted, click on the “Remove” button.
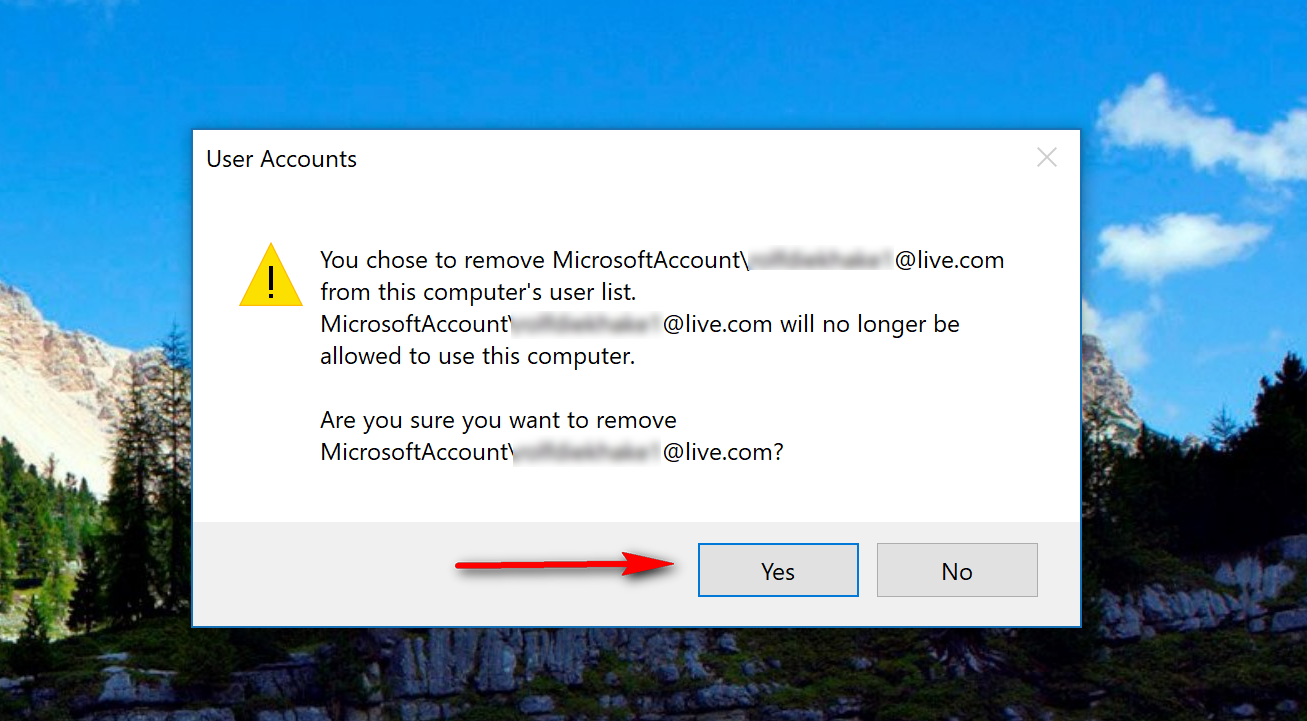
Microsoft then goes into some details about what exactly deleting this user account is going to mean. Have a quick read and then click on the “Yes” button when you are sure that you want the account gone from the computer.
How to delete a user account in Local Users and Groups
Open the Local Users and Groups and then click to expand the “Users” folder that is available in the left pane.
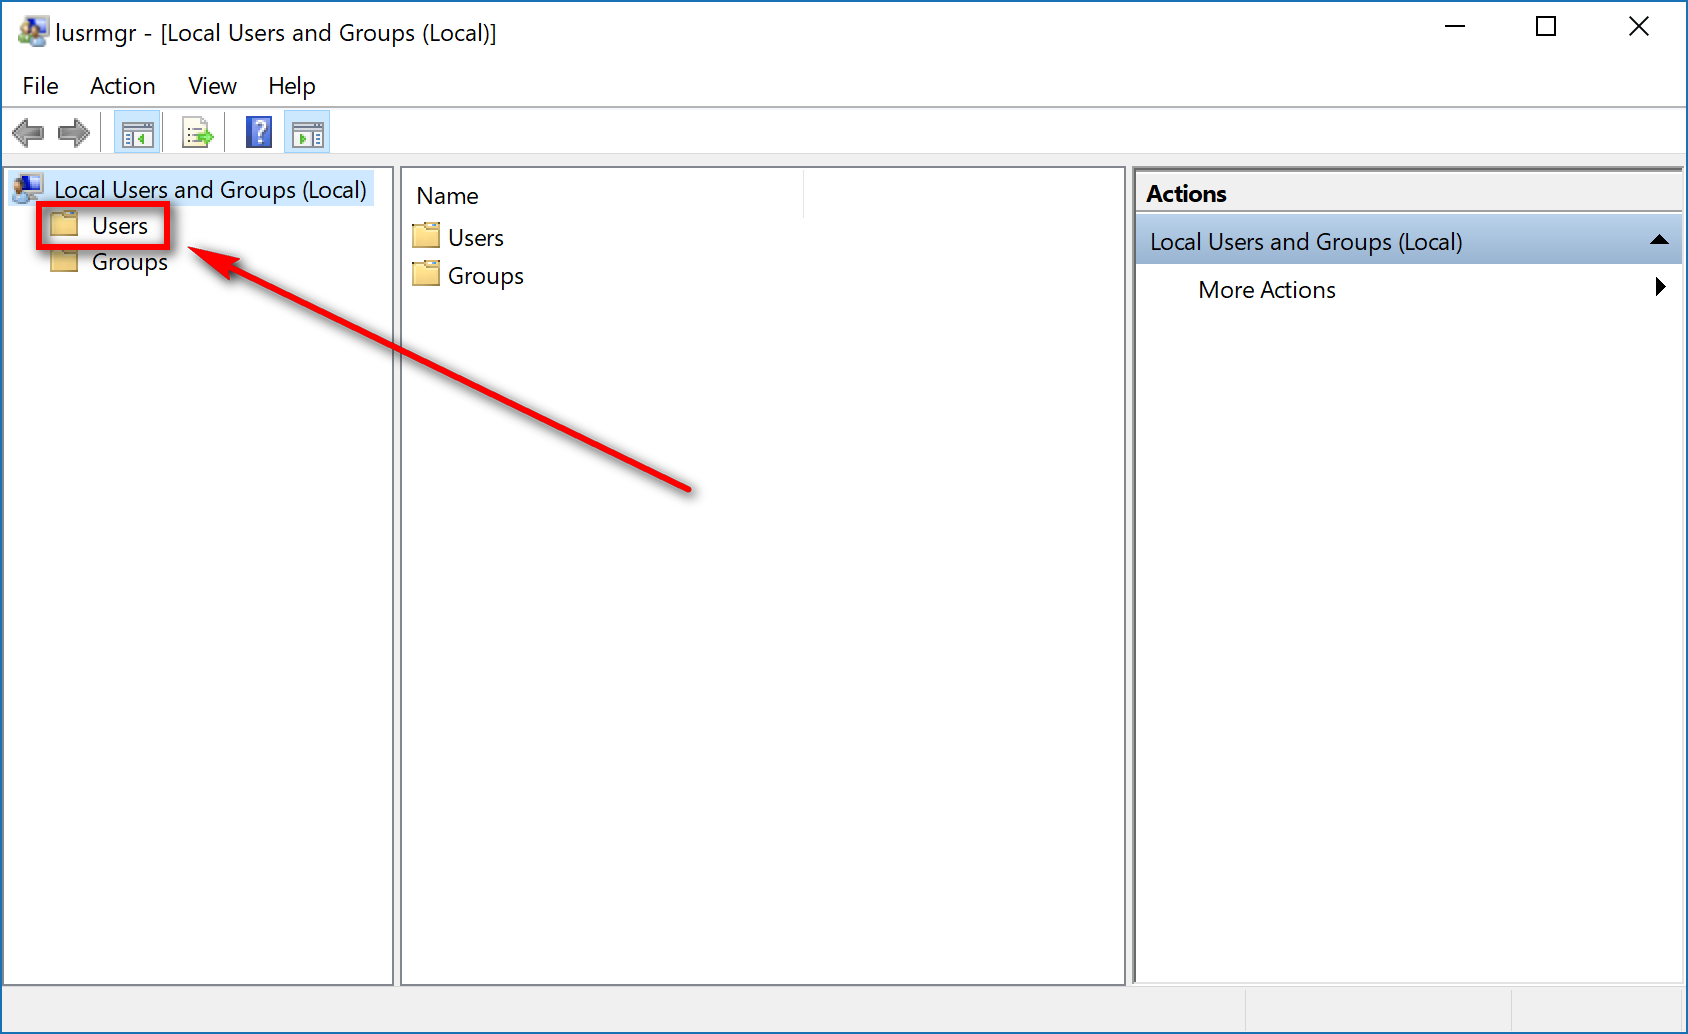
Next, click on the user account that you want to delete that is available from the middle pane so that it is highlighted. (You’ll also notice that the same name that you highlighted is now available just above where it says “More Actions.”)
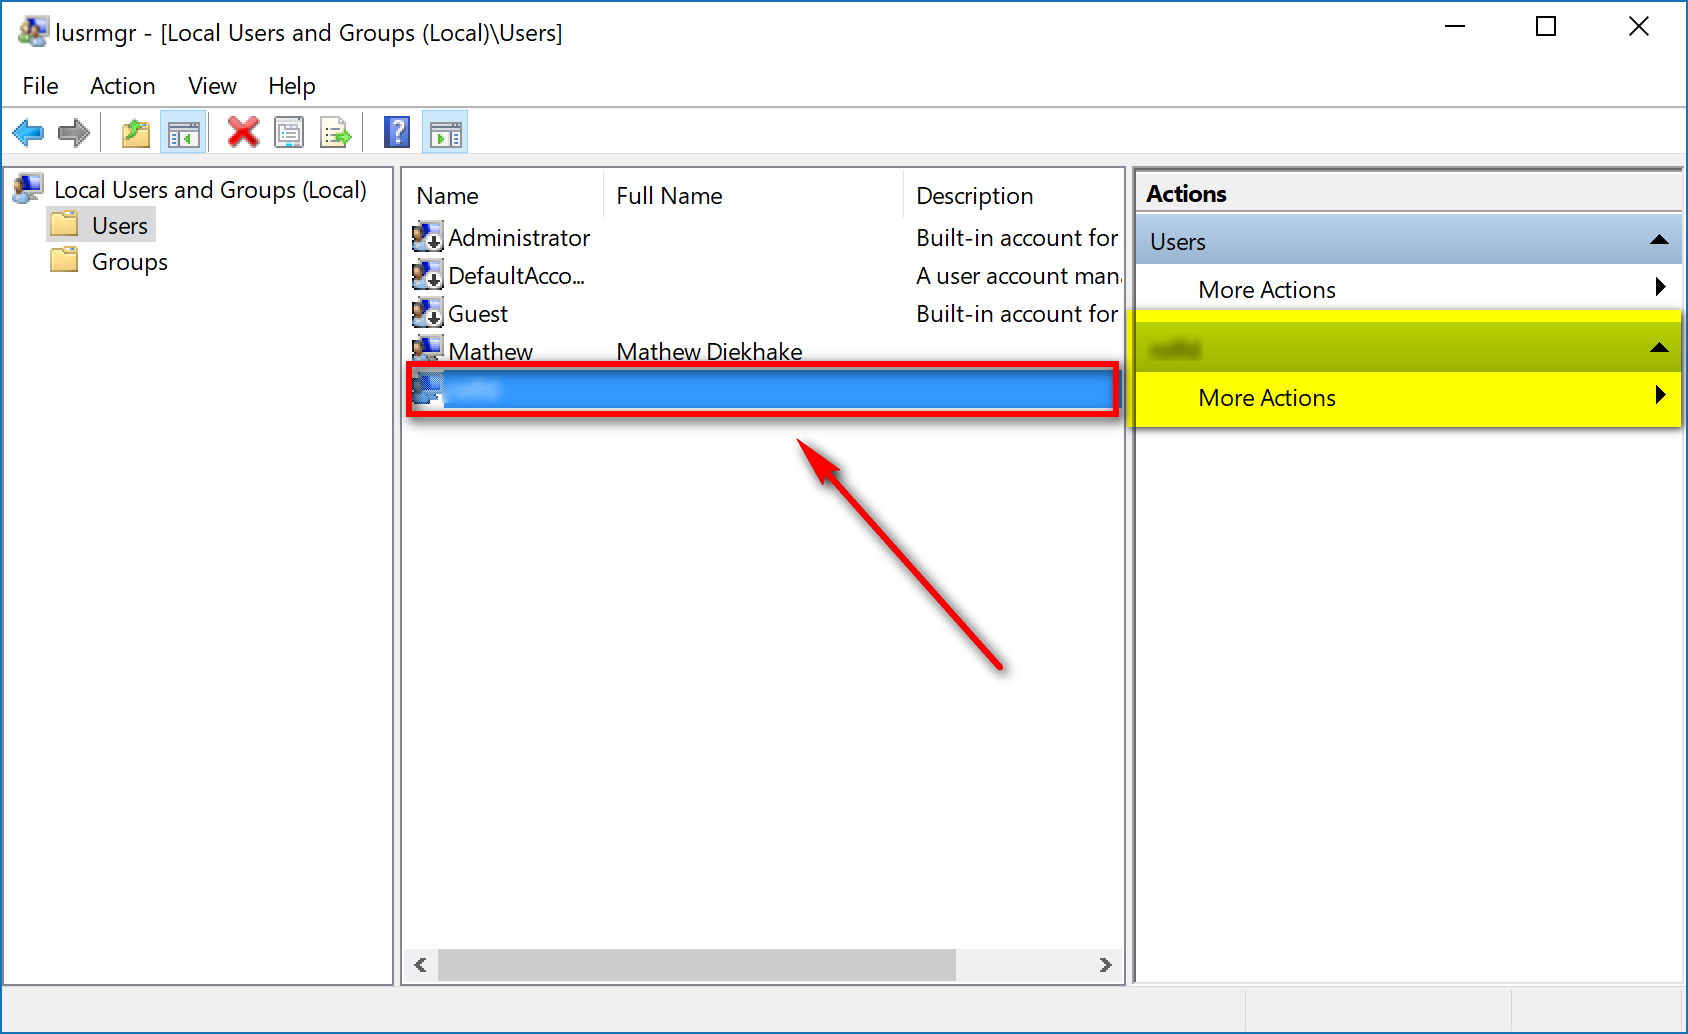
That More Actions menu is associated with the user account that you have highlighted. Click on the small arrow that is on the same “More Actions” button to bring up the secondary menu where you then need to click on the “Delete” button.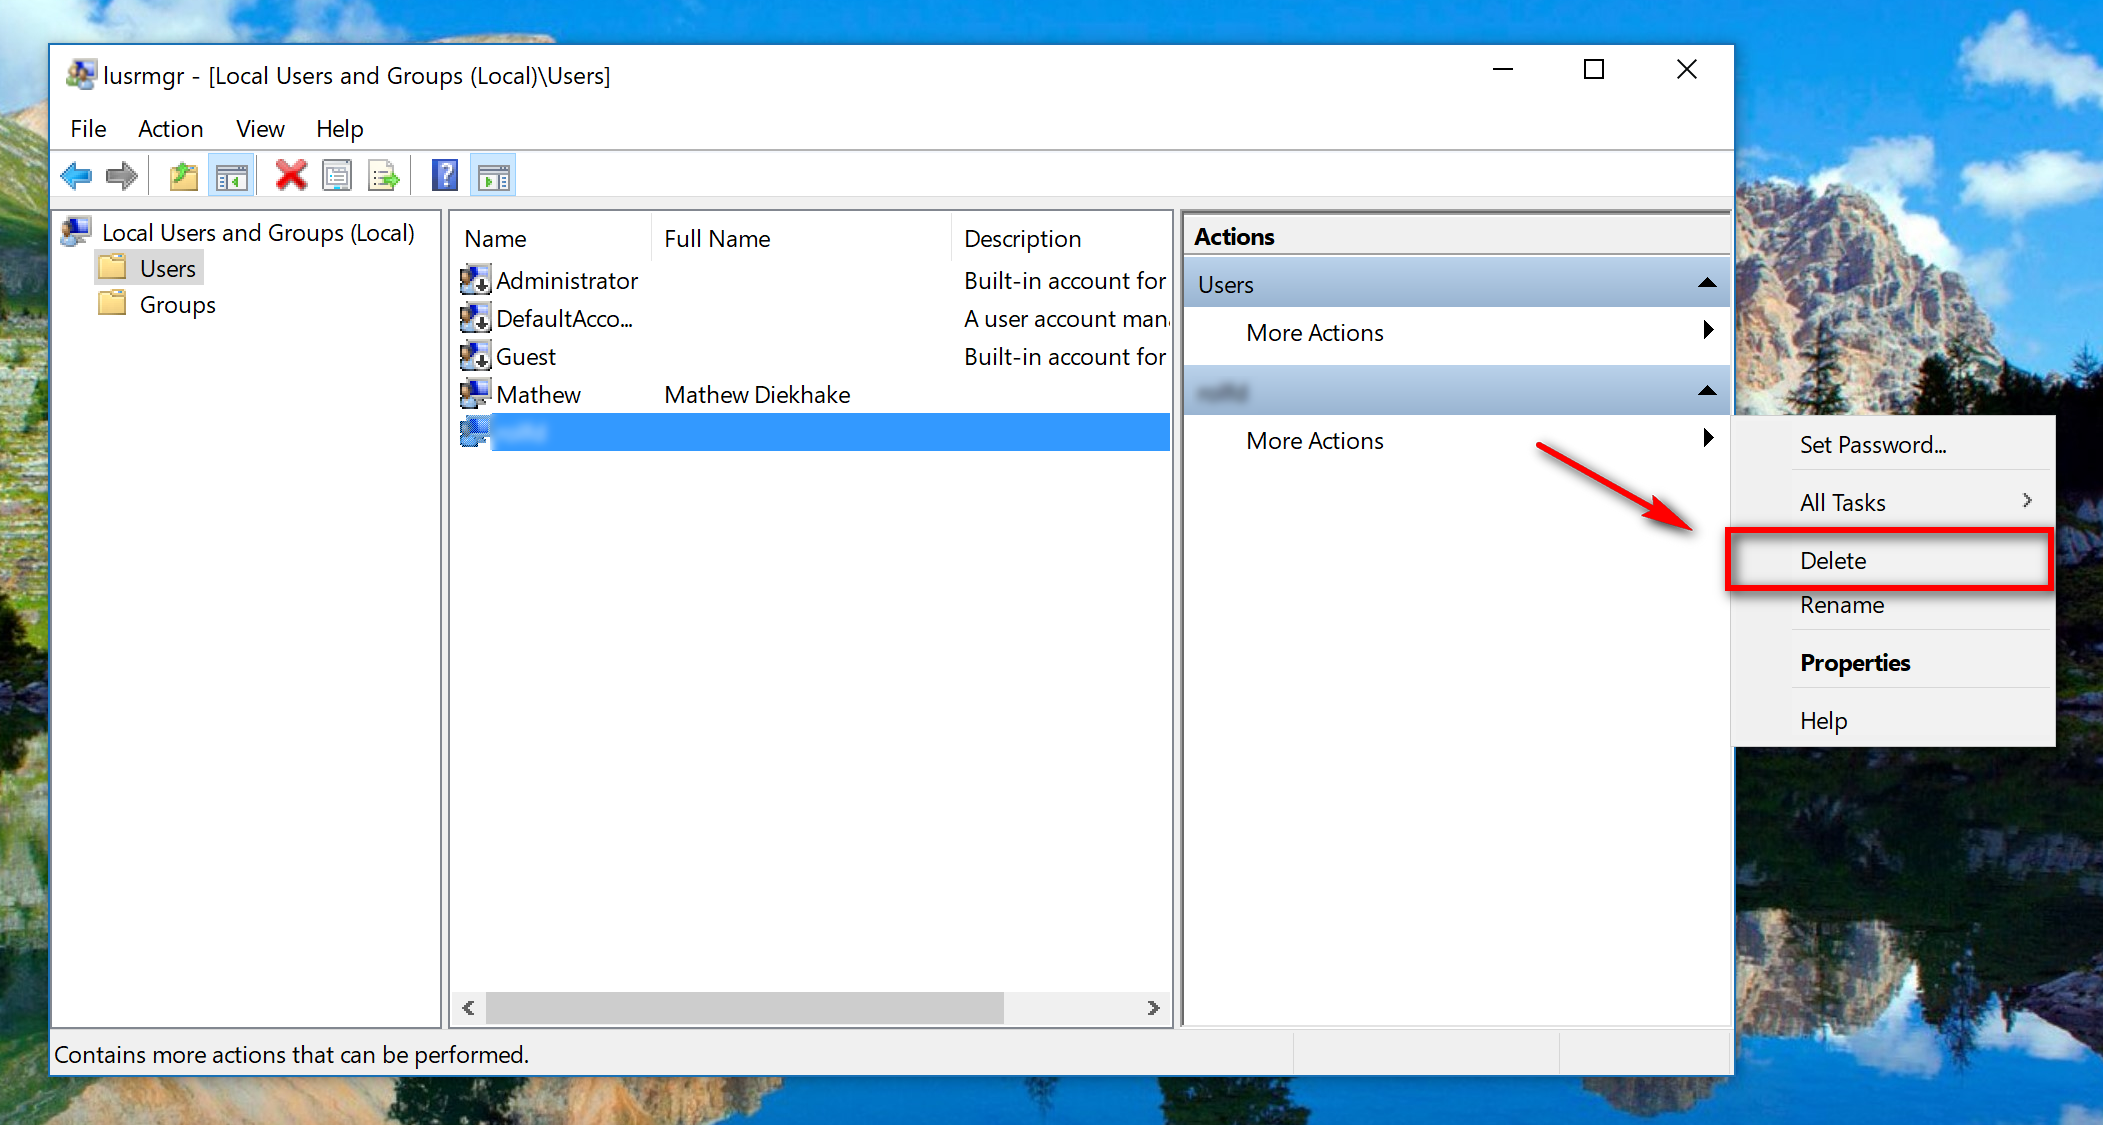
The user account is now deleted.
How to delete a user account in the Command Prompt
There’s a reason why the Command Prompt is still around in Windows, and that is because it is so efficient for running so many commands (hundreds in fact) from the command line. Being able to delete a user account is one of them. The only thing is you need the Command Prompt with administrator permissions on top of being signed into a user account with the administrator permissions.
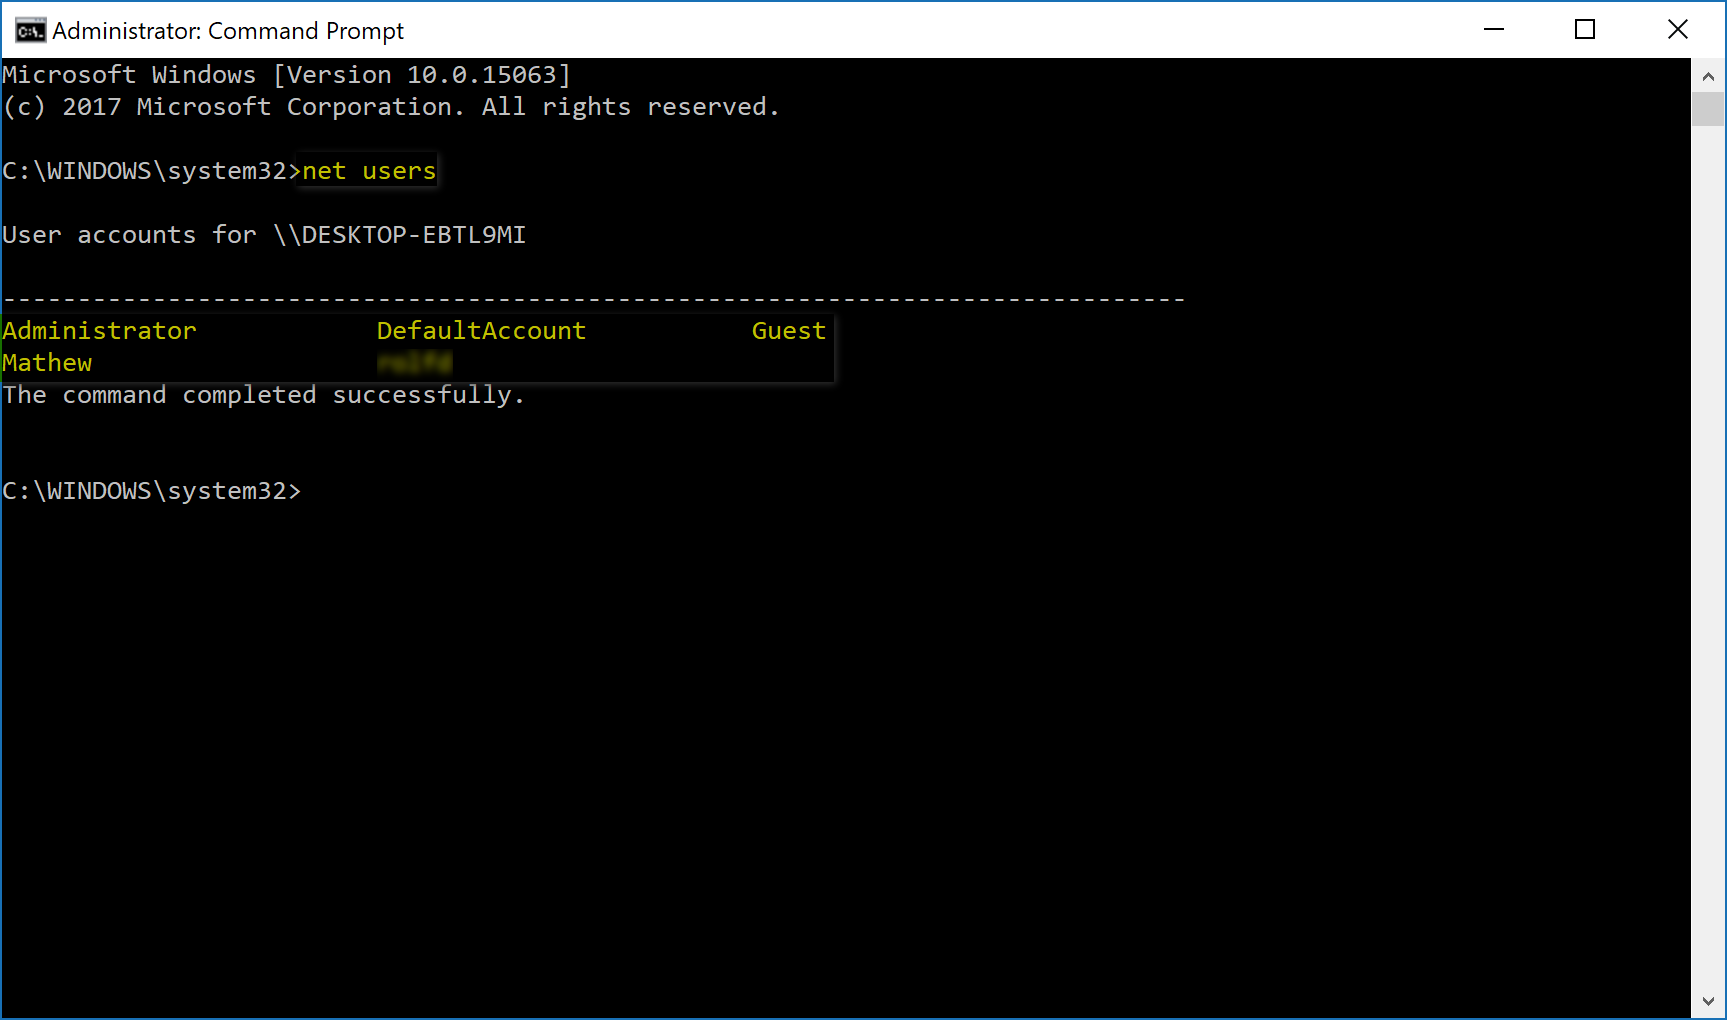
Open up the elevated Command Prompt window in your version of the Windows 10 operating system. Next, type “net users” and then hit the Enter key on the keyboard. Doing so reveals the user accounts that are associated with the computer. That is important because you’ll need to know the name of the account, and you can see the name on the screen now because the Command Prompt has just revealed it for you.
Now for the part that is going to delete the user account: type “net user “the user name” /delete” and swap the part that says “the username” for the real user name that the Command Prompt is showing represents the account that you want to be deleted.
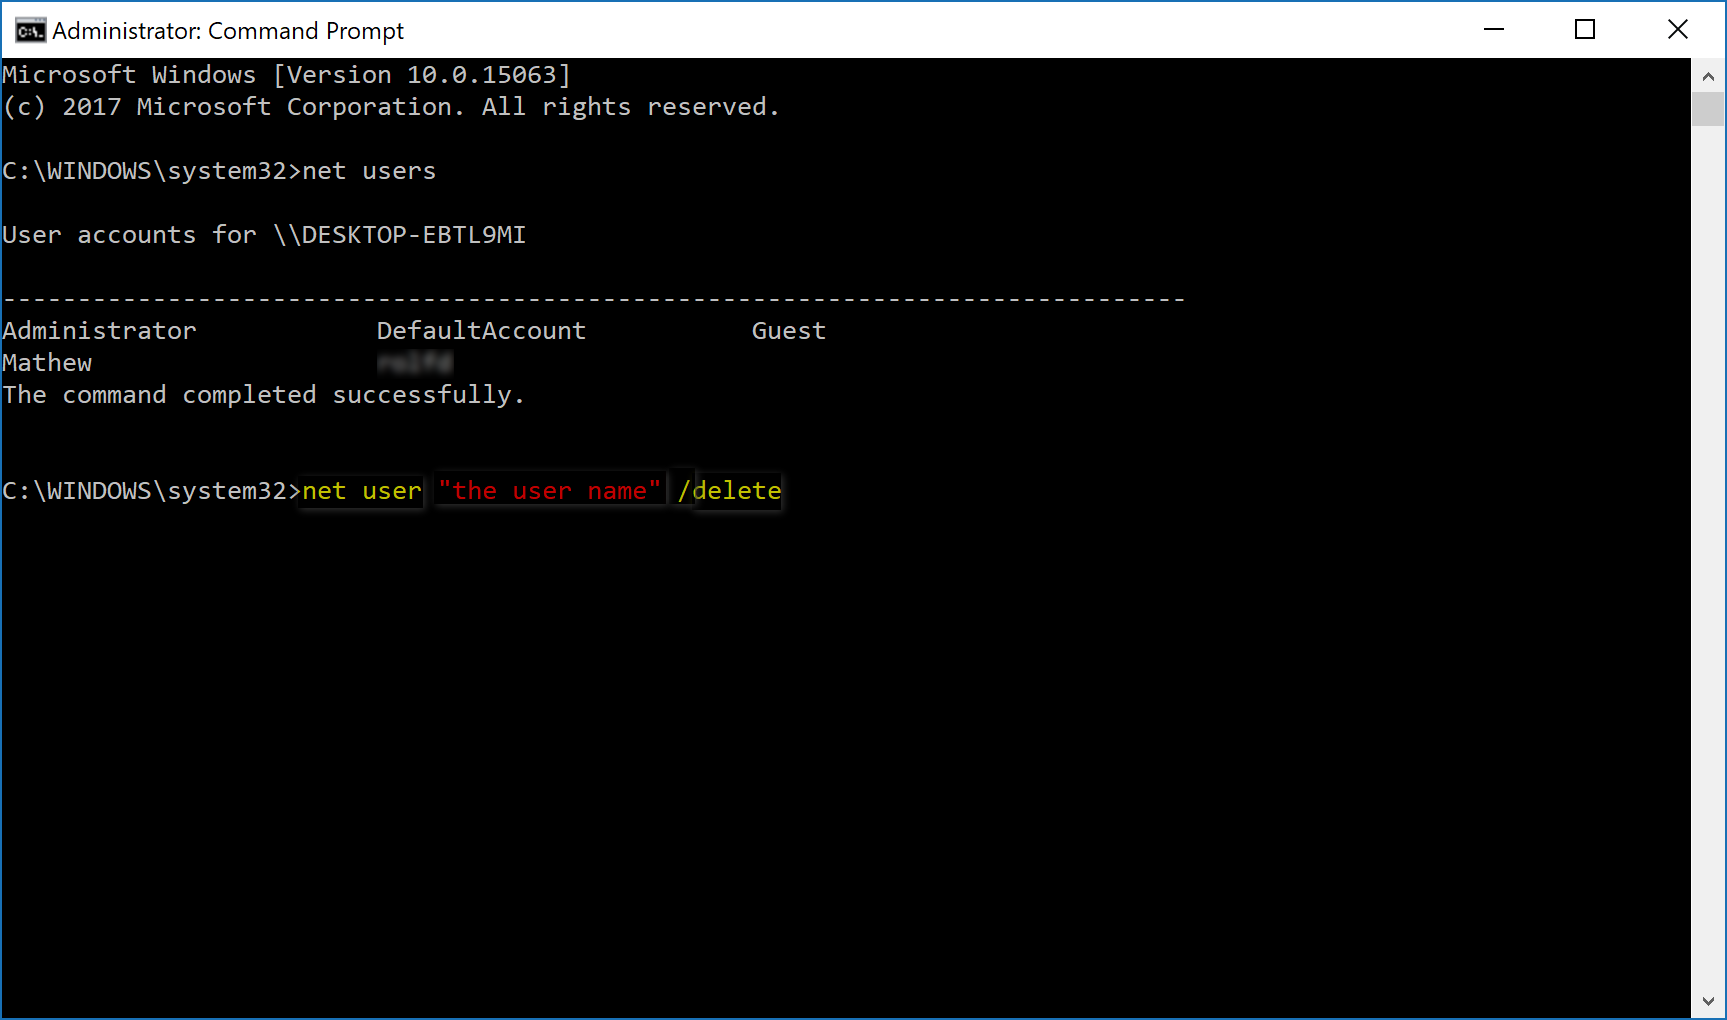
The account is now deleted.
Those are all of the ways that you can delete or block a user account on a computer that is running Windows 10. It doesn’t matter what way you choose to get familiar with, but not all of the ways are available for all versions of Windows 10 (i.e. Home), and there are some additional features available to you if you use the Control Panel, such as the option to keep the files.


